Preparation
Setting up the base unit
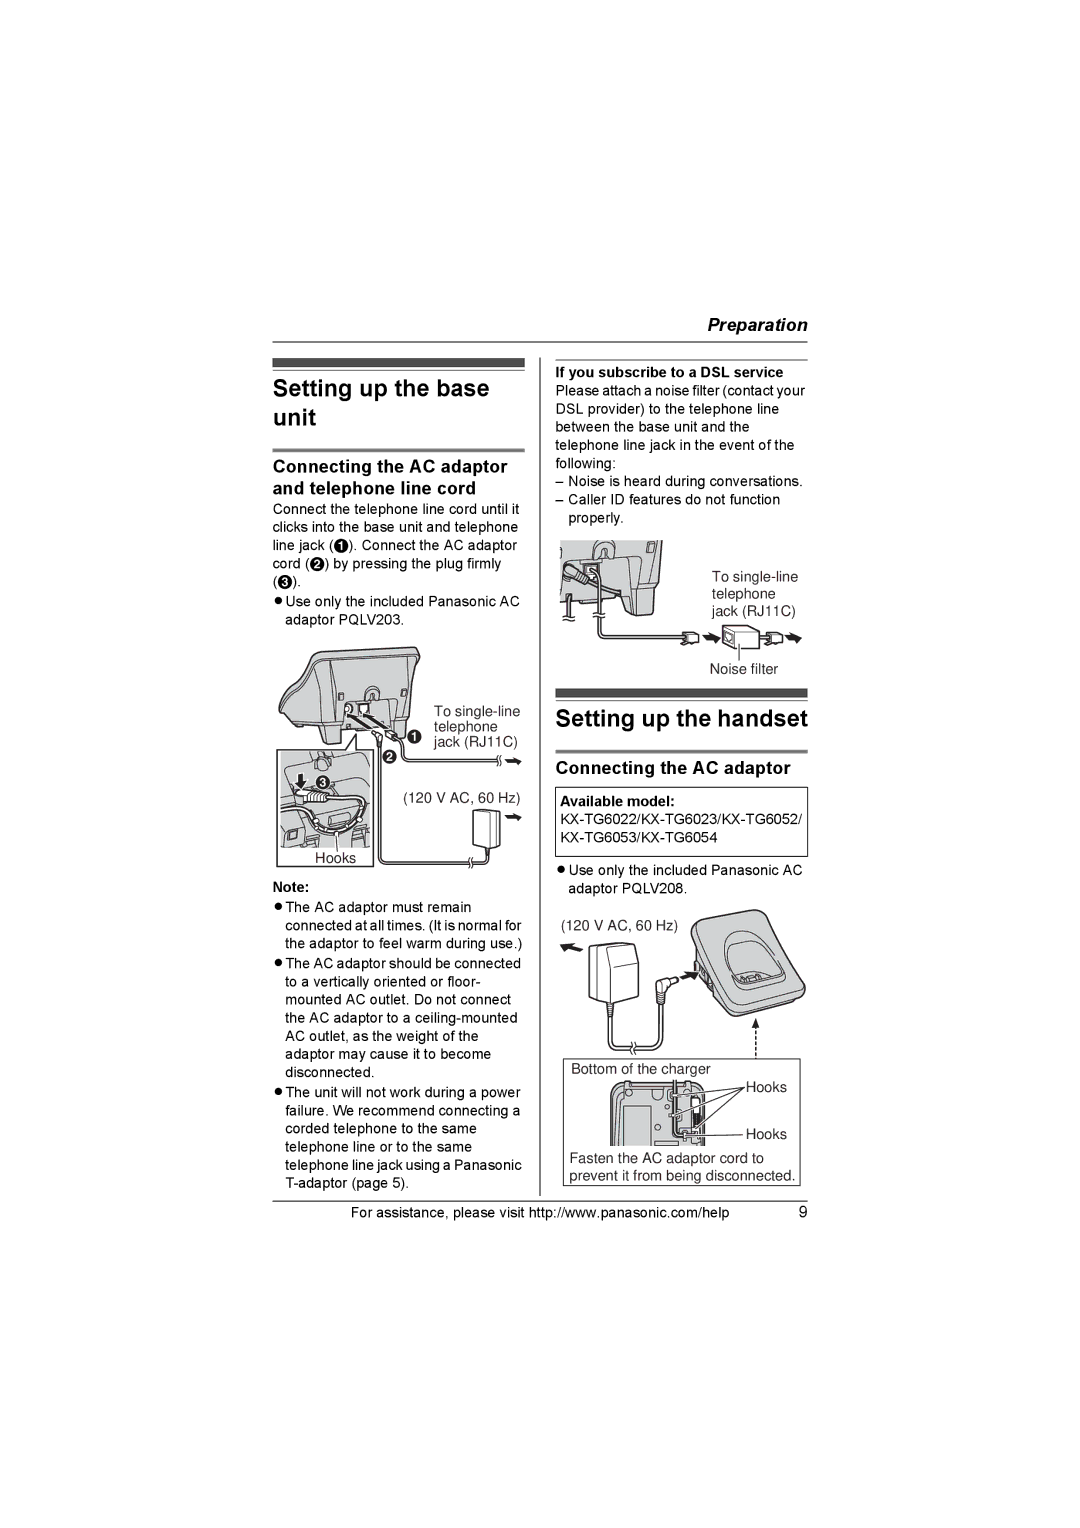
Connecting the AC adaptor and telephone line cord
Connect the telephone line cord until it clicks into the base unit and telephone line jack (A). Connect the AC adaptor cord (B) by pressing the plug firmly (C).
LUse only the included Panasonic AC adaptor PQLV203.
To
A jack (RJ11C)
B
![]() C
C
(120 V AC, 60 Hz)
Hooks
Note:
LThe AC adaptor must remain connected at all times. (It is normal for the adaptor to feel warm during use.)
LThe AC adaptor should be connected to a vertically oriented or floor- mounted AC outlet. Do not connect the AC adaptor to a
LThe unit will not work during a power failure. We recommend connecting a corded telephone to the same telephone line or to the same telephone line jack using a Panasonic
If you subscribe to a DSL service Please attach a noise filter (contact your DSL provider) to the telephone line between the base unit and the telephone line jack in the event of the following:
–Noise is heard during conversations.
–Caller ID features do not function properly.
To
Noise filter
Setting up the handset
Connecting the AC adaptor
Available model:
LUse only the included Panasonic AC adaptor PQLV208.
(120 V AC, 60 Hz)
Bottom of the charger
Hooks
![]()
![]() Hooks
Hooks
Fasten the AC adaptor cord to prevent it from being disconnected.
For assistance, please visit http://www.panasonic.com/help | 9 |