[VIDEO IN] ![]()
![]()
![]() [AUDIO IN]
[AUDIO IN]
1
3
| MIC |
2 |
|
DIGITAL(to USB) / | AV OUT |
EDIT | PHONES |
D
1 (MINI)
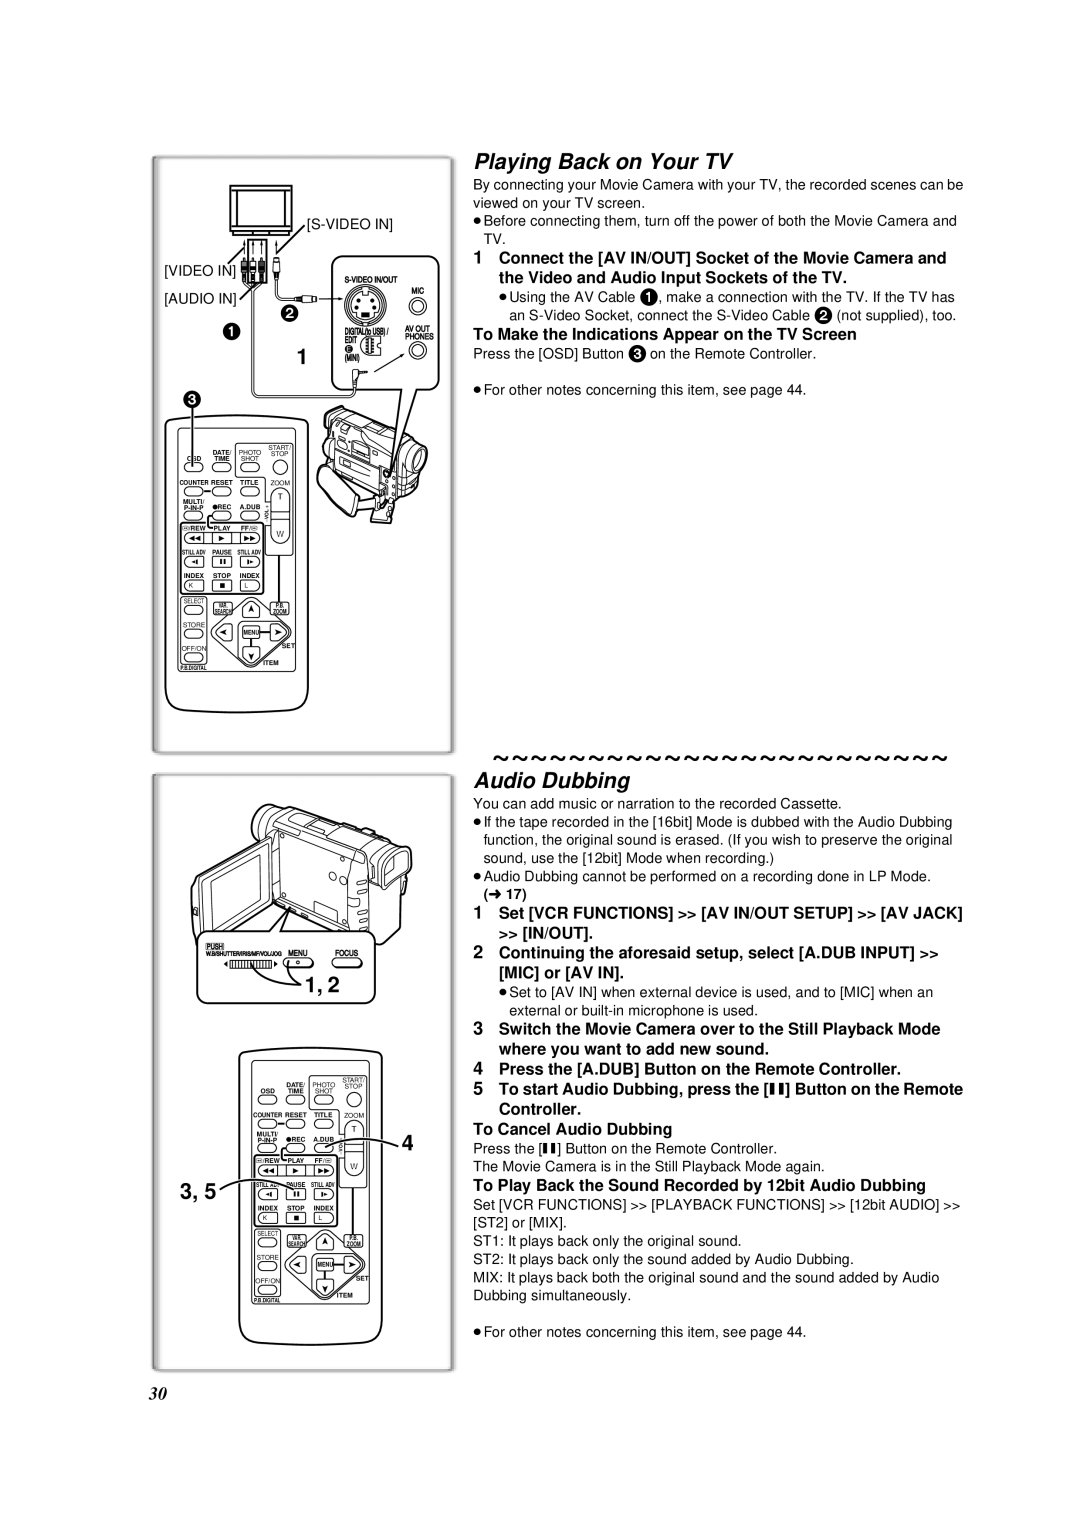
Playing Back on Your TV
By connecting your Movie Camera with your TV, the recorded scenes can be viewed on your TV screen.
≥Before connecting them, turn off the power of both the Movie Camera and TV.
1Connect the [AV IN/OUT] Socket of the Movie Camera and
the Video and Audio Input Sockets of the TV.
≥Using the AV Cable 1, make a connection with the TV. If the TV has an
To Make the Indications Appear on the TV Screen
Press the [OSD] Button 3 on the Remote Controller.
≥For other notes concerning this item, see page 44.
| DATE/ | PHOTO | START/ | |
OSD | STOP | |||
TIME | SHOT |
| ||
COUNTER RESET | TITLE | ZOOM | ||
MULTI/ |
|
| T | |
¥REC | A.DUB |
| ||
r | ||||
|
|
| sVOL | |
V/REW | PLAY | FF/W | W | |
6 | 1 | 5 | ||
| ||||
STILL ADV | PAUSE | STILL ADV |
| |
E | ; | D |
| |
INDEX | STOP | INDEX |
| |
K | ∫ | L |
| |
SELECT | VAR. |
| P.B. | |
|
| |||
| SEARCH |
| ZOOM | |
STORE
| MENU |
OFF/ON | SET |
| |
P.B.DIGITAL | ITEM |
|
PUSH
W.B/SHUTTER/IRIS/MF/VOL/JOG MENU | FOCUS |
![]() 1, 2
1, 2
|
| DATE/ | PHOTO | START/ |
| OSD | STOP | ||
| TIME | SHOT |
| |
| COUNTER RESET | TITLE | ZOOM | |
| MULTI/ |
|
| T |
| ¥REC | A.DUB |
| |
| r | |||
|
|
|
| sVOL |
| V/REW | PLAY | FF/W | W |
| 6 | 1 | 5 | |
|
| |||
3, 5 | STILL ADV | PAUSE | STILL ADV |
|
E | ; | D |
| |
| INDEX | STOP | INDEX |
|
| K | ∫ | L |
|
| SELECT | VAR. |
| P.B. |
|
|
| ||
|
| SEARCH |
| ZOOM |
STORE
| MENU |
OFF/ON | SET |
| |
P.B.DIGITAL | ITEM |
|
~~~~~~~~~~~~~~~~~~~~~~~~
Audio Dubbing
You can add music or narration to the recorded Cassette.
≥If the tape recorded in the [16bit] Mode is dubbed with the Audio Dubbing function, the original sound is erased. (If you wish to preserve the original
sound, use the [12bit] Mode when recording.)
| ≥Audio Dubbing cannot be performed on a recording done in LP Mode. | |
| 1 | (l17) |
| Set [VCR FUNCTIONS] >> [AV IN/OUT SETUP] >> [AV JACK] | |
| 2 | >> [IN/OUT]. |
| Continuing the aforesaid setup, select [A.DUB INPUT] >> | |
|
| [MIC] or [AV IN]. |
|
| ≥Set to [AV IN] when external device is used, and to [MIC] when an |
| 3 | external or |
| Switch the Movie Camera over to the Still Playback Mode | |
| 4 | where you want to add new sound. |
| Press the [A.DUB] Button on the Remote Controller. | |
| 5 | To start Audio Dubbing, press the [;] Button on the Remote |
|
| Controller. |
4 | To Cancel Audio Dubbing | |
Press the [;] Button on the Remote Controller. | ||
The Movie Camera is in the Still Playback Mode again.
To Play Back the Sound Recorded by 12bit Audio Dubbing
Set [VCR FUNCTIONS] >> [PLAYBACK FUNCTIONS] >> [12bit AUDIO] >> [ST2] or [MIX].
ST1: It plays back only the original sound.
ST2: It plays back only the sound added by Audio Dubbing.
MIX: It plays back both the original sound and the sound added by Audio Dubbing simultaneously.
≥For other notes concerning this item, see page 44.
30