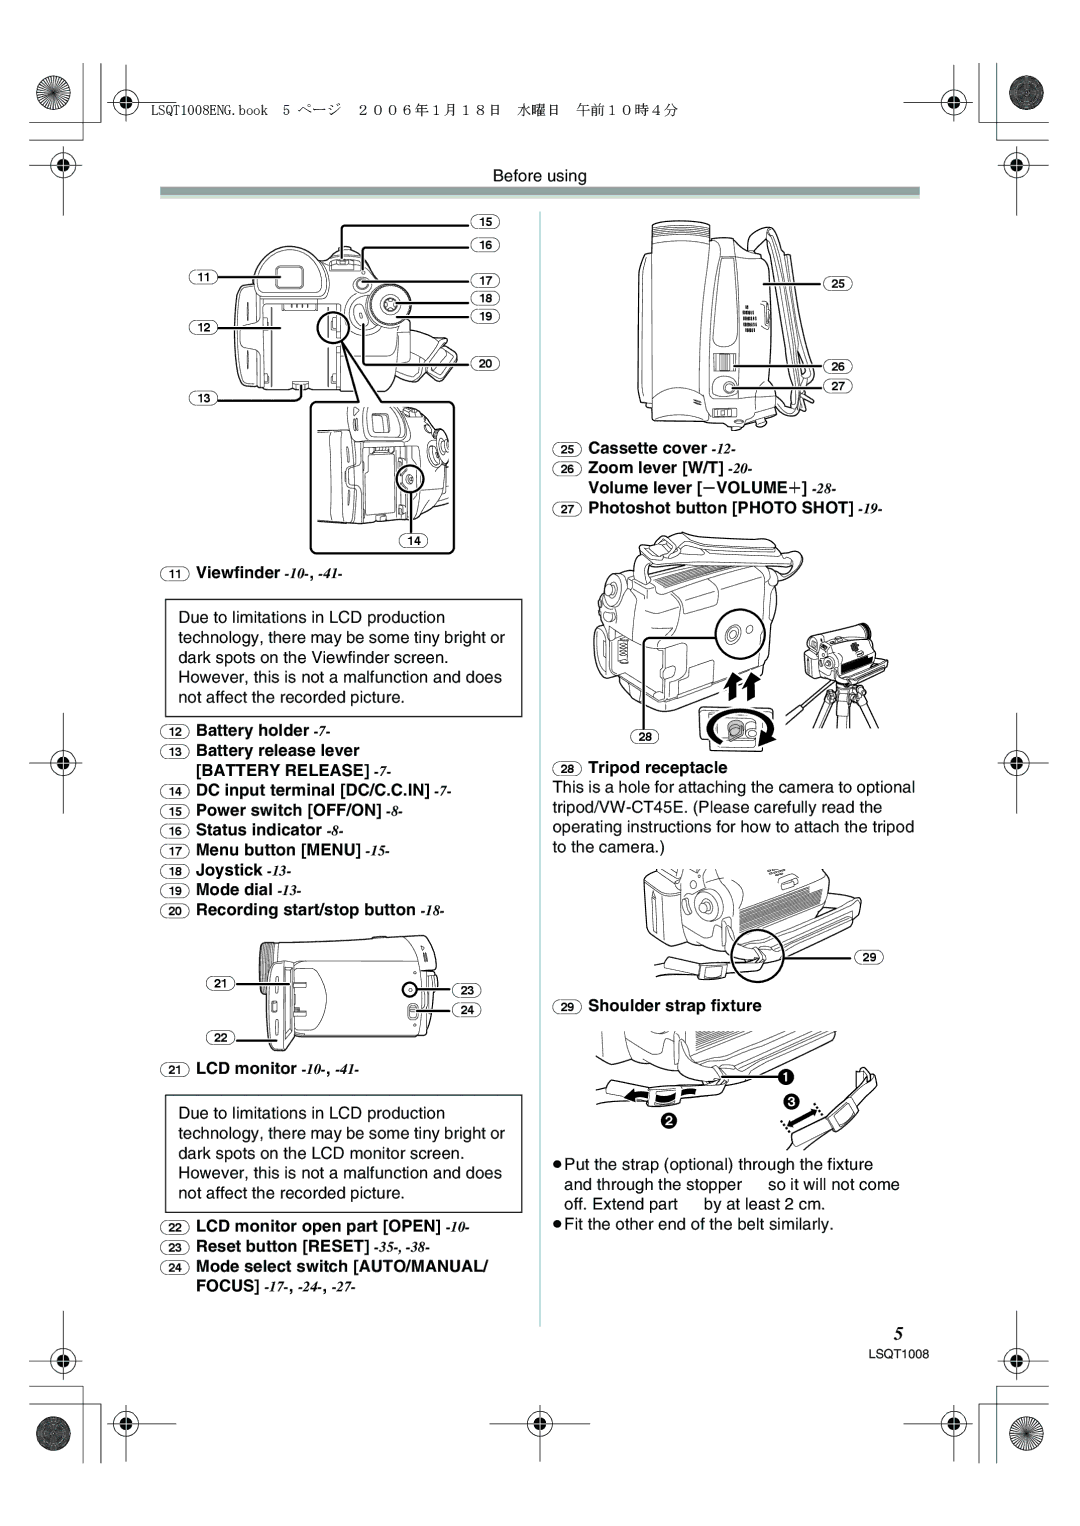
NV-GS27GN specifications
The Panasonic NV-GS27GN is a compact and versatile digital camcorder that exemplifies the innovation and quality associated with the Panasonic brand. Targeted toward both amateur videographers and budding content creators, the NV-GS27GN integrates advanced technologies and user-friendly features, making it an appealing choice for capturing precious moments.One of the standout features of the NV-GS27GN is its 3CCD imaging system. Unlike traditional single-chip camcorders, the 3CCD system enhances color accuracy and delivers stunning image quality. Each of the three CCD sensors captures the primary colors—red, green, and blue—separately, allowing for rich, vibrant videos with minimal color distortion. This technology is particularly effective in various lighting conditions, ensuring that users can achieve professional-grade results.
The camcorder boasts a powerful 24x optical zoom, which enables users to get close-up shots without sacrificing detail. Coupled with a digital zoom of up to 1000x, the NV-GS27GN provides remarkable flexibility for different shooting scenarios, from wide-angle landscapes to tightly framed portraits. The built-in optical image stabilization technology further ensures that shaky hands do not translate into shaky footage, making every video smooth and visually appealing.
Another significant characteristic of the NV-GS27GN is its intuitive LCD touchscreen interface. The 2.7-inch display allows for easy navigation of settings and playback, enhancing the overall user experience. The inclusion of advanced features like face detection autofocus enables the camcorder to automatically focus on the subject's face, producing sharp and well-defined images.
For those who wish to edit their videos post-capture, the NV-GS27GN supports multiple recording formats, making it easy to transfer and work with footage. Its SD card slot provides ample storage options, allowing users to record hours of high-quality video without the need for frequent media changes.
Additionally, the camera includes a host of creative features, such as various scene modes, built-in digital effects, and the ability to capture 1.2-megapixel still images, bridging the gap between photography and videography.
Overall, the Panasonic NV-GS27GN stands out as a reliable and feature-rich camcorder. Its combination of advanced imaging technology, ease of use, and flexibility makes it a perfect companion for anyone looking to document life’s unforgettable moments with clarity and style.

