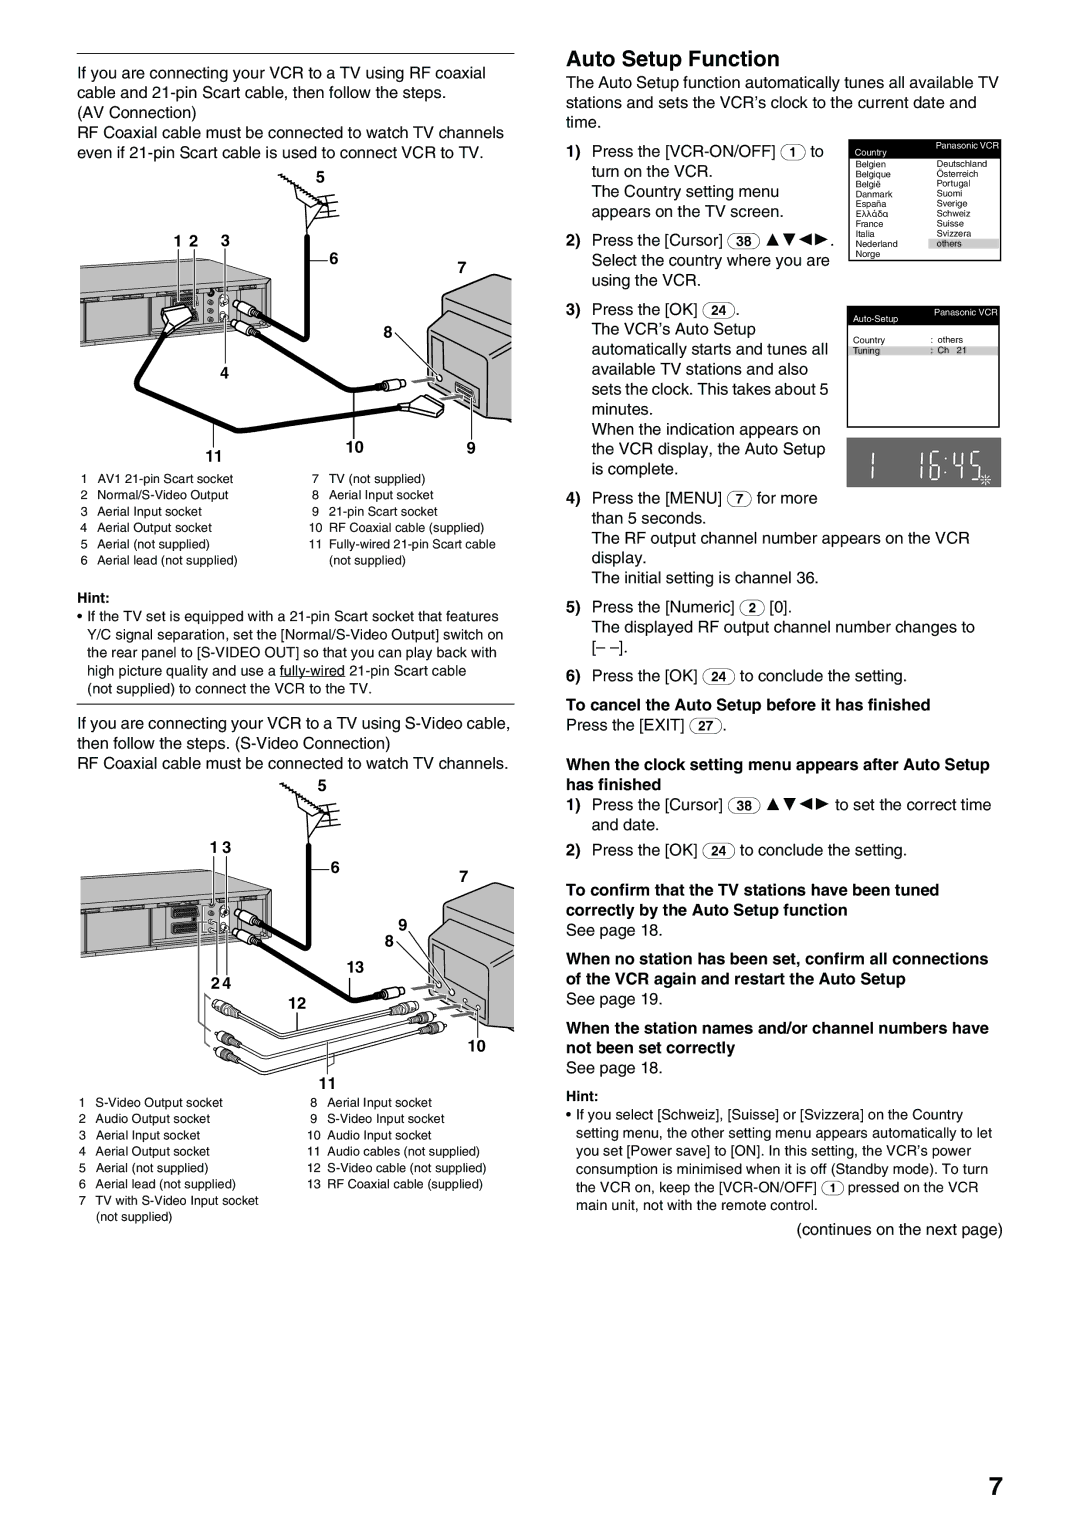
If you are connecting your VCR to a TV using RF coaxial cable and
(AV Connection)
RF Coaxial cable must be connected to watch TV channels even if
| 5 |
|
1 2 | 3 |
|
| 6 | 7 |
|
|
Auto Setup Function
The Auto Setup function automatically tunes all available TV stations and sets the VCR’s clock to the current date and time.
1) Press the | Country | Panasonic VCR |
turn on the VCR. | Belgien | Deutschland |
Belgique | Österreich | |
The Country setting menu | België | Portugal |
Danmark | Suomi | |
appears on the TV screen. | España | Sverige |
Ελλάδα | Schweiz | |
| France | Suisse |
2) Press the [Cursor] (38) 3421. | Italia | Svizzera |
Nederland | others | |
Select the country where you are | Norge |
|
|
| |
using the VCR. |
|
|
| 8 |
|
4 |
|
|
11 | 10 | 9 |
|
| |
1 AV1 | 7 TV (not supplied) |
|
3)Press the [OK] (24). The VCR’s Auto Setup automatically starts and tunes all available TV stations and also sets the clock. This takes about 5 minutes.
When the indication appears on the VCR display, the Auto Setup is complete.
Panasonic VCR | ||
Country | : others | |
Tuning | : Ch 21 | |
|
| |
|
| |
|
|
2 | 8 | Aerial Input socket | |
3 | Aerial Input socket | 9 | |
4 | Aerial Output socket | 10 | RF Coaxial cable (supplied) |
5 | Aerial (not supplied) | 11 | |
6 | Aerial lead (not supplied) |
| (not supplied) |
Hint:
•If the TV set is equipped with a
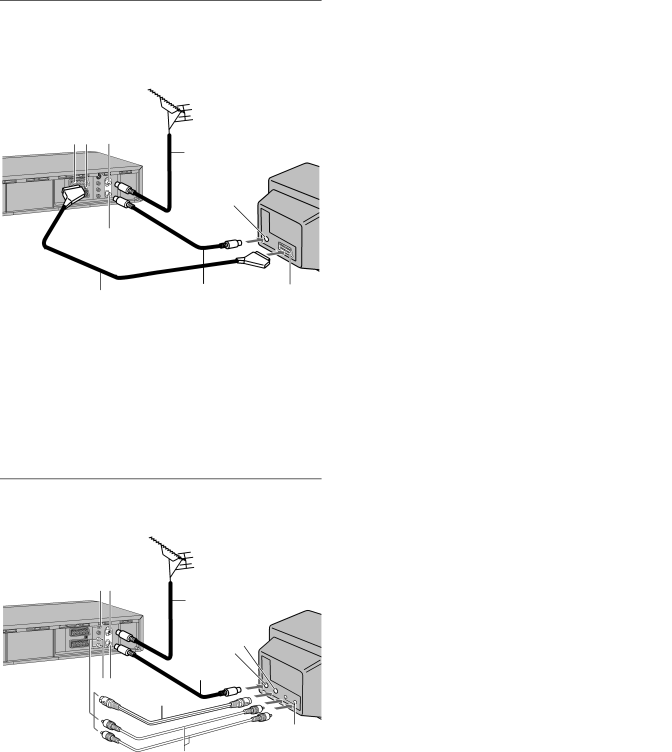
If you are connecting your VCR to a TV using
RF Coaxial cable must be connected to watch TV channels.
5
1 3
|
|
| 6 | 7 |
|
|
|
| |
|
|
| 9 |
|
|
|
| 8 |
|
| 2 4 |
| 13 |
|
|
|
|
| |
|
| 12 |
|
|
|
|
|
| 10 |
|
| 11 |
| |
1 | 8 | Aerial Input socket |
| |
2 | Audio Output socket | 9 |
| |
3 | Aerial Input socket | 10 | Audio Input socket |
|
4 | Aerial Output socket | 11 | Audio cables (not supplied) | |
5 | Aerial (not supplied) | 12 | ||
6 | Aerial lead (not supplied) | 13 | RF Coaxial cable (supplied) | |
7TV with
4)Press the [MENU] (7) for more than 5 seconds.
The RF output channel number appears on the VCR display.
The initial setting is channel 36.
5)Press the [Numeric] (2) [0].
The displayed RF output channel number changes to [–
6)Press the [OK] (24) to conclude the setting.
To cancel the Auto Setup before it has finished Press the [EXIT] (27).
When the clock setting menu appears after Auto Setup has finished
1)Press the [Cursor] (38) 3421 to set the correct time and date.
2)Press the [OK] (24) to conclude the setting.
To confirm that the TV stations have been tuned correctly by the Auto Setup function
See page 18.
When no station has been set, confirm all connections of the VCR again and restart the Auto Setup
See page 19.
When the station names and/or channel numbers have not been set correctly
See page 18.
Hint:
•If you select [Schweiz], [Suisse] or [Svizzera] on the Country setting menu, the other setting menu appears automatically to let you set [Power save] to [ON]. In this setting, the VCR’s power consumption is minimised when it is off (Standby mode). To turn the VCR on, keep the
(continues on the next page)
7