ENGLISH
ESPAÑOL
Making the connections (continued)
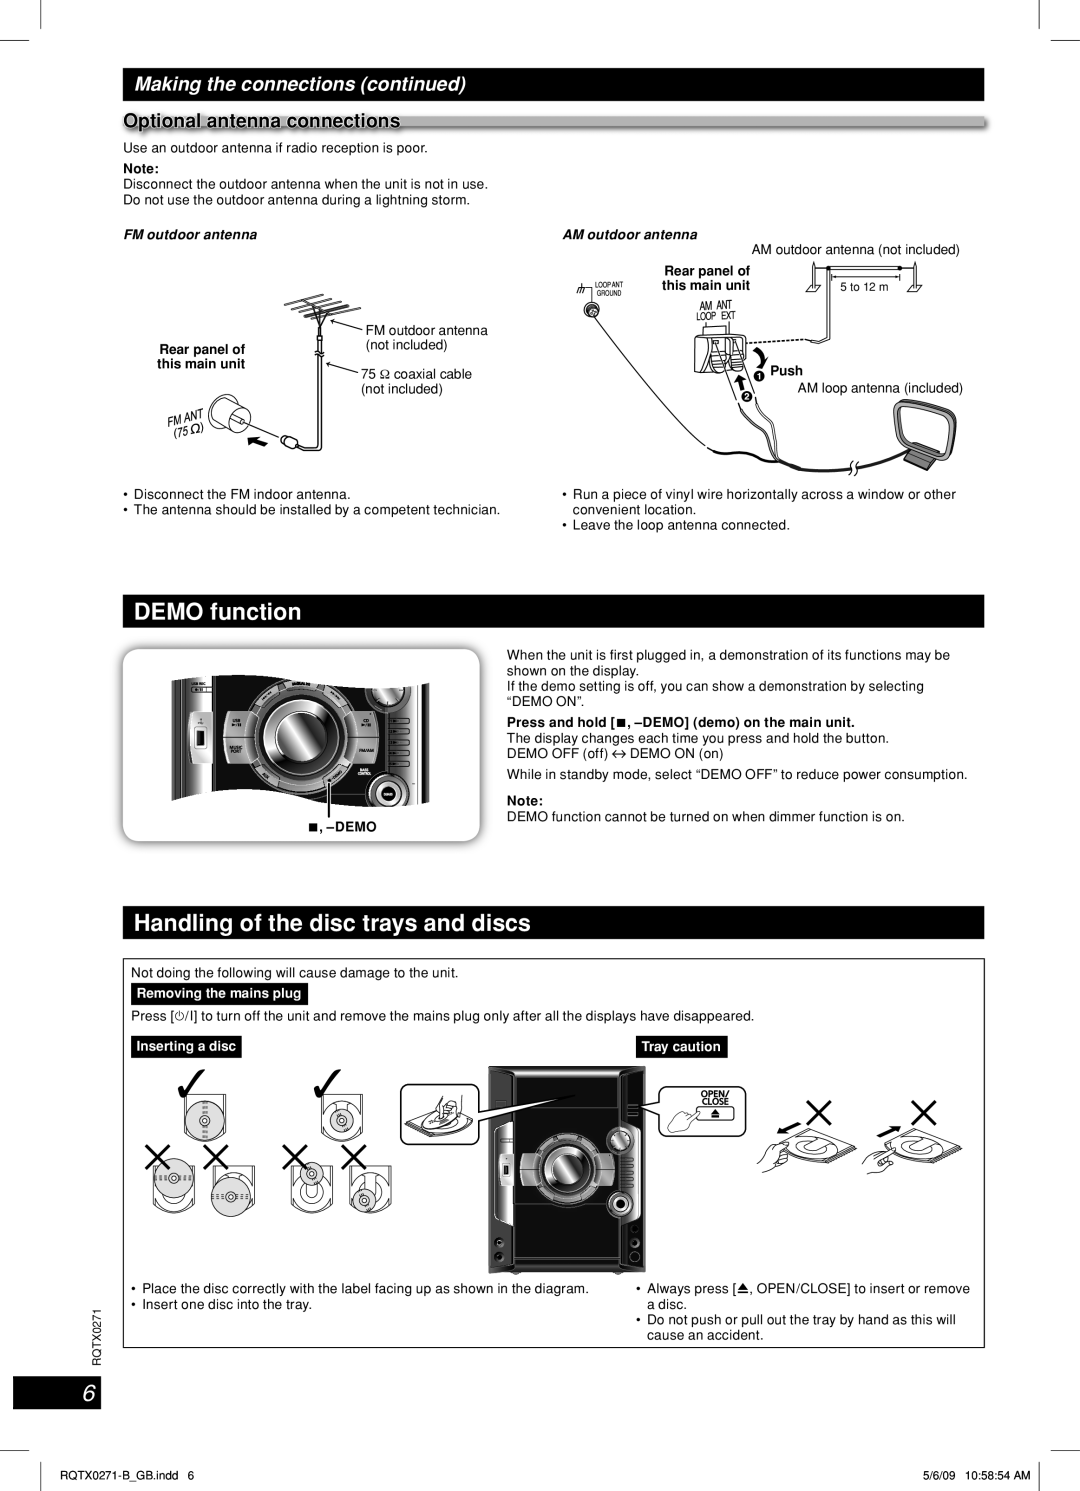
Optional antenna connections
Use an outdoor antenna if radio reception is poor.
Note:
Disconnect the outdoor antenna when the unit is not in use.
Do not use the outdoor antenna during a lightning storm.
FM outdoor antenna |
| AM outdoor antenna | AM outdoor antenna (not included) |
|
|
| |
|
| Rear panel of |
|
|
| this main unit | 5 to 12 m |
| FM outdoor antenna |
|
|
Rear panel of | (not included) |
|
|
this main unit | 75 Ω coaxial cable |
| Push |
|
| ||
| (not included) |
| AM loop antenna (included) |
• Disconnect the FM indoor antenna. | • Run a piece of vinyl wire horizontally across a window or other |
• The antenna should be installed by a competent technician. | convenient location. |
| • Leave the loop antenna connected. |
DEMO function
ESPAÑOL
7 , –DEMO
When the unit is fi rst plugged in, a demonstration of its functions may be shown on the display.
If the demo setting is off, you can show a demonstration by selecting “DEMO ON”.
Press and hold [7 , –DEMO] (demo) on the main unit.
The display changes each time you press and hold the button. DEMO OFF (off) ![]()
![]() DEMO ON (on)
DEMO ON (on)
While in standby mode, select “DEMO OFF” to reduce power consumption.
Note:
DEMO function cannot be turned on when dimmer function is on.
ESPAÑOL
ESPAÑOL
RQTX0271
6
Handling of the disc trays and discs
Not doing the following will cause damage to the unit.
Removing the mains plug
Press [y /I] to turn off the unit and remove the mains plug only after all the displays have disappeared.
Inserting a disc |
|
|
|
|
|
|
| Tray caution | ||
|
|
|
|
|
|
|
|
|
|
|
|
|
|
|
|
|
|
|
|
|
|
|
|
|
|
|
|
|
|
|
|
|
|
|
|
|
|
|
|
|
|
|
|
|
|
|
|
|
|
|
|
|
|
|
|
|
|
|
|
|
|
|
|
|
|
|
|
|
|
|
|
|
|
|
|
|
• | Place the disc correctly with the label facing up as shown in the diagram. | • Always press [0, OPEN/CLOSE] to insert or remove |
• | Insert one disc into the tray. | a disc. |
|
| • Do not push or pull out the tray by hand as this will |
|
| cause an accident. |
5/6/09 10:58:54 AM |