Cassette tape – Play and record

The buttons described for “Cassette tape – Play and record” are mainly for the main unit unless indicated otherwise.

ESPAÑOL


TAPE


Basic play


Use normal position tapes.


High position and metal position tapes can be played, but


the unit will not be able to identify the characteristics of


these tapes.


1

Press [3, TAPE].


The unit turns on.


If a cassette was loaded, play starts automatically (One


touch play).


2

Press [0, OPEN] and insert the cassette.


Insert with the side to be played facing towards you

DANSK


and the exposed tape facing down. Close the holder by


hand.


3

Press [3, TAPE] to start play.


To


Action


stop tape playback

Press [7, STOP].


fast-forward and

Press [ , REW / 4] or [ , FF / ¢].


rewind


FRANÇAIS


• Tape slack can get caught up in the mechanism and should be


Note:


• Tapes exceeding 100 minutes are thin and can break or get caught in the mechanism.

wound up before the tape is played.

TPS (Tape Program Sensor)

This function enables you to search the beginning of up to a maximum of 9 tracks.

Press [ , REW / 4] or [ , FF / ¢] during play.

Play resumes from the track found.

4

Note:

TPS may not operate correctly in the following situations:

-

LANG

• If the interval between tracks is less than 4 seconds.

• If there is noise between tracks.


• If there are silent parts within tracks.

Recording

Selection of tapes for recording

Use normal position tapes.

High position and metal position tapes can be used, but this unit will not be able to record or erase them correctly.


Preparation

- 5

Wind up the source tape so recording can begin

immediately.


1 Press [0, OPEN] and insert the cassette to be

LANG

recorded.

Insert with the side to be recorded facing towards you


and the exposed tape facing down.

RQTV0196


12


RQT8043


2 Select the source to be recorded. Radio recording:

Tune in the station .(\ page 13)

Disc recording:

Insert the disc(s) you want to record. Press [6, CD] and then [7, STOP].

Prepare the desired disc recording mode.


To

Action


record


programmed

Perform steps 2 to 4 in “Program play”


tracks


(\ page 10).


Perform steps 3 to 6 in “Program play”


(\ page 10).


By remote control only


record

1) Press [DISC] and then [1] ~ [5] to select


specifi c

the disc.


discs/tracks

Ensure disc is stopped.


2) Press [PLAY MODE] to select the desired


mode (\ page 9).


3)


For 1-ALBUM mode and 1-TRACK mode:


Press [ALBUM ( or )] to select the


album.


For 1-TRACK mode:


Press [4, / REW] or [¢, / FF] to


select the track.


3 Press [, REC] to start recording.

Other basic operations


To

Action


stop recording

Press [7, STOP].


record on the other

Turn the cassette over and press [, REC].

side of the tape


erase a recorded

1) Press [3, TAPE] and then [7, STOP].

sound

2) Insert the recorded cassette.


3) Press [, REC].


Your attention is drawn to the fact that recording pre- recorded tapes or discs or other published or broadcast material may infringe copyright laws.

Note:

Changes to volume and sound adjustments quality do not affect recording.

Erasure prevention

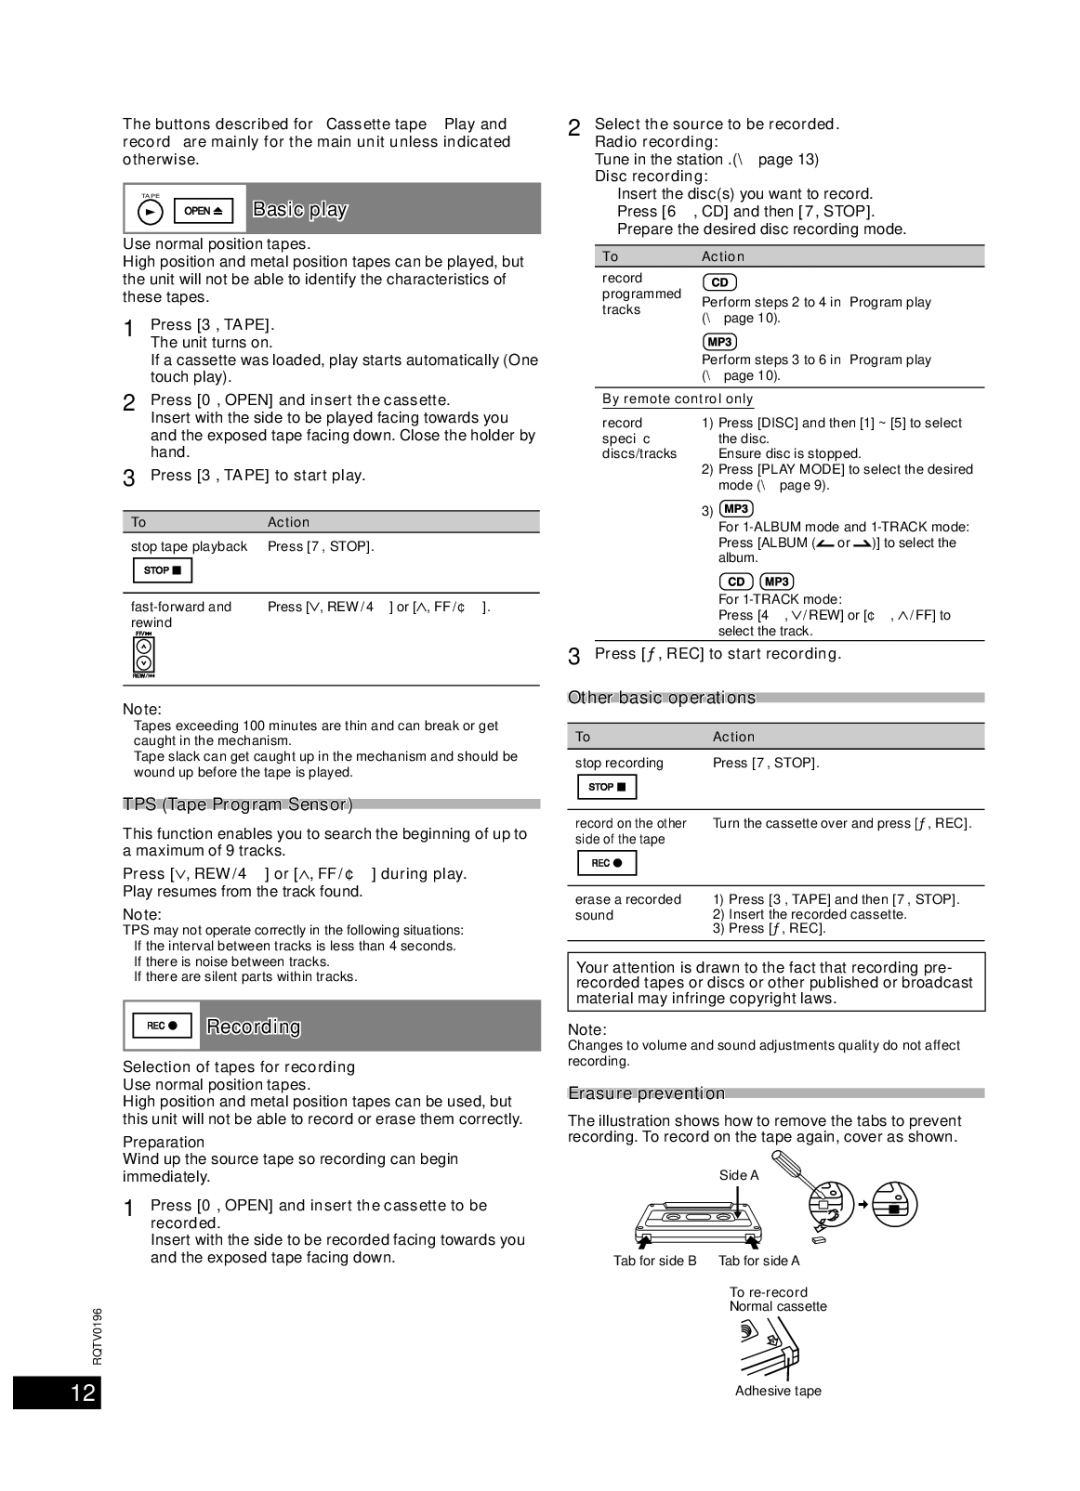
The illustration shows how to remove the tabs to prevent recording. To record on the tape again, cover as shown.

Side A

Tab for side B Tab for side A

To re-record

Normal cassette

Adhesive tape

RQTV0196-B.indd 12

2/23/07 4:49:23 PM

Page 12
Image 12
Panasonic SC-AK250, SC-AK350 Cassette tape Play and record, Recording, TPS Tape Program Sensor, Other basic operations

SC-AK350, SC-AK250 specifications

The Panasonic SC-AK250 and SC-AK350 are versatile and dynamic high-power audio systems, well-suited for music lovers looking for superior audio performance. These models, part of Panasonic's SC-AK series, showcase their commitment to delivering rich sound and an immersive listening experience in both small and large spaces.

One of the standout features of both the SC-AK250 and SC-AK350 is their high output power. The SC-AK250 delivers an exhilarating 250 watts of RMS power, while the SC-AK350 takes it a step further with a robust 350 watts. This high power output enables these systems to fill any room with clear, vibrant sound, making them perfect for parties or casual listening sessions.

Both systems utilize advanced sound enhancement technologies, such as Panasonic’s unique Mega Bass system, which actively adjusts the sound output to provide a deeper bass experience without distorting the overall sound quality. This feature is particularly appealing to bass enthusiasts who enjoy genres like hip-hop or electronic dance music.

In terms of connectivity, the SC-AK250 and SC-AK350 are equipped with multiple input options, including USB ports and AUX inputs, allowing users to connect various devices easily. These systems also feature Bluetooth connectivity, making it simple to stream music wirelessly from smartphones, tablets, or laptops.

The SC-AK350, while similar to the SC-AK250, boasts additional features that enhance its functionality. It includes a built-in CD player, allowing users to enjoy their favorite CDs effortlessly. Both models come with a digital tuner that supports FM and AM radio, ensuring users can access a wide range of broadcast channels.

The design of both models reflects a modern aesthetic, with sleek lines and an intuitive interface. The LED display is easy to read, while the buttons are conveniently placed for straightforward navigation.

Another noteworthy characteristic of the SC-AK250 and SC-AK350 is their multi-source playback capability, which allows users to enjoy music from different sources simultaneously. This is an excellent feature for those who appreciate a diverse music library and want to enjoy multiple audio inputs without the hassle of switching cables.

In summary, the Panasonic SC-AK250 and SC-AK350 audio systems deliver powerful performance, versatile connectivity options, and user-friendly features, making them ideal choices for anyone seeking to enhance their audio experience. Whether for casual listening or hosting gatherings, these systems are designed to impress with their sound quality and overall functionality.