Connections
3 Complete all the necessary connections to this unit. (> 10)
≥Connect the AC power supply cord to this unit, but do not connect it to the household AC outlet until the installation is completed.
≥For details, refer to the operating instructions for this unit.
Placement
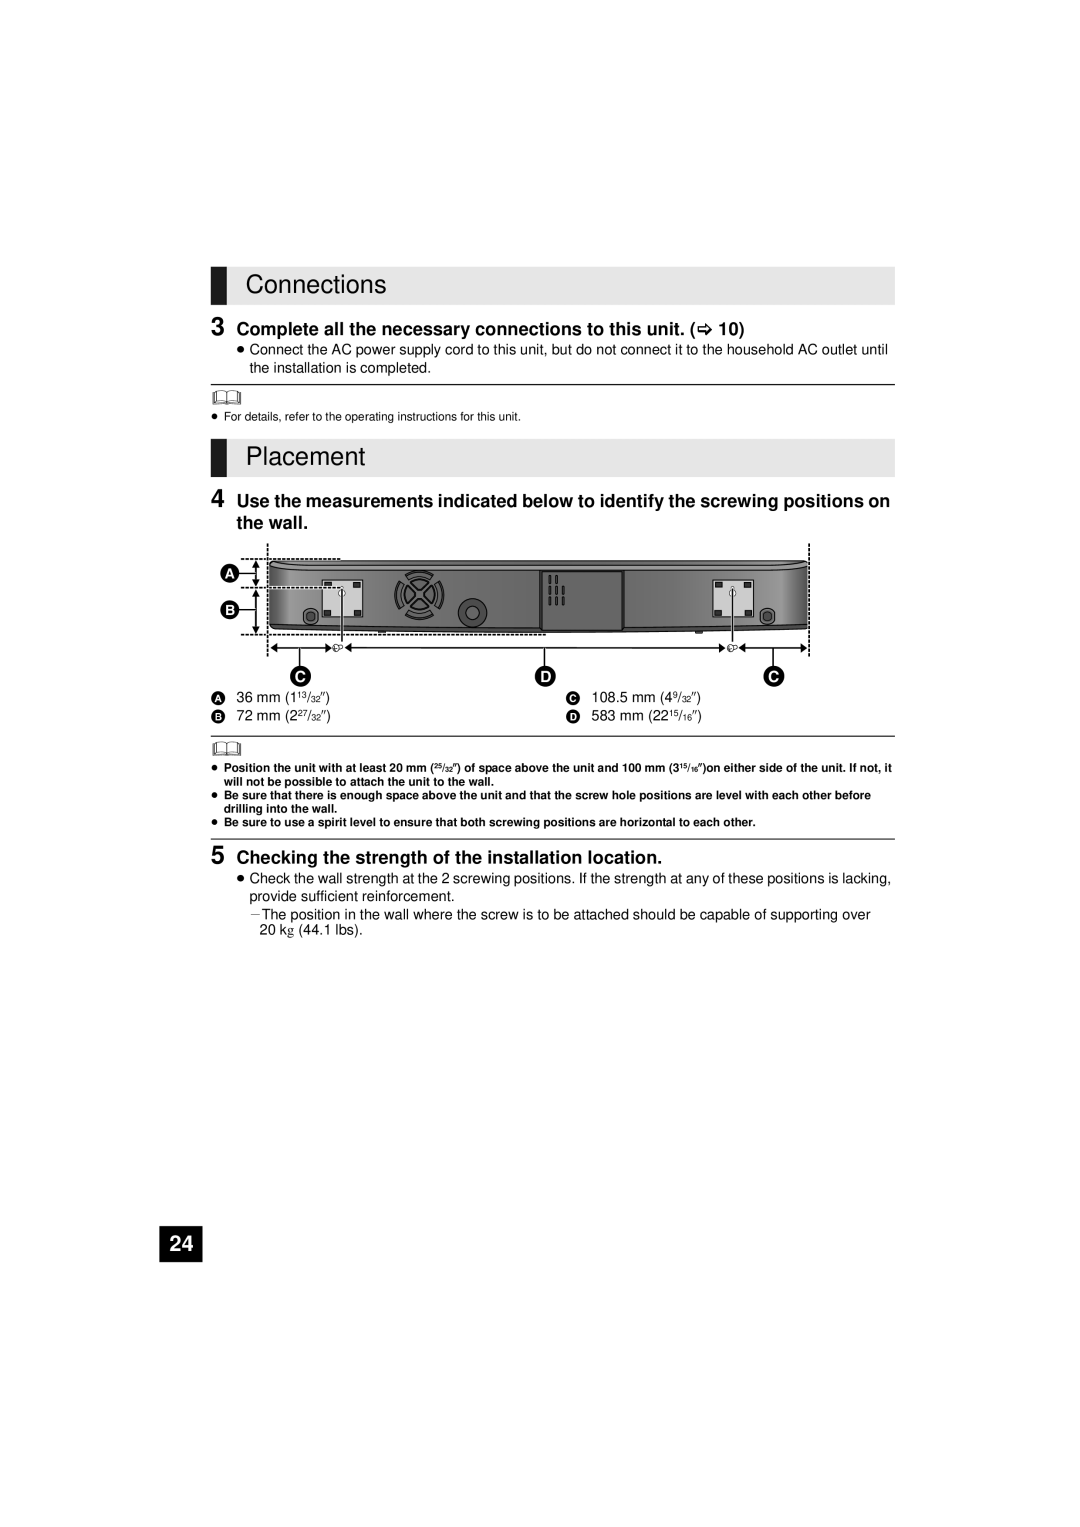
4 Use the measurements indicated below to identify the screwing positions on the wall.
![]()
![]()
![]()
|
|
|
|
|
|
|
|
| | |
| | |||
A | 36 mm (113/32q) |
|
| C | 108.5 mm (49/32q) | ||
B | 72 mm (227/32q) |
|
| D | 583 mm (2215/16q) | ||
|
|
|
|
|
|
|
|
≥Position the unit with at least 20 mm (25/32q) of space above the unit and 100 mm (315/16q)on either side of the unit. If not, it will not be possible to attach the unit to the wall.
≥Be sure that there is enough space above the unit and that the screw hole positions are level with each other before drilling into the wall.
≥Be sure to use a spirit level to ensure that both screwing positions are horizontal to each other.
5 Checking the strength of the installation location.
≥Check the wall strength at the 2 screwing positions. If the strength at any of these positions is lacking, provide sufficient reinforcement.
jThe position in the wall where the screw is to be attached should be capable of supporting over 20 kg (44.1 lbs).
24