Assembling the unit
Refer to the following when placing this unit on a table or in a rack. For wall mount, refer to the installation instructions. (> 21)
Professional installation is required.
The installation should never be done by any other than a qualified installation specialist.
Preparation
≥To prevent damage or scratches, lay down a soft cloth and perform the assembly on it. ≥Keep the screws out of reach of children to prevent swallowing.
≥Do not hold this unit in one hand to avoid injury by dropping this unit when carrying.
To prevent the unit from falling
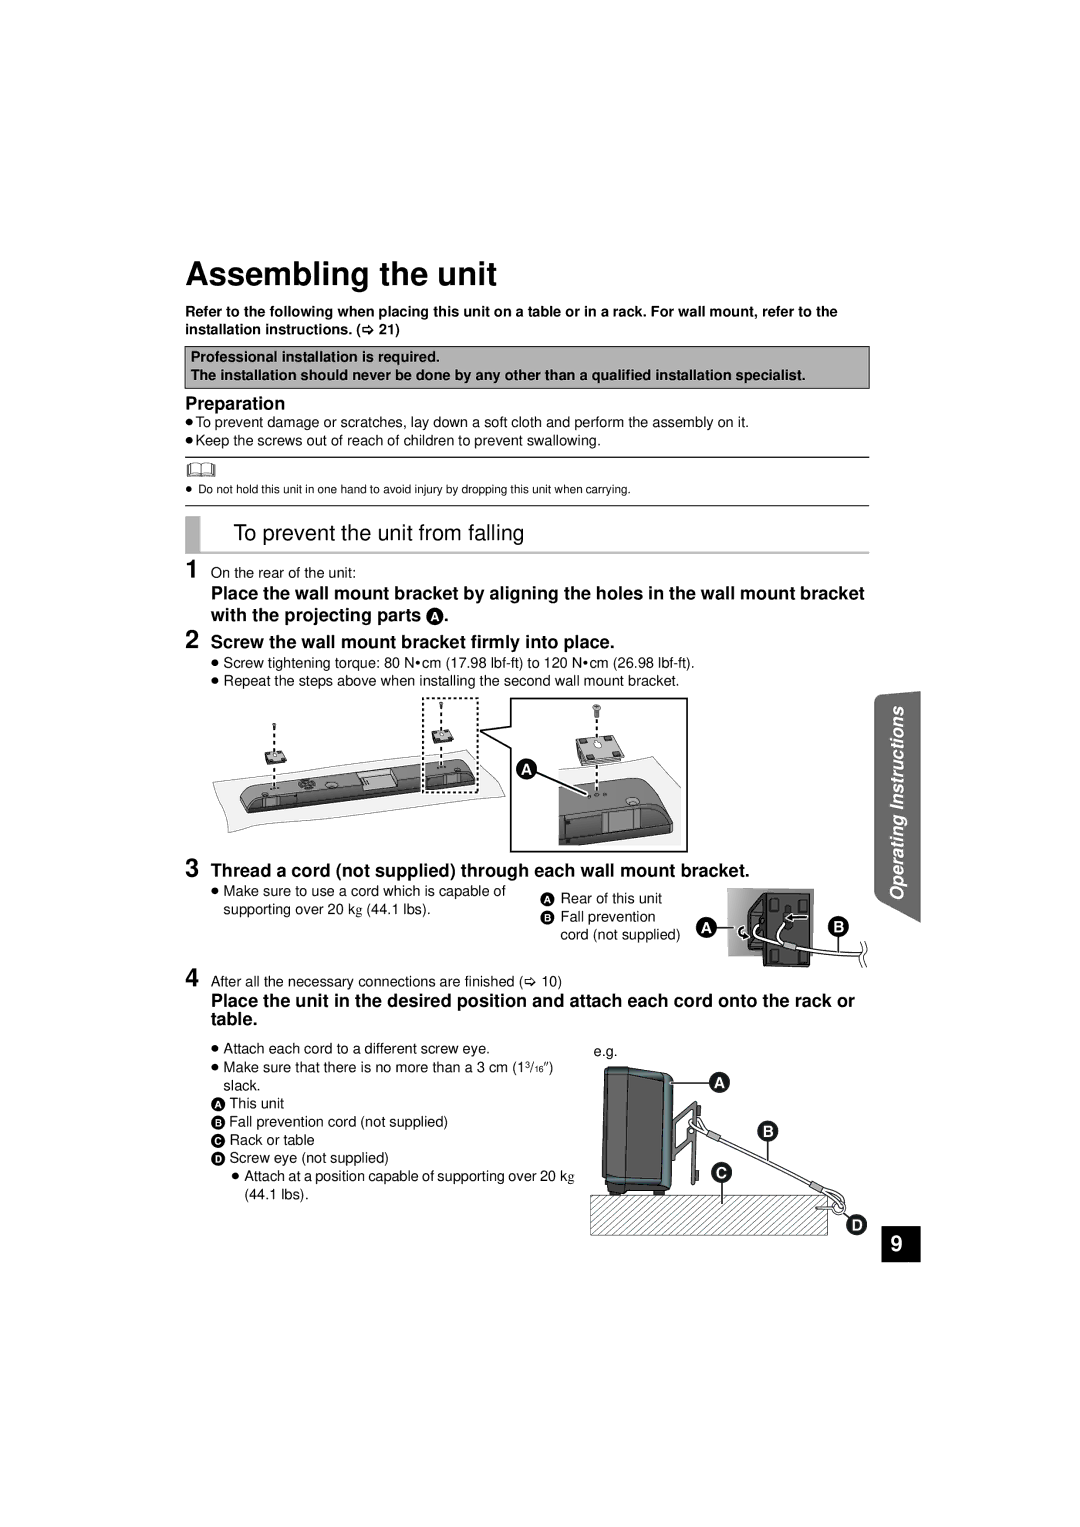
1 On the rear of the unit:
Place the wall mount bracket by aligning the holes in the wall mount bracket with the projecting parts A.
2 Screw the wall mount bracket firmly into place.
≥Screw tightening torque: 80 N0cm (17.98
≥Repeat the steps above when installing the second wall mount bracket.
3 Thread a cord (not supplied) through each wall mount bracket.
≥ Make sure to use a cord which is capable of | A Rear of this unit |
|
| |
supporting over 20 kg (44.1 lbs). |
|
| ||
B Fall prevention | | | ||
| ||||
| cord (not supplied) |
4 After all the necessary connections are finished (> 10)
Place the unit in the desired position and attach each cord onto the rack or table.
Operating Instructions
≥ Attach each cord to a different screw eye. | e.g. |
≥Make sure that there is no more than a 3 cm (13/16q)
slack.
AThis unit
BFall prevention cord (not supplied) C Rack or table
D Screw eye (not supplied)
≥ Attach at a position capable of supporting over 20 kg (44.1 lbs).
![]()
![]()
![]()
9