Platter setup
The stoppers are used to lock the platter, protecting the unit from shock during shipping.
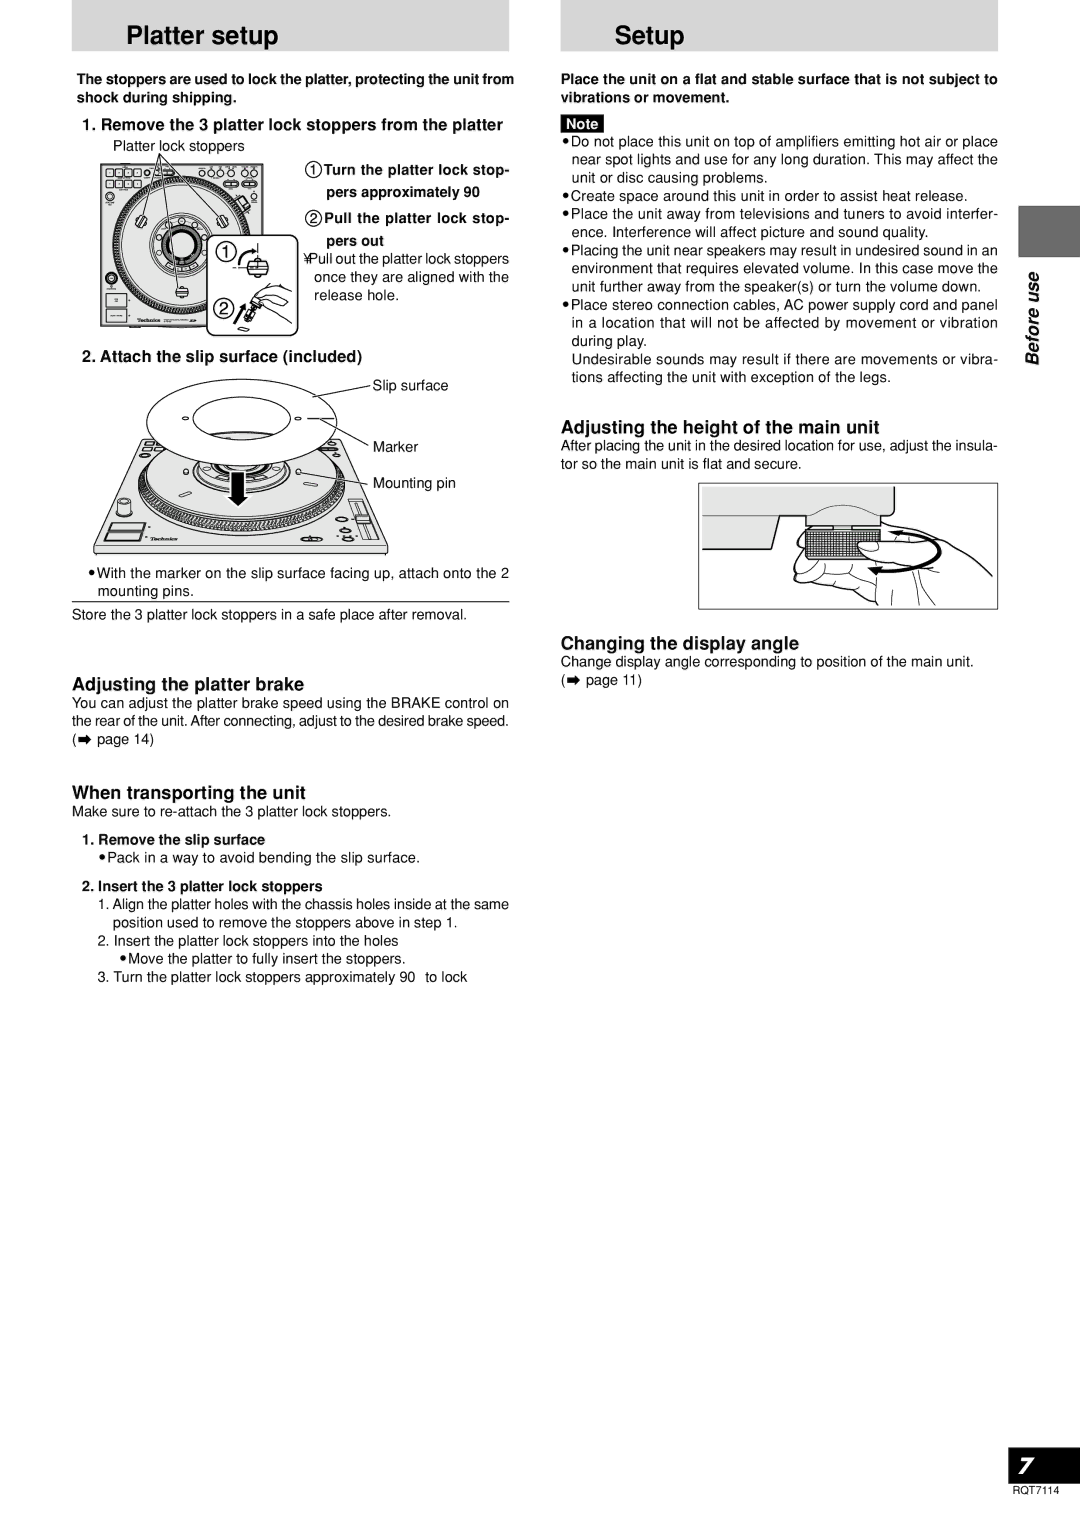
1.Remove the 3 platter lock stoppers from the platter
Platter lock stoppers
![]() Turn the platter lock stop-
Turn the platter lock stop-
pers approximately 90°
![]() Pull the platter lock stop- pers out
Pull the platter lock stop- pers out
•Pull out the platter lock stoppers once they are aligned with the release hole.
2. Attach the slip surface (included)
![]() Slip surface
Slip surface
Marker
![]() Mounting pin
Mounting pin
•With the marker on the slip surface facing up, attach onto the 2 mounting pins.
Store the 3 platter lock stoppers in a safe place after removal.
Adjusting the platter brake
You can adjust the platter brake speed using the BRAKE control on the rear of the unit. After connecting, adjust to the desired brake speed. (![]() page 14)
page 14)
When transporting the unit
Make sure to
1.Remove the slip surface
•Pack in a way to avoid bending the slip surface.
2.Insert the 3 platter lock stoppers
1.Align the platter holes with the chassis holes inside at the same position used to remove the stoppers above in step 1.
2.Insert the platter lock stoppers into the holes
•Move the platter to fully insert the stoppers.
3. Turn the platter lock stoppers approximately 90° to lock
Setup
Place the unit on a flat and stable surface that is not subject to vibrations or movement.
Note
•Do not place this unit on top of amplifiers emitting hot air or place near spot lights and use for any long duration. This may affect the unit or disc causing problems.
•Create space around this unit in order to assist heat release.
•Place the unit away from televisions and tuners to avoid interfer- ence. Interference will affect picture and sound quality.
•Placing the unit near speakers may result in undesired sound in an environment that requires elevated volume. In this case move the unit further away from the speaker(s) or turn the volume down.
•Place stereo connection cables, AC power supply cord and panel in a location that will not be affected by movement or vibration during play.
Undesirable sounds may result if there are movements or vibra- tions affecting the unit with exception of the legs.
Adjusting the height of the main unit
After placing the unit in the desired location for use, adjust the insula- tor so the main unit is flat and secure.
Changing the display angle
Change display angle corresponding to position of the main unit. ( page 11)
Before use
7
RQT7114
