Network link
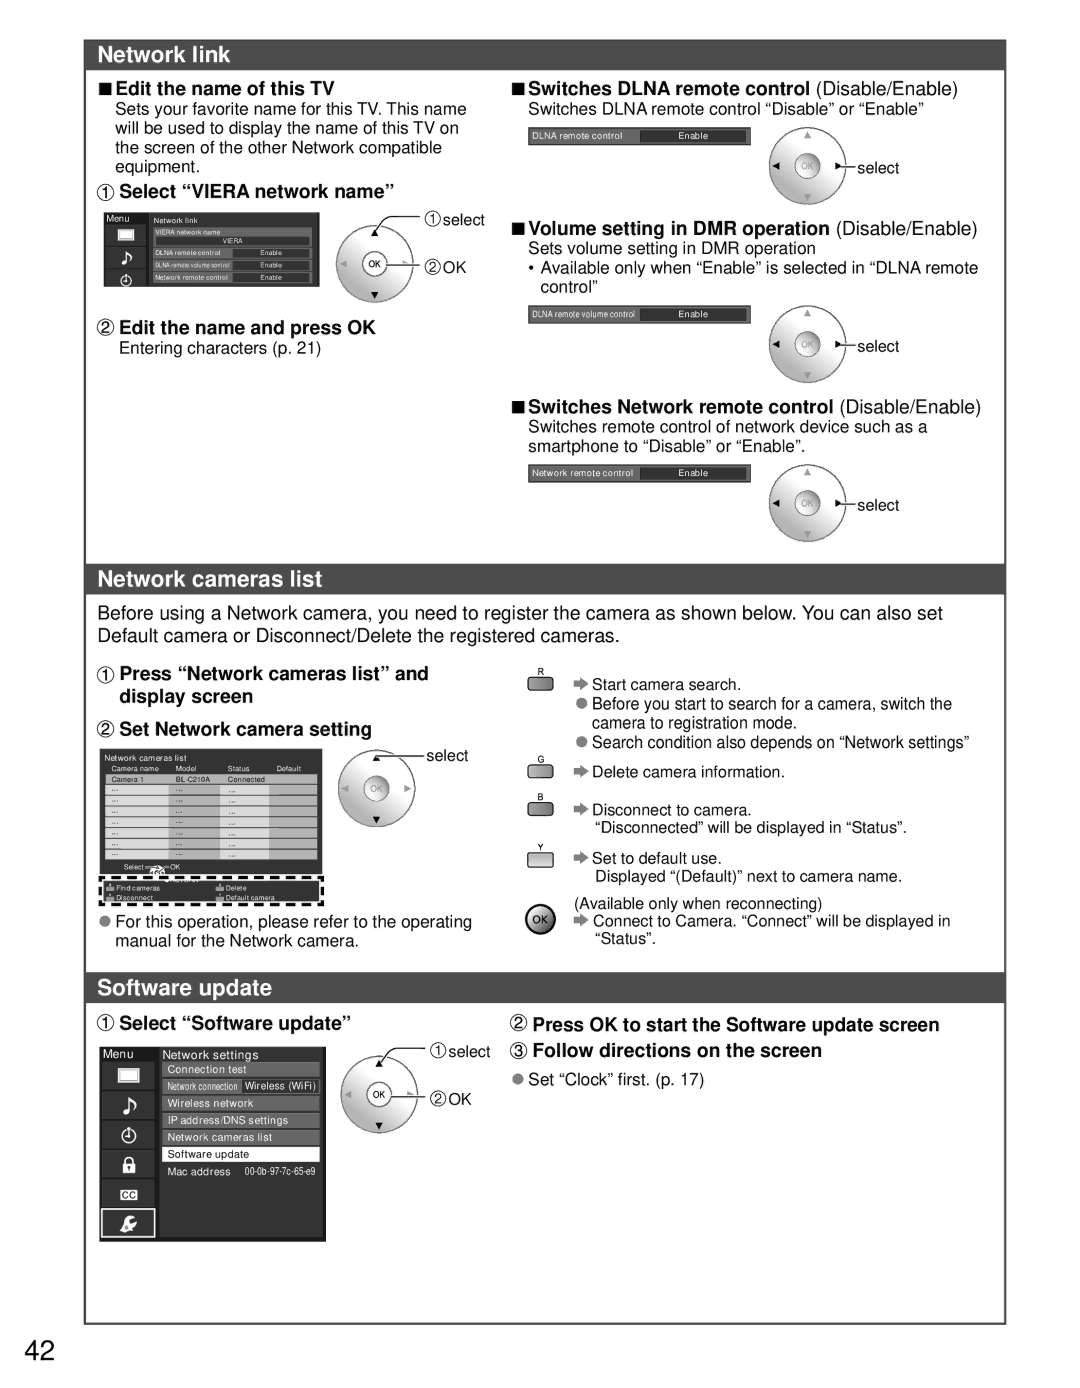
■Edit the name of this TV
Sets your favorite name for this TV. This name will be used to display the name of this TV on the screen of the other Network compatible equipment.
 Select “VIERA network name”
Menu | Network link |
| select | |
| VIERA network name |
|
| |
| VIERA |
|
| |
| DLNA remote control |
|
|
|
|
| Enable | OK | |
|
|
|
| |
| DLNA remote volume control |
| Enable |
|
| Network remote control |
|
|
|
|
| Enable |
| |
 Edit the name and press OK
Entering characters (p. 21)
■Switches DLNA remote control (Disable/Enable)
Switches DLNA remote control “Disable” or “Enable”
DLNA remote control | Enable |
| select |
■Volume setting in DMR operation (Disable/Enable)
Sets volume setting in DMR operation
•Available only when “Enable” is selected in “DLNA remote control”
DLNA remote volume control | Enable |
| select |
■Switches Network remote control (Disable/Enable)
Switches remote control of network device such as a smartphone to “Disable” or “Enable”.
Network remote control | Enable |
| select |
Network cameras list
Before using a Network camera, you need to register the camera as shown below. You can also set Default camera or Disconnect/Delete the registered cameras.
![]() Press “Network cameras list” and display screen
Press “Network cameras list” and display screen
![]() Set Network camera setting
Set Network camera setting
Network cameras list | select |
Start camera search.
●Before you start to search for a camera, switch the camera to registration mode.
●Search condition also depends on “Network settings”
Camera 1 | Connected | Default | Delete camera information. | |
Camera name | Model | Status |
| |
... | ... | ... |
|
|
... | ... | ... |
| Disconnect to camera. |
... | ... | ... |
| |
... | ... | ... |
| “Disconnected” will be displayed in “Status”. |
... | ... | ... |
| |
... | ... | ... |
|
|
... | ... | ... |
| Set to default use. |
Select | OK |
|
| |
|
| Displayed “(Default)” next to camera name. | ||
| RETURN |
|
|
Find cameras | Delete | (Available only when reconnecting) | |
Disconnect | Default camera | ||
●For this operation, please refer to the operating | |||
Connect to Camera. “Connect” will be displayed in | |||
manual for the Network camera. | “Status”. | ||
Software update
 Select “Software update”
Menu | Network settings | |
| Connection test | |
| Network connection | Wireless (WiFi) |
| Wireless network | |
| IP address/DNS settings | |
| Network cameras list | |
| Software update | |
| Mac address |
|
![]() Press OK to start the Software update screen
Press OK to start the Software update screen ![]() select
select ![]() Follow directions on the screen
Follow directions on the screen
●Set “Clock” first. (p. 17)
![]() OK
OK
42