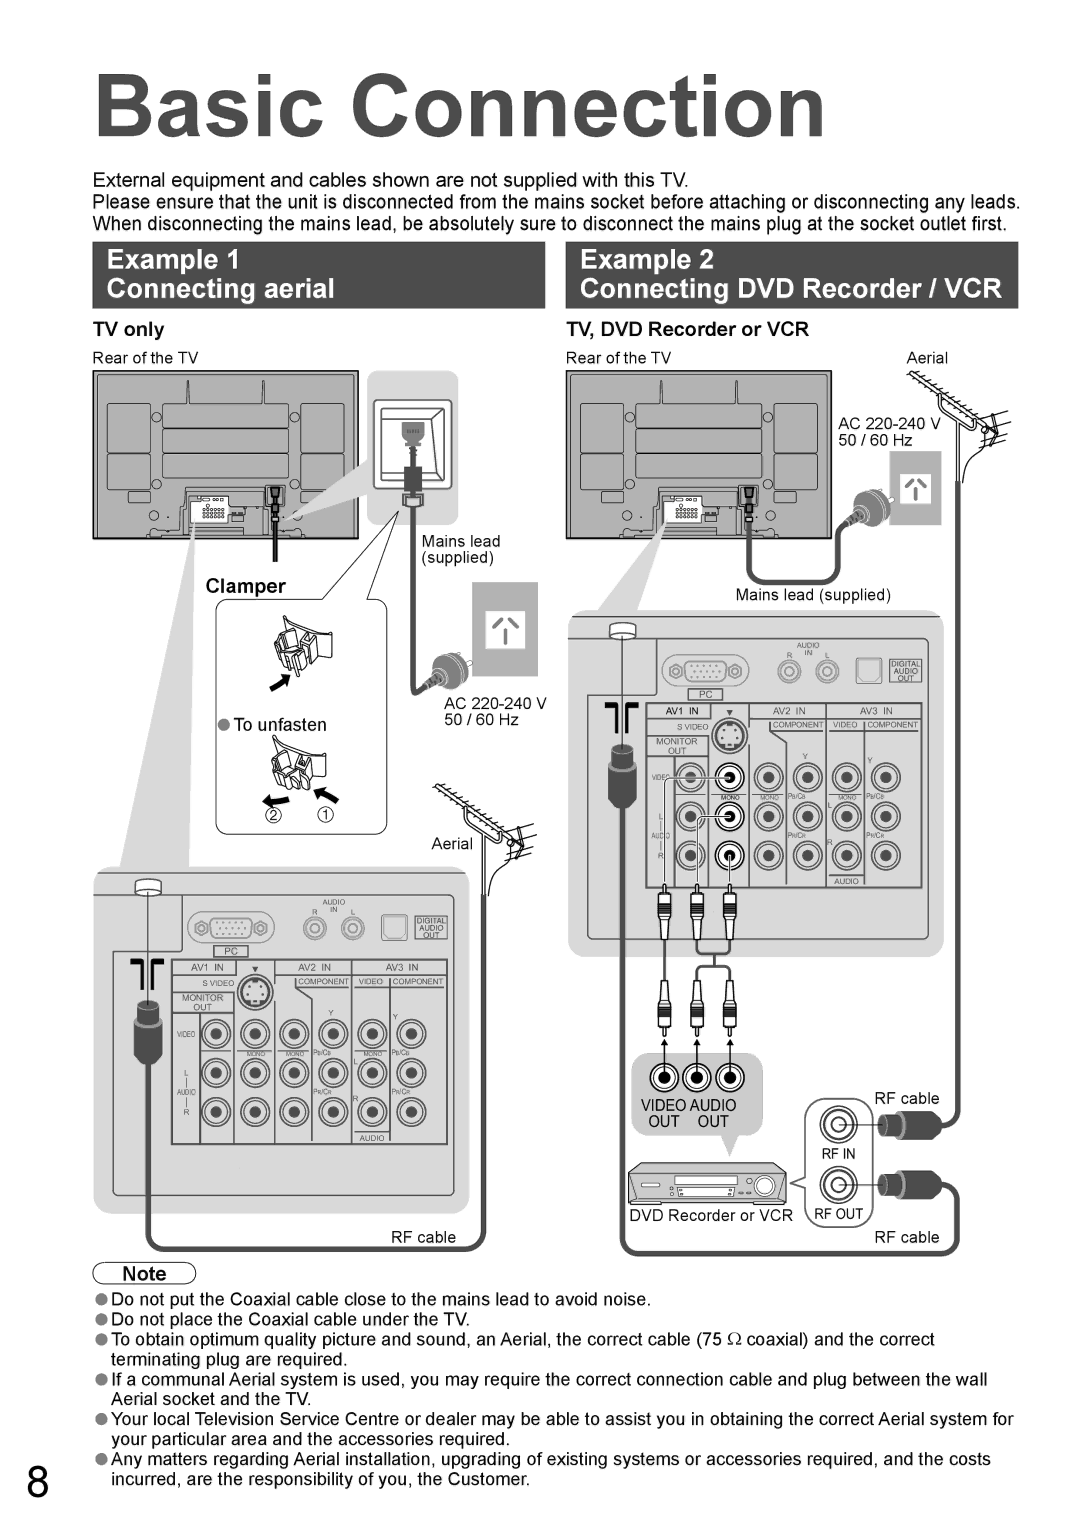
Basic Connection
External equipment and cables shown are not supplied with this TV.
Please ensure that the unit is disconnected from the mains socket before attaching or disconnecting any leads. When disconnecting the mains lead, be absolutely sure to disconnect the mains plug at the socket outlet first.
Example 1
Connecting aerial
TV only
Rear of the TV
Mains lead (supplied)
Clamper
•To unfasten | AC |
50 / 60 Hz | |
|
Aerial
|
|
| AUDIO |
|
|
|
| R | IN | L |
|
PC |
|
|
|
|
|
AV1 IN | AV2 IN |
| AV3 IN | ||
S VIDEO | COMPONENT | VIDEO | COMPONENT | ||
MONITOR |
|
|
|
|
|
OUT |
|
| Y |
| Y |
|
|
|
| ||
|
|
|
|
| |
VIDEO |
|
|
|
|
|
MONO | MONO | PB/CB | MONO | PB/CB | |
|
|
|
| L |
|
L |
|
|
|
|
|
AUDIO |
| PR/CR | R | PR/CR | |
|
|
|
|
| |
R |
|
|
|
|
|
|
|
|
| AUDIO |
|
Example 2
Connecting DVD Recorder / VCR
TV, DVD Recorder or VCR
Rear of the TV | Aerial |
AC
Mains lead (supplied) | |||||
|
|
| AUDIO |
|
|
|
| R | IN | L |
|
|
|
|
| ||
PC |
|
|
|
|
|
AV1 IN | AV2 IN |
| AV3 IN | ||
S VIDEO | COMPONENT | VIDEO | COMPONENT | ||
MONITOR |
|
|
|
|
|
OUT |
|
| Y |
| Y |
|
|
|
| ||
|
|
|
|
| |
VIDEO |
|
|
|
|
|
MONO | MONO | PB/CB | MONO | PB/CB | |
|
|
|
| L |
|
L |
|
|
|
|
|
AUDIO |
| PR/CR | R | PR/CR | |
|
|
|
|
| |
R |
|
|
|
|
|
|
|
|
| AUDIO |
|
VIDEO AUDIO | RF cable |
OUT OUT |
|
| RF IN |
DVD Recorder or VCR | RF OUT |
RF cable | RF cable |
Note
| Do not put the Coaxial cable close to the mains lead to avoid noise. |
| •Do not place the Coaxial cable under the TV. |
| •To obtain optimum quality picture and sound, an Aerial, the correct cable (75 Ω coaxial) and the correct |
| •terminating plug are required. |
| If a communal Aerial system is used, you may require the correct connection cable and plug between the wall |
| •Aerial socket and the TV. |
| Your local Television Service Centre or dealer may be able to assist you in obtaining the correct Aerial system for |
| •your particular area and the accessories required. |
8 | Any matters regarding Aerial installation, upgrading of existing systems or accessories required, and the costs |
•incurred, are the responsibility of you, the Customer. |