6.High quality picture:
(a)2H type vertical enhancer for greater picture sharpness
(b)Chroma averaging circuit for better color
(c)Minimum of aliasing on fine objects
(d)Expanded dynamic range by use of knee circuit
(e)Highlight aperture correction for greater picture detail of bright objects
7.Ability to shoot indoor scenes with fixed iris lens by use of Electronic Light Control (ELC) function.
8.Selectable electronic sensitivity enhancing modes including AUTO, MANUAL and OFF
9.Built in Digital Motion Detector
yDown Button (  )
)
This button is used to move the cursor downward. It is also used to select items in the CAM SET UP menu.
uLeft Button (  )
)
This button is used to move the cursor to the left. It also selects the mode and can be used to adjust some levels.
iUp Button (  )
)
This button is used to move the cursor upward. It is also used to select items in the CAM SET UP menu.
oRight Button (  )
)
This button is used to move the cursor to the right. It also selects the mode and can be used to adjust some levels.
!0Set Button (  )
)
This button is used to activate an item selected in the CAM SET UP menu.
!1Gen-lock Termination Switch (Hi-Z, G/L 75 Ω )
Set this switch to
!2Gen-lock Input Connector (GEN-LOCK)
This connector is used to connect an external system for synchronization.
!3Video Output Connector (VIDEO OUT)
This connector is used to connect the VIDEO IN connector of the monitor.
!4AC Inlet Socket
This socket is used to connect the power cord (supplied as a standard accessory).
!5AC/DC Compatible Input Terminal (DC 12 V IN/AC 24 V IN)
This terminal is for connecting the 12 V DC or 24 V AC power supply cord.
Cautions:
1.Connect to 12 V DC (10.8
2.To prevent fire or electric shock hazard, use a UL listed cable
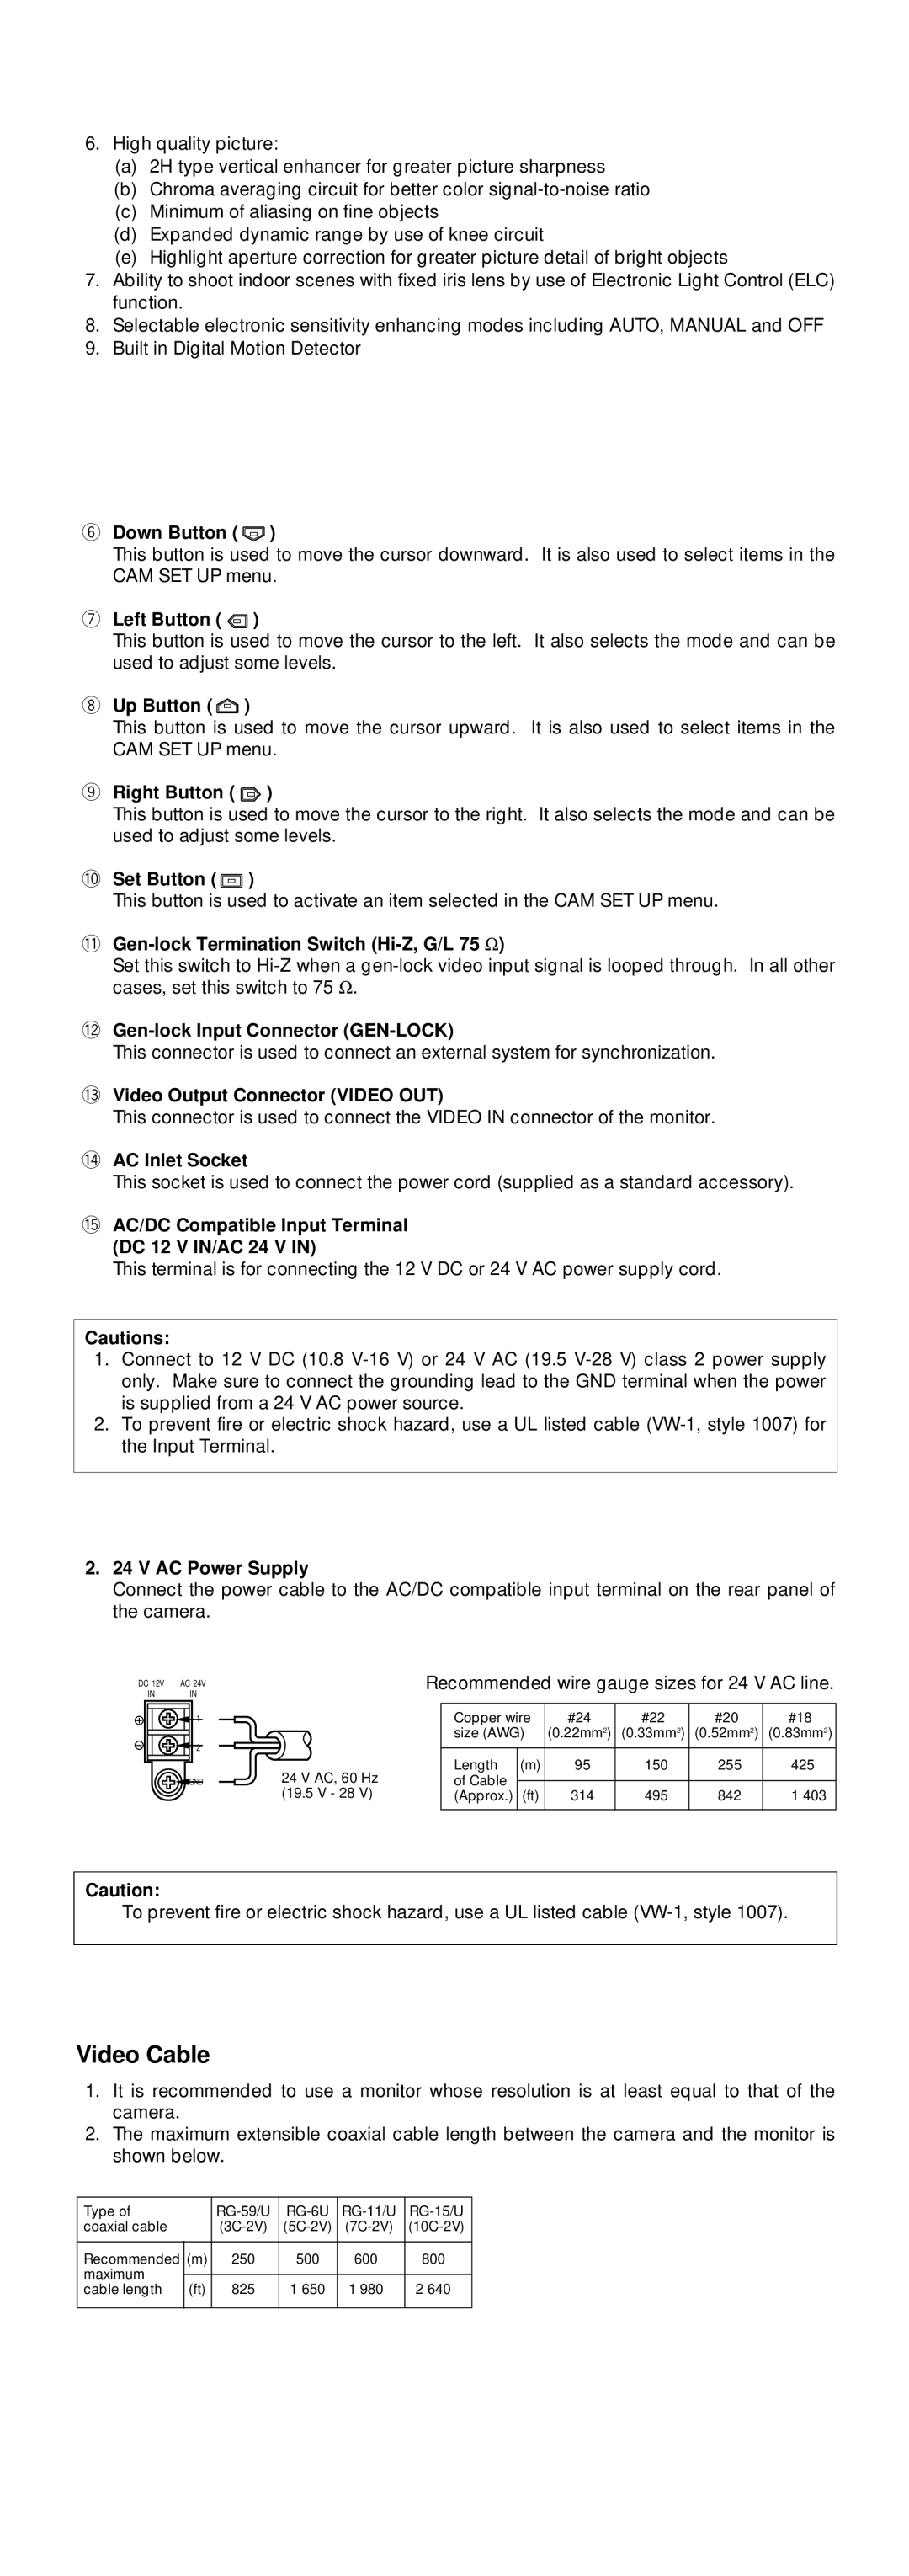
2.24 V AC Power Supply
Connect the power cable to the AC/DC compatible input terminal on the rear panel of the camera.
DC 12V | AC 24V |
IN | IN |
Recommended wire gauge sizes for 24 V AC line.
|
|
| 1 |
|
|
| Copper wire | #24 | #22 | #20 | #18 | |
|
|
|
|
|
| |||||||
|
|
| 2 |
|
|
| size (AWG) | (0.22mm2) | (0.33mm2) | (0.52mm2) | (0.83mm2) | |
|
|
|
|
|
| |||||||
|
|
|
|
|
|
|
|
|
|
|
| |
|
|
|
|
|
|
| Length | (m) | 95 | 150 | 255 | 425 |
|
|
| GND | 24 V AC, 60 Hz |
| of Cable |
|
|
|
|
| |
|
|
|
|
| ||||||||
|
|
|
|
| (19.5 V - 28 V) |
| (Approx.) | (ft) | 314 | 495 | 842 | 1 403 |
|
|
|
|
|
|
|
|
|
|
|
|
|
|
|
|
|
|
|
|
|
|
|
|
|
|
Caution:
To prevent fire or electric shock hazard, use a UL listed cable
Video Cable
1.It is recommended to use a monitor whose resolution is at least equal to that of the camera.
2.The maximum extensible coaxial cable length between the camera and the monitor is shown below.
Type of |
|
| |||
coaxial cable |
| ||||
|
|
|
|
|
|
Recommended | (m) | 250 | 500 | 600 | 800 |
maximum |
|
|
|
|
|
|
|
|
|
| |
cable length | (ft) | 825 | 1 650 | 1 980 | 2 640 |
|
|
|
|
|
|