●Installation
1.Open the dome cover. (See Disassembling the camera.)
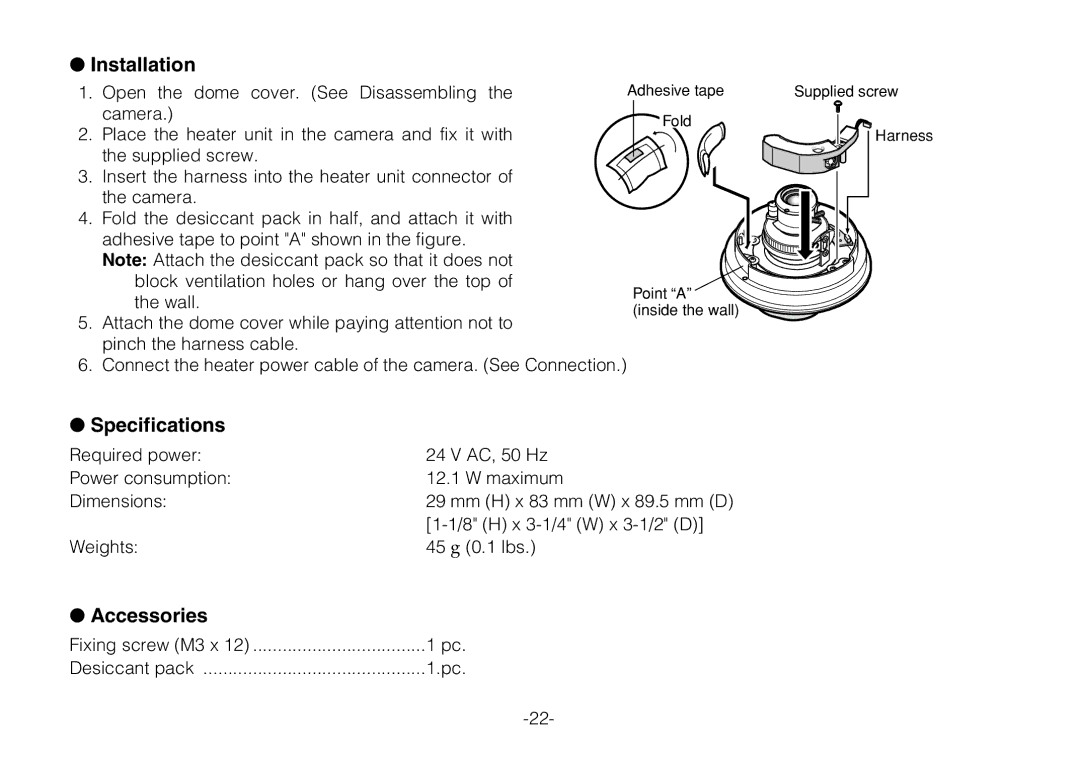
2.Place the heater unit in the camera and fix it with the supplied screw.
3.Insert the harness into the heater unit connector of the camera.
4.Fold the desiccant pack in half, and attach it with adhesive tape to point "A" shown in the figure. Note: Attach the desiccant pack so that it does not
block ventilation holes or hang over the top of the wall.
5.Attach the dome cover while paying attention not to pinch the harness cable.
6.Connect the heater power cable of the camera. (See Connection.)
Adhesive tape
Fold
Point “A” (inside the wall)
Supplied screw
Harness
● Specifications
Required power: | 24 V AC, 50 | Hz | |
Power consumption: | 12.1 | W maximum | |
Dimensions: | 29 mm (H) x 83 mm (W) x 89.5 mm (D) | ||
| |||
Weights: | 45 g | (0.1 lbs.) | |
● Accessories
Fixing screw (M3 x 12) | ...................................1 pc. |
Desiccant pack | 1.pc. |