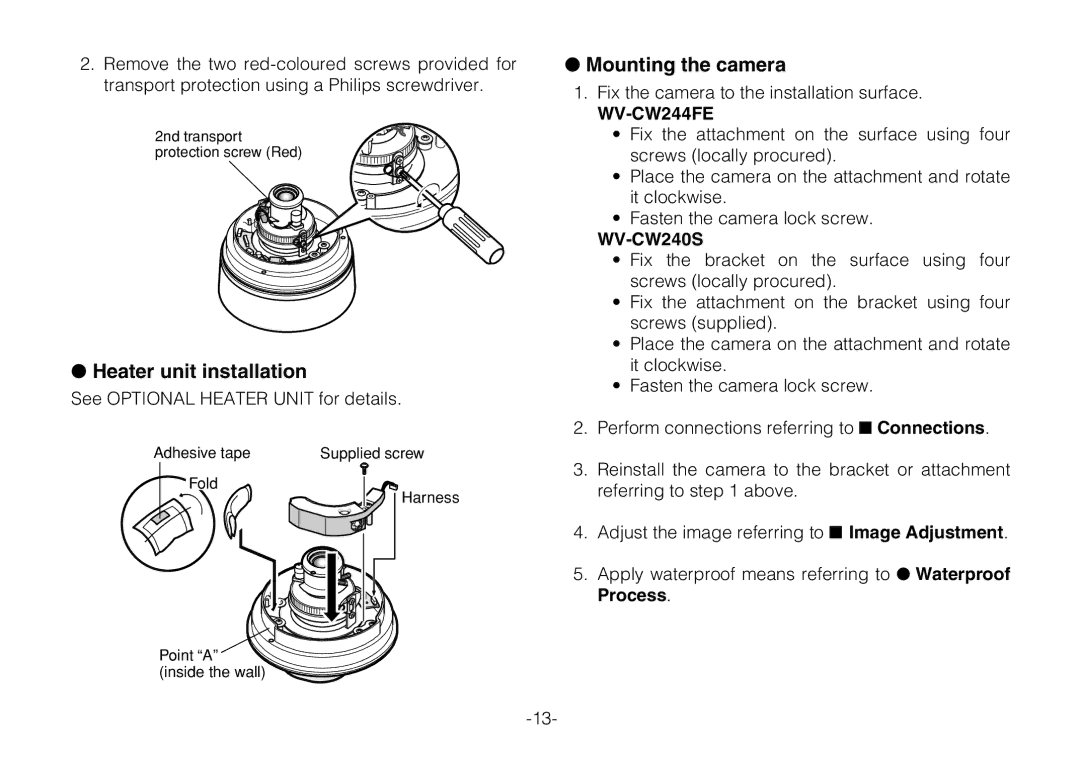
2.Remove the two
2nd transport protection screw (Red)
●Heater unit installation
See OPTIONAL HEATER UNIT for details.
Adhesive tape | Supplied screw |
Fold
Harness
Point “A” (inside the wall)
●Mounting the camera
1.Fix the camera to the installation surface.
WV-CW244FE
•Fix the attachment on the surface using four screws (locally procured).
•Place the camera on the attachment and rotate it clockwise.
•Fasten the camera lock screw.
WV-CW240S
•Fix the bracket on the surface using four screws (locally procured).
•Fix the attachment on the bracket using four screws (supplied).
•Place the camera on the attachment and rotate it clockwise.
•Fasten the camera lock screw.
2.Perform connections referring to ■ Connections.
3.Reinstall the camera to the bracket or attachment referring to step 1 above.
4.Adjust the image referring to ■ Image Adjustment.
5.Apply waterproof means referring to ● Waterproof Process.
