INSTALLATION
Cautions:
•The installation described below should be made by qualified service personnel or system installers.
•During installation, remove all connected cables and turn off the power of the monitor.
 Removing Stand in the Monitor
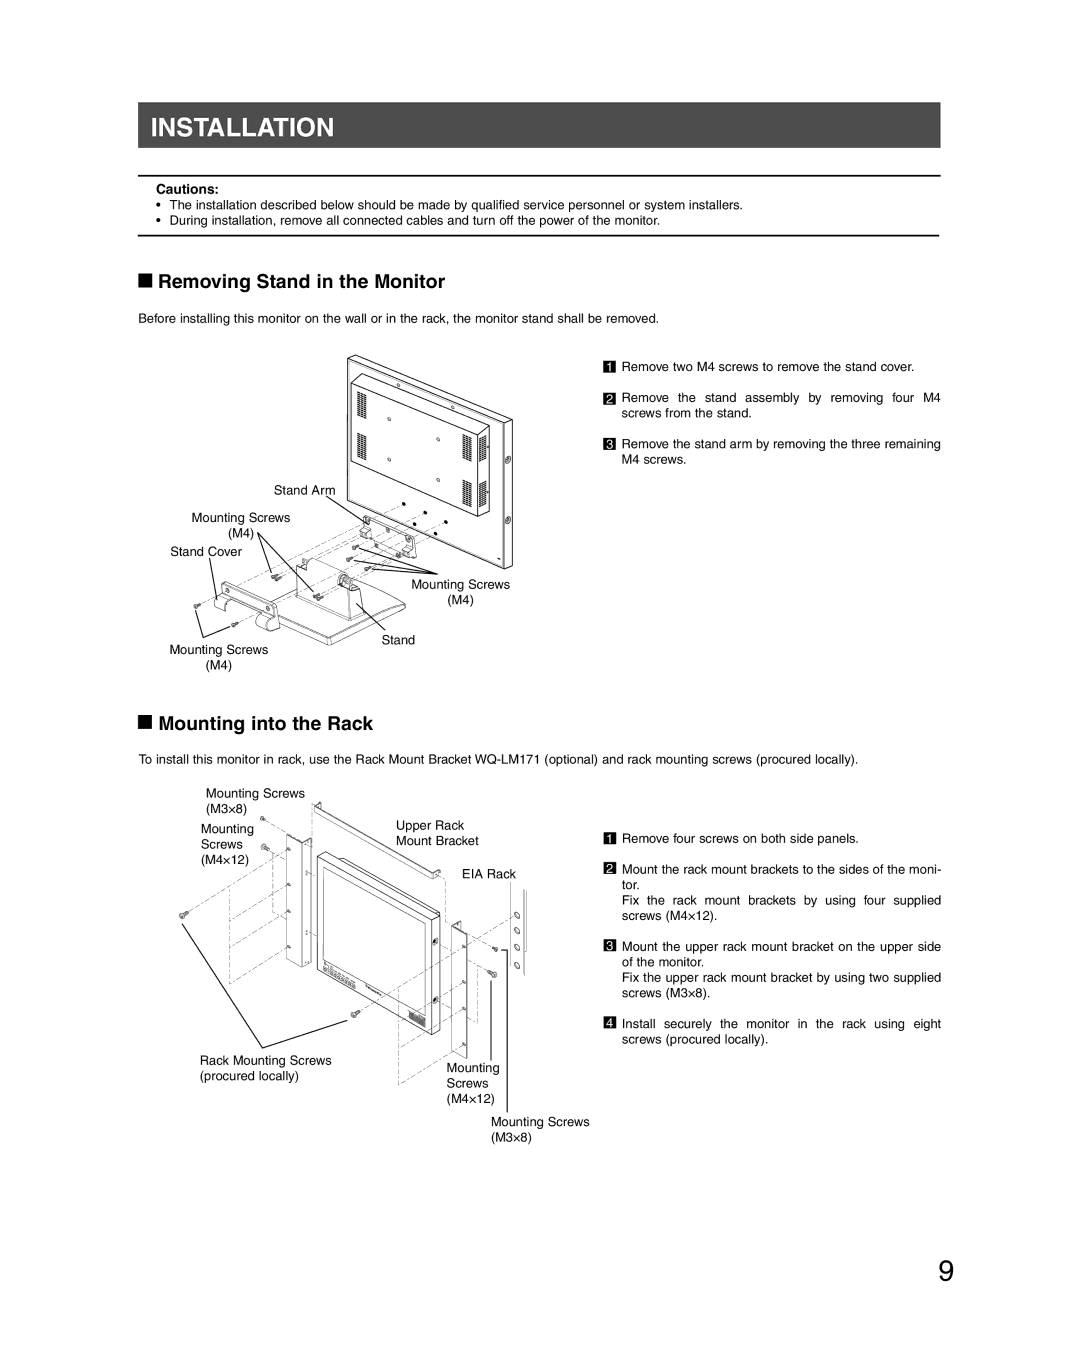
Before installing this monitor on the wall or in the rack, the monitor stand shall be removed.
![]() Remove two M4 screws to remove the stand cover.
Remove two M4 screws to remove the stand cover.
![]() Remove the stand assembly by removing four M4 screws from the stand.
Remove the stand assembly by removing four M4 screws from the stand.
![]() Remove the stand arm by removing the three remaining
Remove the stand arm by removing the three remaining
M4 screws.
Stand Arm
Mounting Screws
(M4)
Stand Cover
Mounting Screws
(M4)
Stand
Mounting Screws
(M4)
 Mounting into the Rack
To install this monitor in rack, use the Rack Mount Bracket
Mounting Screws |
|
(M3×8) |
|
Mounting | Upper Rack |
Screws | Mount Bracket |
(M4×12) |
|
EIA Rack
Rack Mounting Screws
![]() Remove four screws on both side panels.
Remove four screws on both side panels.
![]() Mount the rack mount brackets to the sides of the moni- tor.
Mount the rack mount brackets to the sides of the moni- tor.
Fix the rack mount brackets by using four supplied screws (M4×12).
![]() Mount the upper rack mount bracket on the upper side of the monitor.
Mount the upper rack mount bracket on the upper side of the monitor.
Fix the upper rack mount bracket by using two supplied screws (M3×8).
![]() Install securely the monitor in the rack using eight screws (procured locally).
Install securely the monitor in the rack using eight screws (procured locally).
(procured locally)
Mounting Screws (M4×12)
Mounting Screws (M3×8)
9