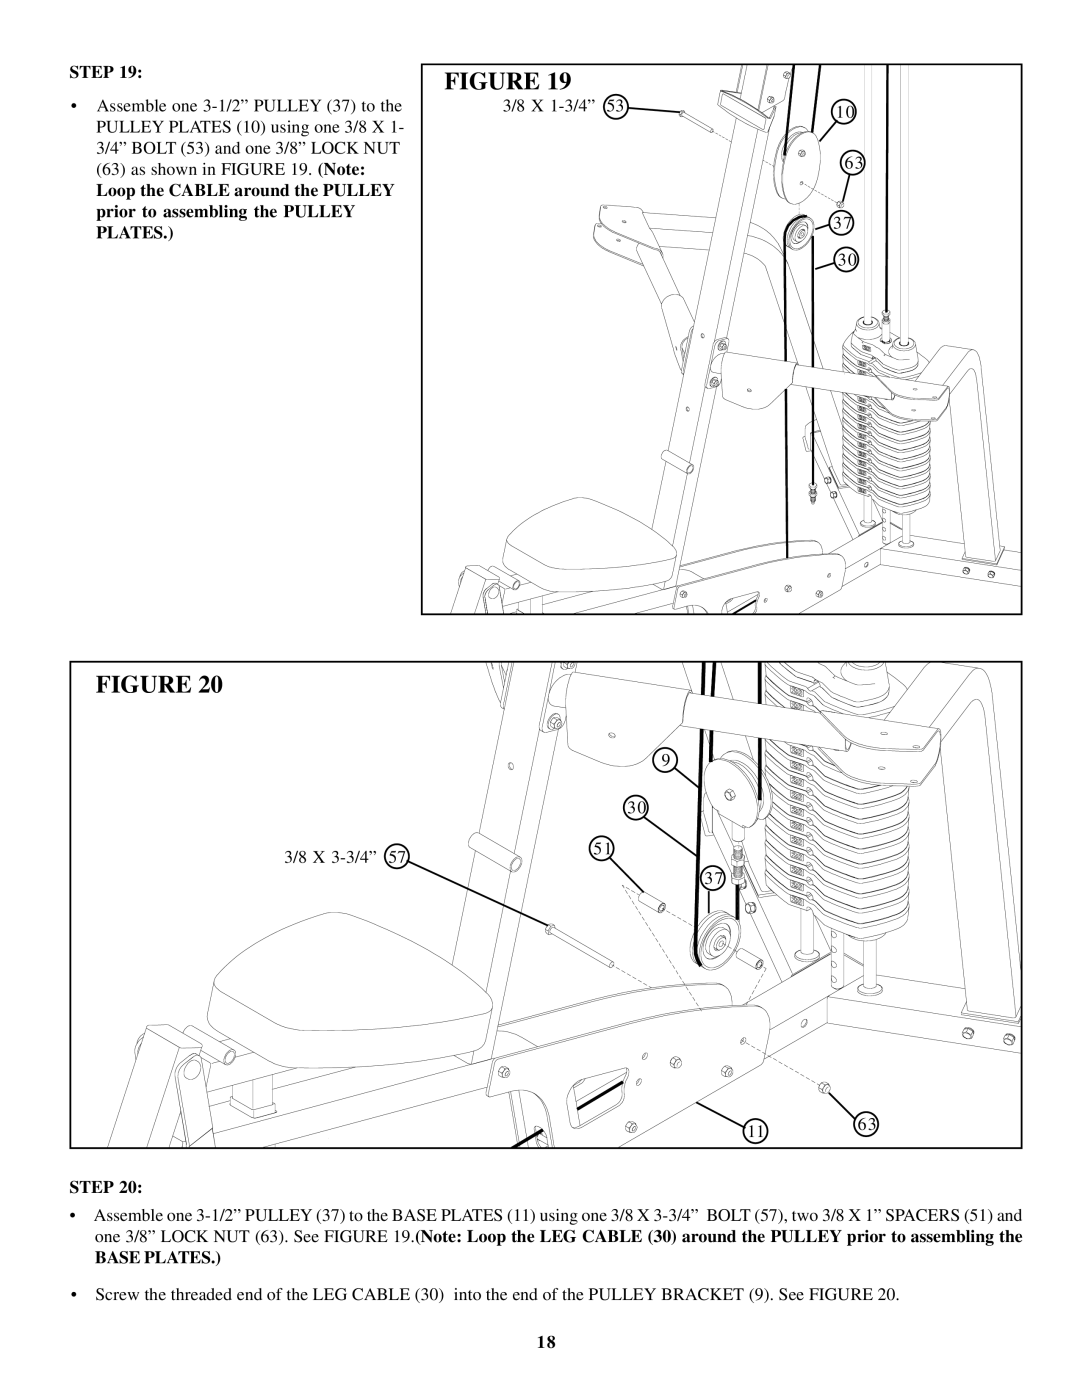
STEP 19: | FIGURE 19 |
|
|
|
|
|
|
| |
• Assemble one | 3/8 X | 53 |
| 10 |
PULLEY PLATES (10) using one 3/8 X 1- |
|
|
| |
|
|
|
| |
3/4” BOLT (53) and one 3/8” LOCK NUT |
|
|
| 63 |
(63) as shown in FIGURE 19. (Note: |
|
|
| |
Loop the CABLE around the PULLEY |
|
|
|
|
prior to assembling the PULLEY |
|
|
| 37 |
PLATES.) |
|
|
| |
|
|
|
| |
|
|
|
| 30 |
FIGURE 20 |
|
|
|
|
|
|
| 9 |
|
|
|
| 30 |
|
3/8 X | 51 |
|
| |
|
| 37 |
| |
|
|
|
| |
|
|
| 11 | 63 |
|
|
|
| |
STEP 20:
•Assemble one
BASE PLATES.)
•Screw the threaded end of the LEG CABLE (30) into the end of the PULLEY BRACKET (9). See FIGURE 20.
18
