Manuals
/
Patton electronic
/
Computer Equipment
/
Network Router
Patton electronic
4110 Series
quick start
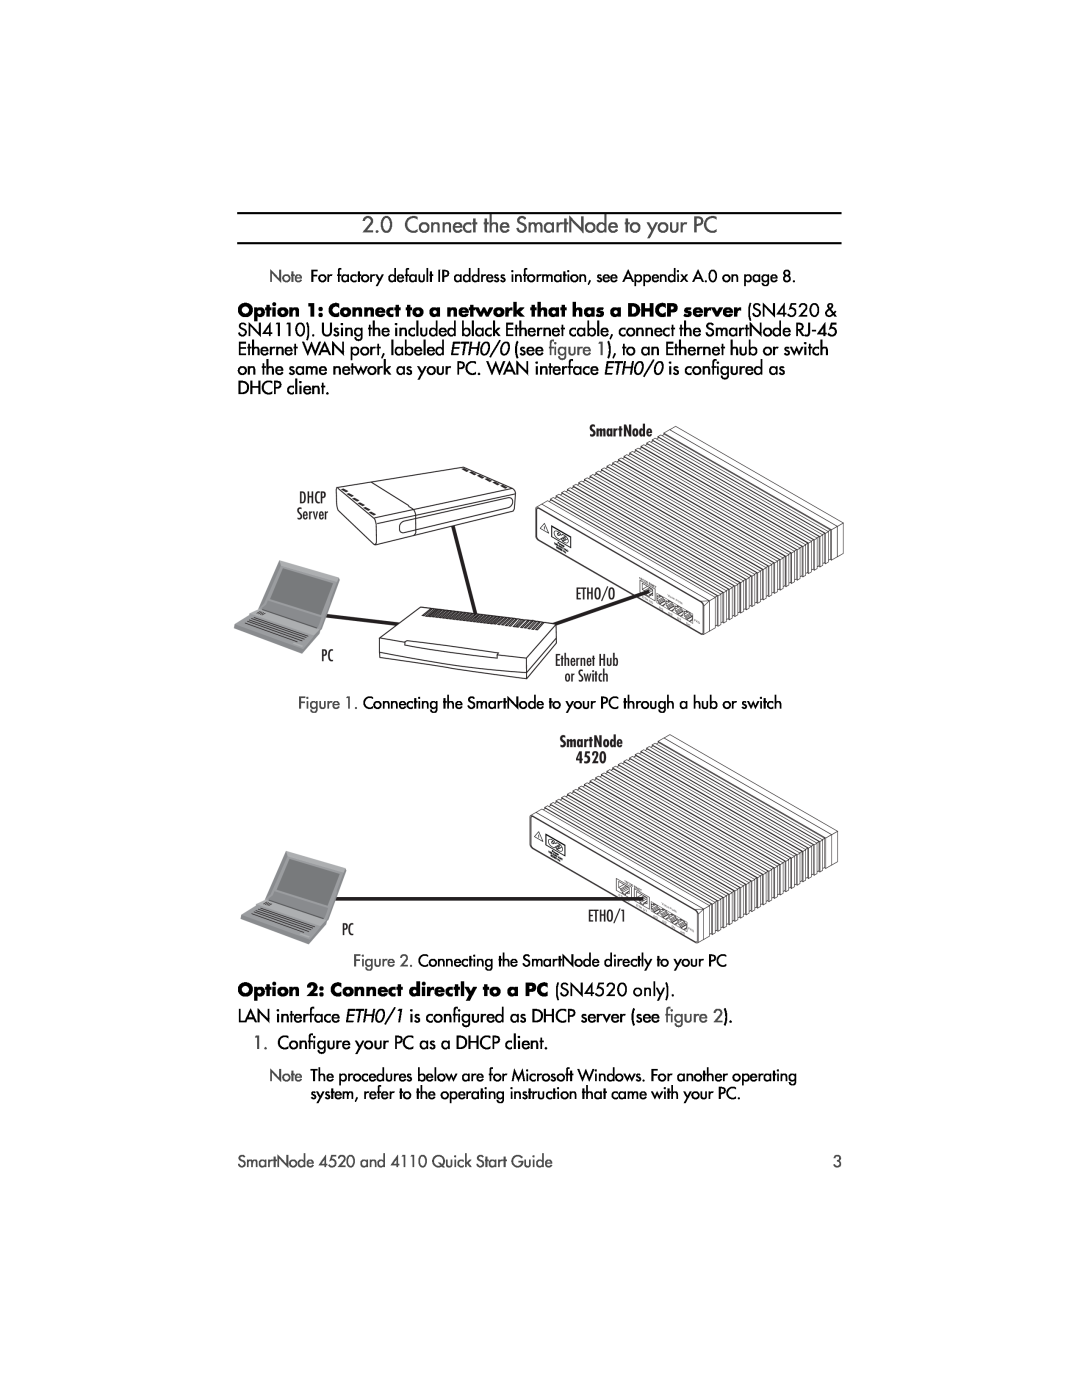
Connect the SmartNode to your PC
Models:
4110 Series
1
3
12
12
Download
12 pages
34.71 Kb
1
2
3
4
5
6
7
8
Warranty
Power up the SmartNode
Page 3
Image 3
Page 2
Page 4
Page 3
Image 3
Page 2
Page 4
Contents
Document Number 13202U7-001 Rev. C
VoIP Gateway Routers
SmartNode 4520 and 4110 Series
Quick Start Guide
1.0 Power up the SmartNode
2.0 Connect the SmartNode to your PC
5. Click OK to save changes and close the properties windows
3.0 Start the SmartNode Discovery Tool
4.0 Access the Command Line Interface
10.10.22.50if-ipeth0#copy tftp//10.10.1.11/SN.cfg startup- config
configuration. Since you just downloaded a configuration file
written and lost
Fax +1 253 663-5693 USA or +41 031 985 25 26 Switzerland
A.0 Factory default IP address information
6.0 Additional Information
B.0 Customer and Technical Support
C.0 Compliance Information
C.3 FCC Part 68 ACTA statement FXO ports
R&TTE Directive 1999/5/EC
R&TTE 1999/5/EG
C.5 EC Declaration of Conformity
C.8 Zulassung
Warranty
Copyright statement
Trademarks statement
Top
Page
Image
Contents