Electrostatic Discharge (ESD) can damage equipment and impair electrical circuitry. It occurs when electronic printed circuit cards are improperly handled and can result in complete or intermittent failures. Do the follow-
WARNING ing to prevent ESD:
•Always follow ESD prevention procedures when removing and replac- ing cards.
•Wear an
•To properly guard against ESD damage and shocks, the wrist strap and cord must operate effectively. If no wrist strap is available, ground yourself by touching the metal part of the chassis.
1.0 Installing the EHA3201
To install the EHA3201, follow these steps:
1.Make a ground connection for the unit (refer to section 1.1, “Grounding the EHA3201” on page 4).
2.Connect the line interface between the units (refer to section 1.2, “Connecting the
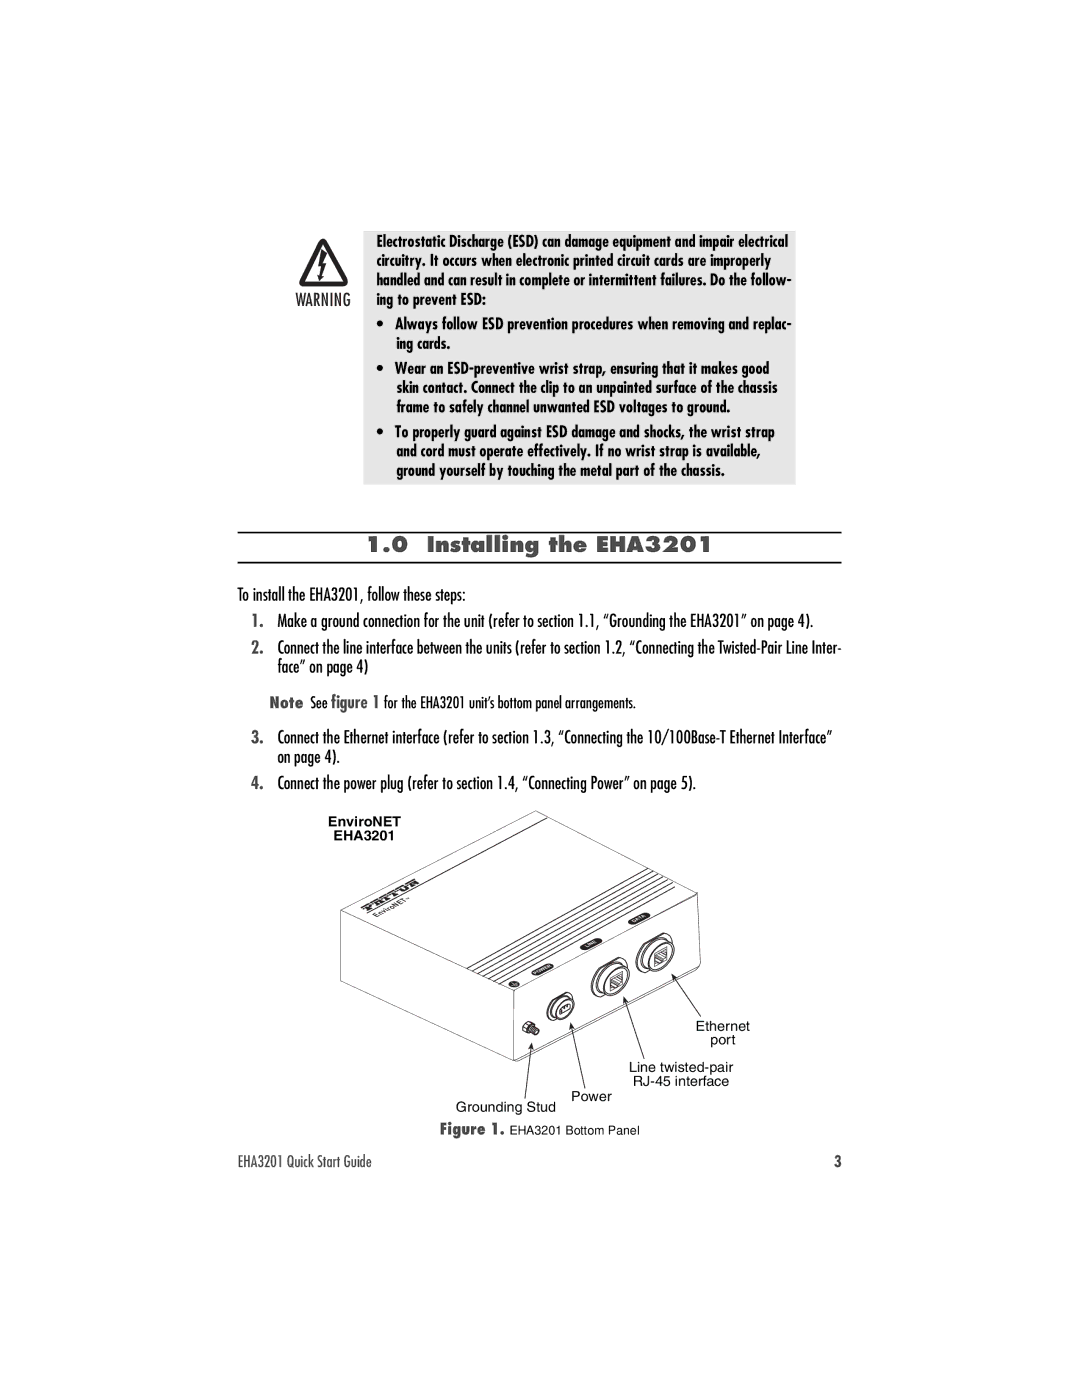
Note See figure 1 for the EHA3201 unit’s bottom panel arrangements.
3.Connect the Ethernet interface (refer to section 1.3, “Connecting the
4.Connect the power plug (refer to section 1.4, “Connecting Power” on page 5).
EnviroNET
EHA3201
![]()
![]() ª
ª ![]()
![]() EnviroNET
EnviroNET
A
T
A
D
| E |
IN | |
L |
|
|
| R |
|
| E |
| W | |
O |
| |
P |
|
|
Ethernet
port
Line
Power
Grounding Stud
Figure 1. EHA3201 Bottom Panel
EHA3201 Quick Start Guide | 3 |