C o n n e c t i n g t h e P r i n t e r
1 . Plug your host into the printer’s RS232 port using a modular connector .
2 . Turn on the printer .
3 . Make sure the DIP switches are set to match the communication
values on your host .
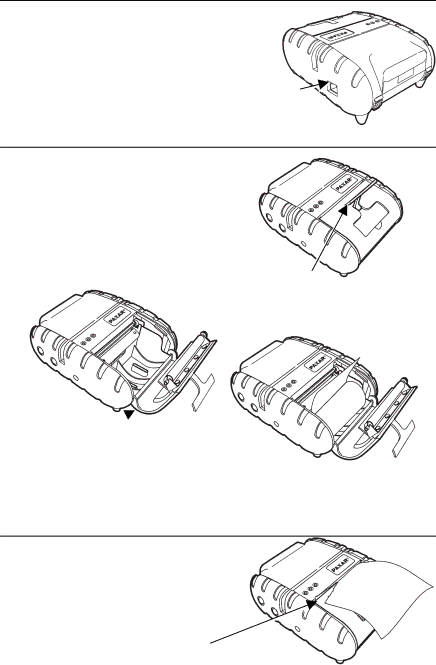
L o a d i n g S u p p l i e s
The printer can print text, bar codes, and some limited graphics on thermal direct receipt paper .
1 . Lift up the “T” lever on the supply door and wrap your fingers around it .
2 . Pull up firmly on the supply door to open it .
3 .
Supply Door ![]()
“T” Lever
Drop the supply into the well . Make sure the supply unwinds from the bottom .
4 . Position the supply between the printhead guides.
5 . Make sure 2 - 3 inches of supply extends past the printhead .
6 . Close the supply door .
T e a r i n g S u p p l y
The printer’s supply door acts as a tear bar . Tear down against the tear bar to remove receipts .
Do not tear supply up against the printhead or sideways, because the supply door may open .
Tear Bar
3
