ECLIPSER ADJUSTMENT
The eclipser is set at the factory and usually does not need to be readjusted. However, if fine tuning is necessary, do the following:
1.Set the DIP switches.
a.AGC: OFF
b.ELC: OFF
c.BLC: OFF
2.Set the IRIS MODE selector.
a.Auto iris lens controlled by video signal - VIDEO
b.Auto iris lens controlled by DC voltage - DC
3.Set the variable resistors and Eclipse DIP switch.
a. | THRE: | Counterclockwise |
b. | ECLP: | Mechanical center |
c. | GRAY: | Mechanical center |
d.ECLIPSER DIP: OFF
4.Set the response selector of the auto iris lens (video type) to AVERAGE. While viewing an object, set the video output level of the camera to 0.75
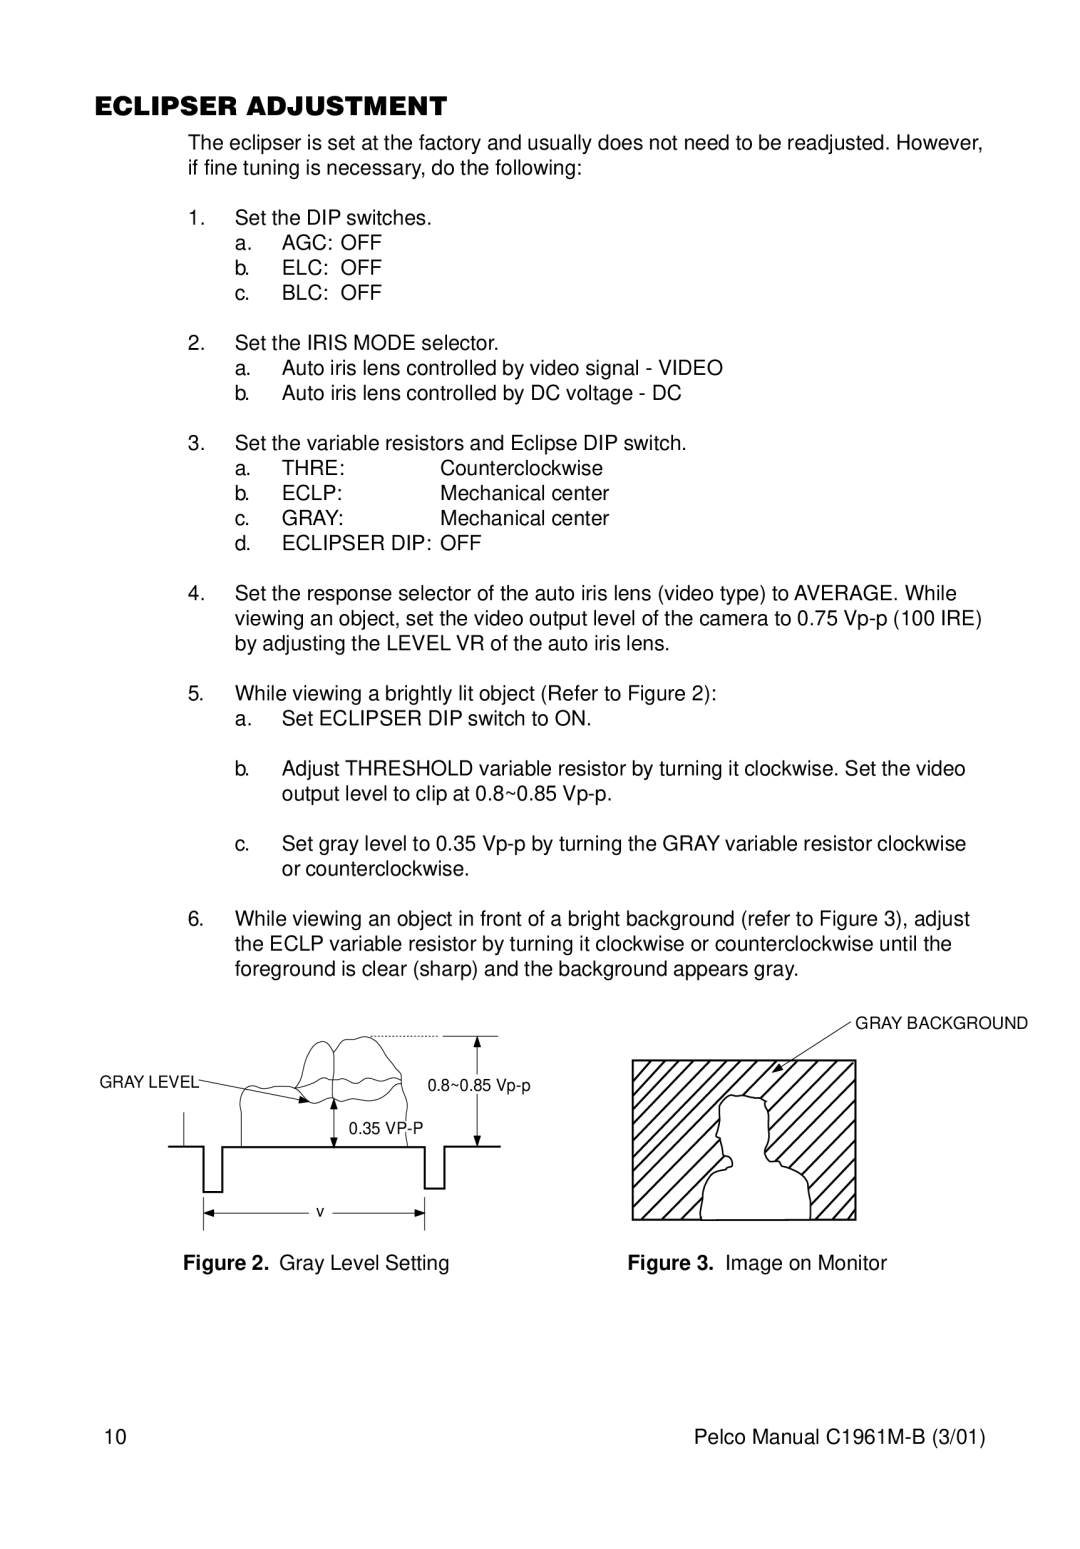
5.While viewing a brightly lit object (Refer to Figure 2):
a.Set ECLIPSER DIP switch to ON.
b.Adjust THRESHOLD variable resistor by turning it clockwise. Set the video output level to clip at 0.8~0.85
c.Set gray level to 0.35
6.While viewing an object in front of a bright background (refer to Figure 3), adjust the ECLP variable resistor by turning it clockwise or counterclockwise until the foreground is clear (sharp) and the background appears gray.
GRAY BACKGROUND
GRAY LEVEL | 0.8~0.85 |
|
| 0.35 |
|
| v |
|
Figure 2. Gray Level Setting | Figure 3. Image on Monitor | |
10 | Pelco Manual |
