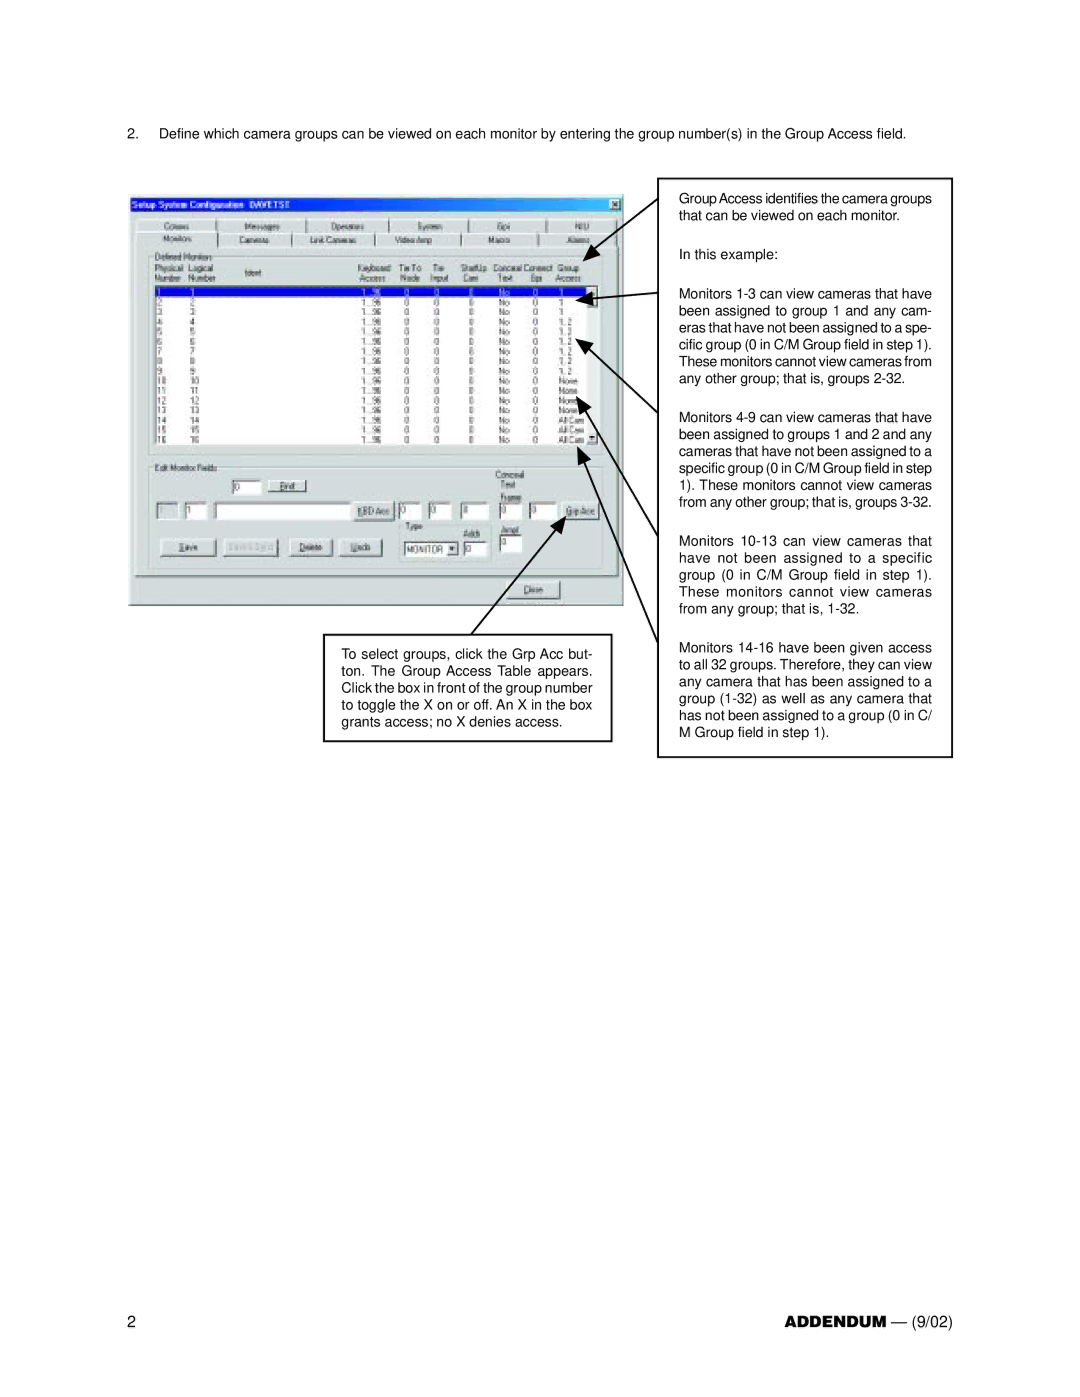
Group Access identifies the camera groups that can be viewed on each monitor.
In this example:
Monitors 1-3 can view cameras that have been assigned to group 1 and any cam- eras that have not been assigned to a spe- cific group (0 in C/M Group field in step 1). These monitors cannot view cameras from any other group; that is, groups 2-32.
Monitors 4-9 can view cameras that have been assigned to groups 1 and 2 and any cameras that have not been assigned to a specific group (0 in C/M Group field in step 1). These monitors cannot view cameras from any other group; that is, groups 3-32.
Monitors 10-13 can view cameras that have not been assigned to a specific group (0 in C/M Group field in step 1). These monitors cannot view cameras from any group; that is, 1-32.
Monitors 14-16 have been given access to all 32 groups. Therefore, they can view any camera that has been assigned to a group (1-32) as well as any camera that has not been assigned to a group (0 in C/ M Group field in step 1).

