Hard Disk Drive Replacement
PREPARING THE UNIT TO INSTALL A DRIVE
WARNING: The chassis assembly includes parts with sharp edges. To avoid injury, use caution when handling the DVR5100 chassis or components.
1.Log off the system and shut down the machine. The power will turn off automatically.
2.As a precaution against electrostatic shock, remove the power cord from the rear panel of the unit, and then disconnect all devices attached to it. Use the enclosed disposable ESD wrist strap to dissipate ESDs.
3.If your unit is installed in a rack, place the unit on a counter or other flat surface, and then remove the rails.
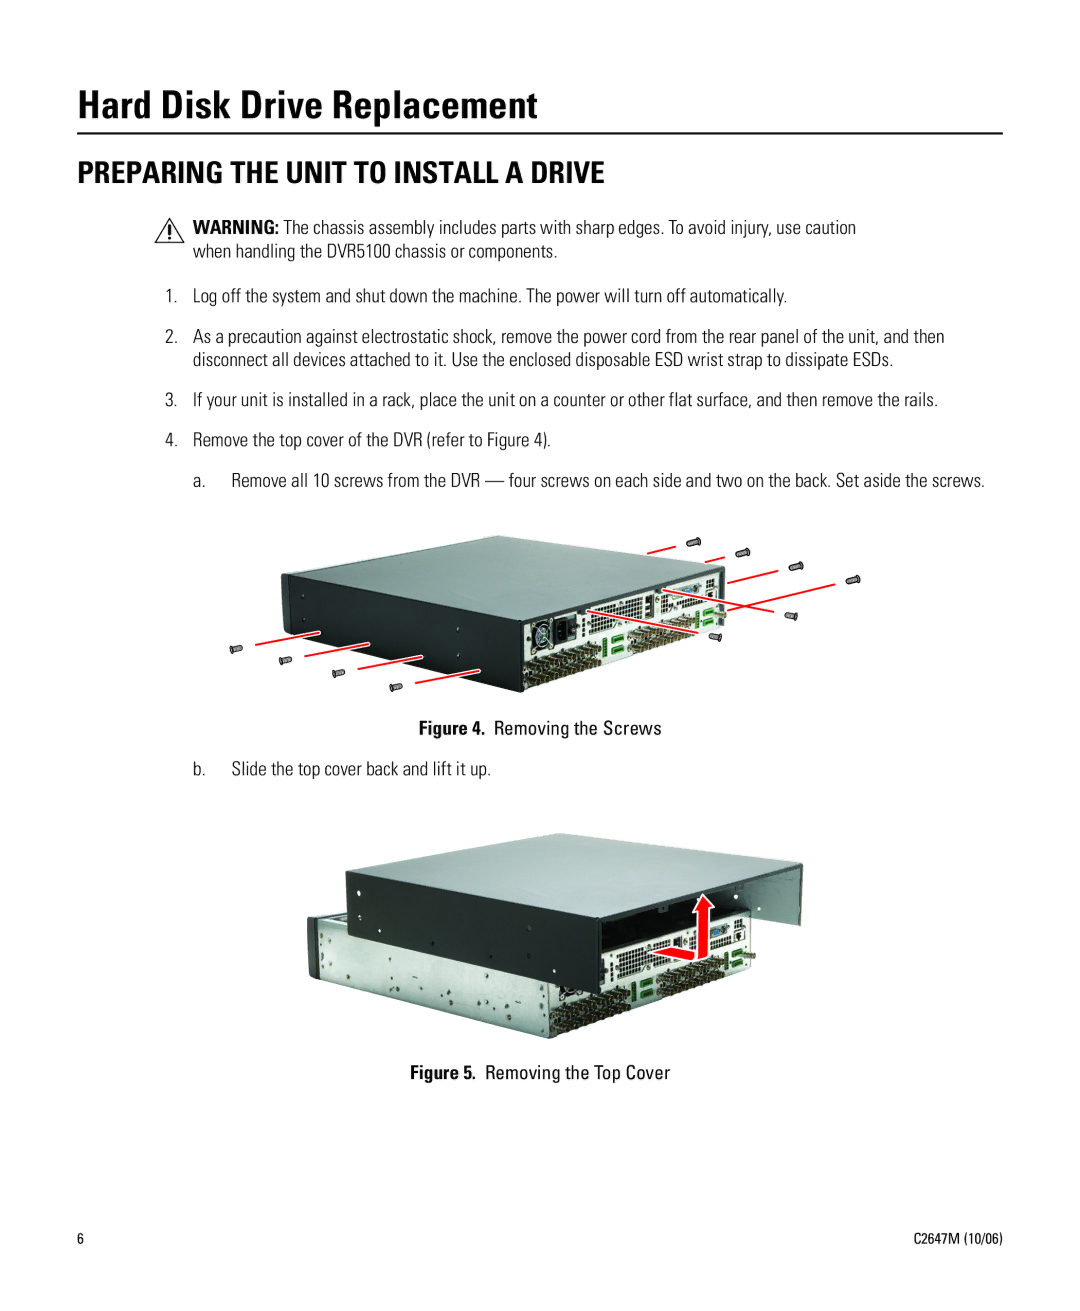
4.Remove the top cover of the DVR (refer to Figure 4).
a. Remove all 10 screws from the DVR — four screws on each side and two on the back. Set aside the screws.
Figure 4. Removing the Screws
b.Slide the top cover back and lift it up.
Figure 5. Removing the Top Cover
6 | C2647M (10/06) |