12
Section 3: Replacing a lamp only (Continued)
13.While holding the glass lens and plastic face ring, turn the light over and place it face down on a flat soft clean surface. Be careful not to scratch the lens.
14.Insert one new sealing screw, provided with the Bulb Replacement Kit, through the circular hole located at the TOP (12 o'clock) of the back of the housing and loosely tighten it into the face ring. Insert the remaining new sealing screw through the circular hole located at the BOTTOM (6 o'clock) of the back of the housing and loosely tighten it into the face ring. The BOTTOM (6 o'clock) circular hole is accessible through a hole drilled in the center of the hook mounting bracket.
15.Continue to tighten all the sealing screws into the face ring. It is recommended that opposing sealing screws be tightened in order (12 o'clock and 6 o'clock; 3 o'clock and 9 o'clock, etc.) to the recommended torque of
16.Wrap a length of the cord up to a maximum of eight (8) feet long on the back of the light assembly. Wind a maximum of three (3) wraps of cord so that the last wrap stops at the top of the light. This extra cord allows the light to be brought out of the pool for servicing.
NOTE: Leave 2" to 3" of slack cord at the top so that the light may be tipped back for removal.
![]() WARNING Always install a new lens gasket, part number 619599, whenever reassembling the light. Failure to do so may permit water to leak into the assembly which
WARNING Always install a new lens gasket, part number 619599, whenever reassembling the light. Failure to do so may permit water to leak into the assembly which
could cause; (a) an electrical hazard resulting in death or serious injury to pool users, installer, or others due to electrical shock, or (b) breakage of the lamp or lens, which likewise could result in serious injury to pool user, installers, or bystanders, or in damage to property.
17.Feed the remaining cord through the conduit hole in the mounting hub. Place the hook mounting bracket over the pin on the bottom of the mounting bracket. Press down lightly to secure in place. Secure at the top of the light with the captive screw.
18.Before operating the light for more than 10 seconds, be sure the Nicheless Light is completely submerged in water. To check for proper operation, switch on the main switch or circuit breaker, as well as the switch which operates the Nicheless Light.
![]() WARNING Use only the special stainless steel captive screw (see Light Assembly Parts, item 4, on page 14) provided with this Nicheless Light. This screw mounts and electrically grounds the housing securely to the Nicheless fixture. Failure to use the screw provided could create an electrical hazard which could result in death or serious injury to pool users, installers or others due to electrical shock.
WARNING Use only the special stainless steel captive screw (see Light Assembly Parts, item 4, on page 14) provided with this Nicheless Light. This screw mounts and electrically grounds the housing securely to the Nicheless fixture. Failure to use the screw provided could create an electrical hazard which could result in death or serious injury to pool users, installers or others due to electrical shock.
5
Section 1: Installing a mounting bracket and light fixture during new vinyl pool construction (Continued)
4.Connect bonding wire from bonding grid to bonding lug on rear of the mounting hub assembly.
5.Before installing liner, be sure gasket is firmly attached to
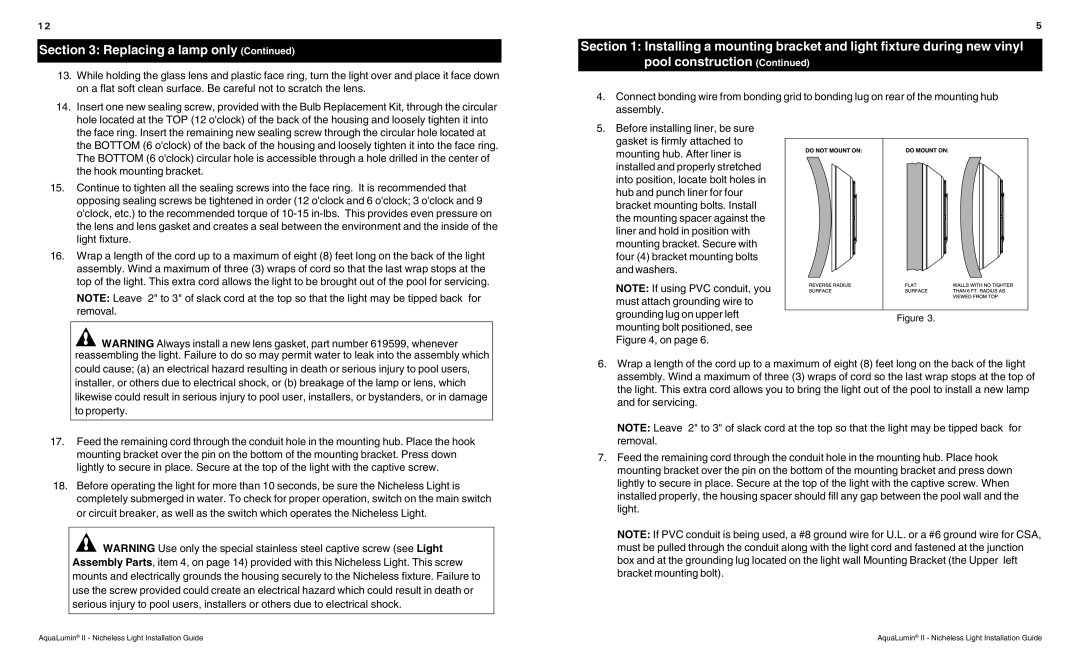
mounting hub. After liner is installed and properly stretched into position, locate bolt holes in hub and punch liner for four bracket mounting bolts. Install the mounting spacer against the liner and hold in position with mounting bracket. Secure with four (4) bracket mounting bolts and washers.
NOTE: If using PVC conduit, you |
|
|
|
|
|
|
|
|
|
|
|
|
|
|
|
|
|
| |
must attach grounding wire to |
|
|
|
|
|
|
|
|
|
|
|
|
|
|
|
|
|
| |
|
|
|
|
|
|
|
|
| |
grounding lug on upper left |
|
|
|
|
|
|
|
|
|
|
| Figure 3. | |||||||
mounting bolt positioned, see |
|
| |||||||
|
|
|
|
|
|
|
|
| |
Figure 4, on page 6. |
|
|
|
|
|
|
|
|
|
6.Wrap a length of the cord up to a maximum of eight (8) feet long on the back of the light assembly. Wind a maximum of three (3) wraps of cord so the last wrap stops at the top of the light. This extra cord allows you to bring the light out of the pool to install a new lamp and for servicing.
NOTE: Leave 2" to 3" of slack cord at the top so that the light may be tipped back for removal.
7.Feed the remaining cord through the conduit hole in the mounting hub. Place hook mounting bracket over the pin on the bottom of the mounting bracket and press down lightly to secure in place. Secure at the top of the light with the captive screw. When installed properly, the housing spacer should fill any gap between the pool wall and the light.
NOTE: If PVC conduit is being used, a #8 ground wire for U.L. or a #6 ground wire for CSA, must be pulled through the conduit along with the light cord and fastened at the junction box and at the grounding lug located on the light wall Mounting Bracket (the Upper left bracket mounting bolt).
AquaLumin® II - Nicheless Light Installation Guide | AquaLumin® II - Nicheless Light Installation Guide |