A470 Users Guide
Chapter 3: Print Tests and Setup Mode
Two reports are available:
Self Test / Configuration Report : Includes read and write tests of internal RAM; and a printed report listing the serial number, firmware, font, serial parameters, hardware settings, memory information, tallies, and the printer compatibility mode.
Extended Self Test: Checks printhead pin firing, vertical line adjustment, fonts, validation clamp, pitches and character sets.
Self Tests & Configuration Report
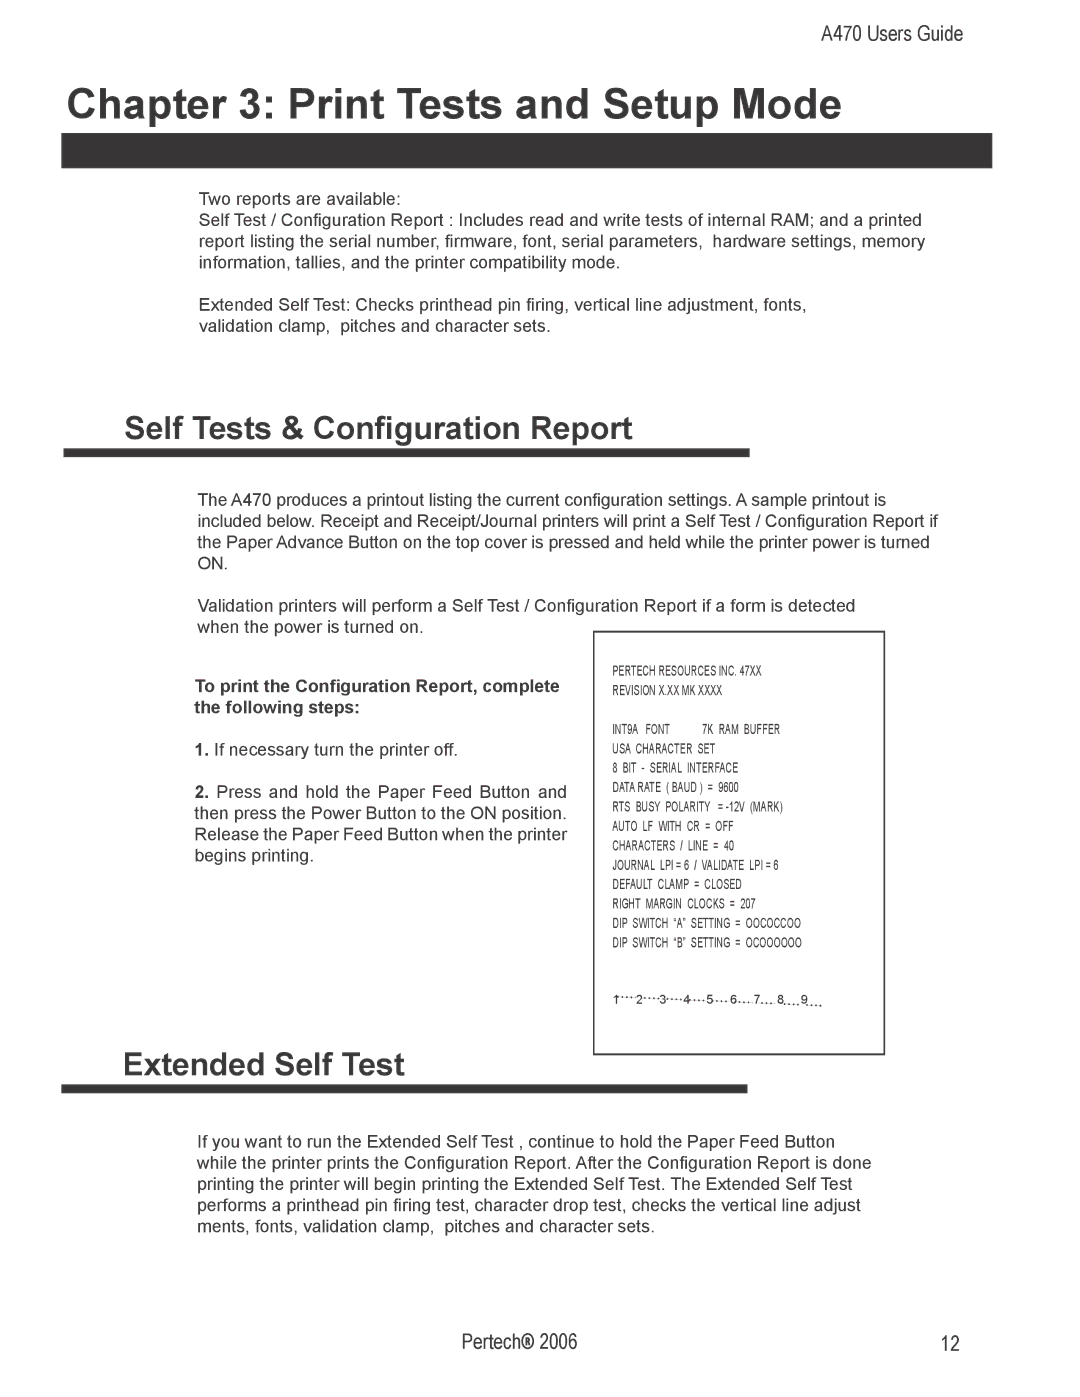
The A470 produces a printout listing the current configuration settings. A sample printout is included below. Receipt and Receipt/Journal printers will print a Self Test / Configuration Report if the Paper Advance Button on the top cover is pressed and held while the printer power is turned ON.
Validation printers will perform a Self Test / Configuration Report if a form is detected when the power is turned on.
To print the Configuration Report, complete | PERTECH RESOURCES INC. 47XX |
|
| ||||||
REVISION X.XX MK XXXX |
|
|
| ||||||
the following steps: | INT9A | FONT |
| 7K RAM BUFFER |
| ||||
1. If necessary turn the printer off. |
|
| |||||||
USA CHARACTER SET |
|
|
|
| |||||
| 8 BIT - SERIAL INTERFACE |
|
|
| |||||
2. Press and hold the Paper Feed Button and | DATA RATE ( BAUD ) = 9600 |
|
|
| |||||
then press the Power Button to the ON position. | RTS BUSY POLARITY | = |
| ||||||
Release the Paper Feed Button when the printer | AUTO LF WITH CR = OFF |
|
|
| |||||
CHARACTERS / LINE = 40 |
|
|
| ||||||
begins printing. |
|
|
| ||||||
JOURNAL LPI = 6 / VALIDATE LPI = 6 |
| ||||||||
|
| ||||||||
| DEFAULT CLAMP = CLOSED |
|
|
| |||||
| RIGHT MARGIN CLOCKS = 207 |
|
| ||||||
| DIP SWITCH “A” SETTING = OOCOCCOO | ||||||||
| DIP SWITCH “B” SETTING = OCOOOOOO | ||||||||
| 1 | 2 | 3 | 4 | 5 | 6 | 7 | 8 | 9 |
Extended Self Test
If you want to run the Extended Self Test , continue to hold the Paper Feed Button while the printer prints the Configuration Report. After the Configuration Report is done printing the printer will begin printing the Extended Self Test. The Extended Self Test performs a printhead pin firing test, character drop test, checks the vertical line adjust ments, fonts, validation clamp, pitches and character sets.
Pertech® 2006 | 12 |