A470 Users Guide
Validation
A Validation Form can be inserted from the top or top and left once the clamp has opened. The printer will automatically clamp the form when it has been detected. Wait until the printer has finished printing and released the form prior to removal.
Adjustable Features
Air Gap Adjustment
The air gap may need adjustment if 3 ply roll paper is used. If adjustment is required it will be evidenced by ink smudge on a Self Test printout. Most 3 ply paper can be accommodated by turning the 2 adjustment screws clockwise 1/8 of a turn.
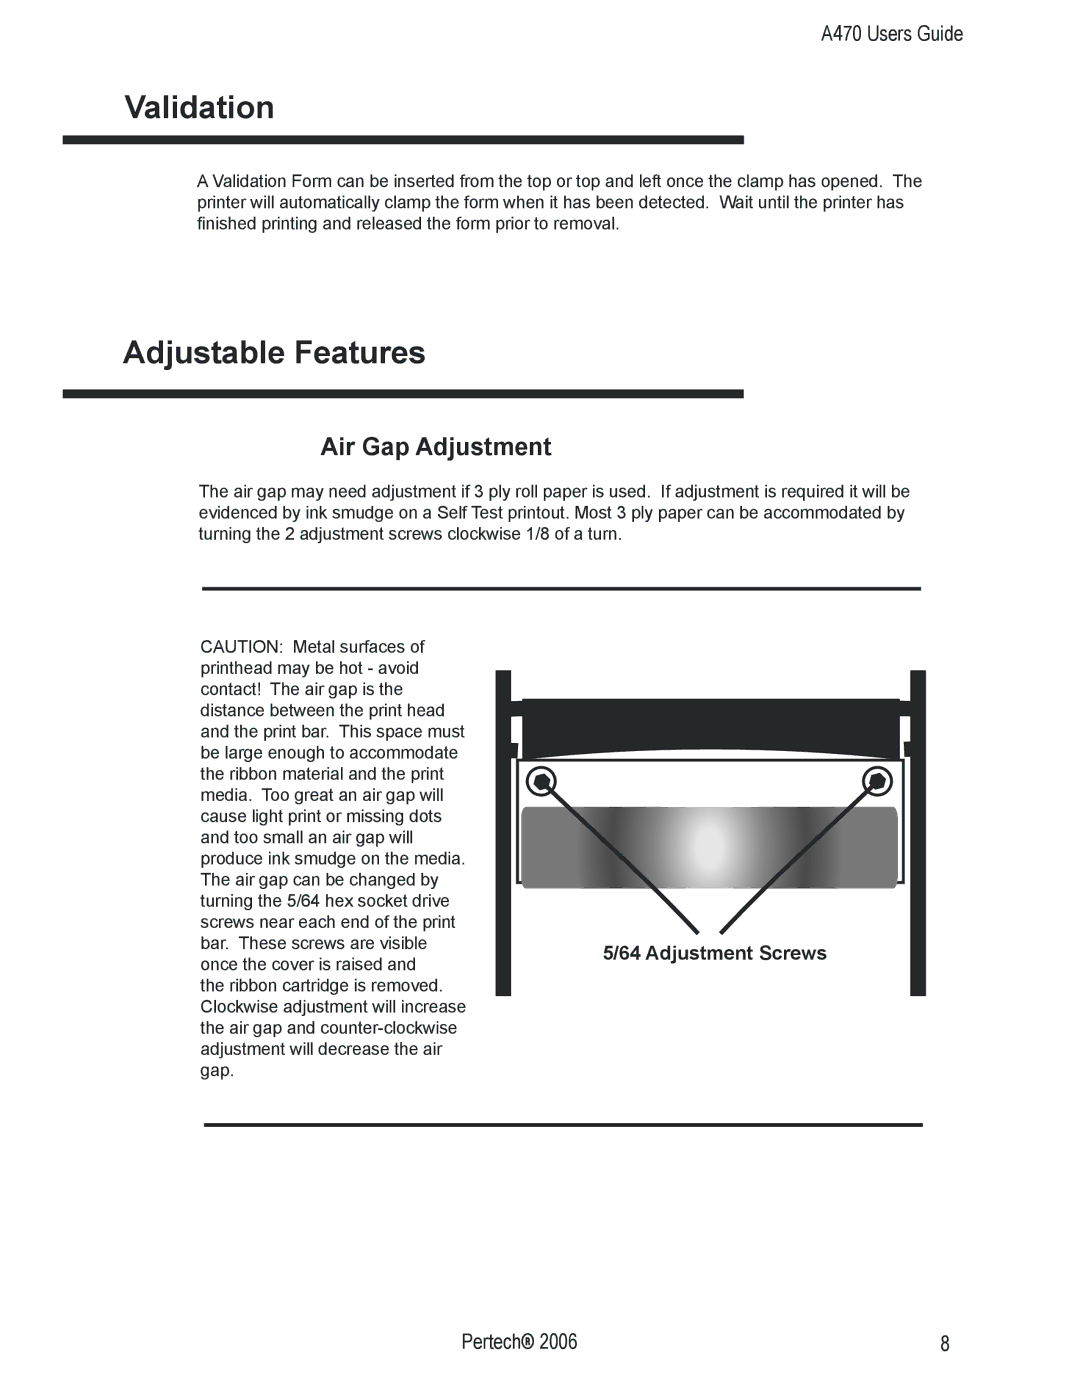
CAUTION: Metal surfaces of printhead may be hot - avoid contact! The air gap is the distance between the print head and the print bar. This space must be large enough to accommodate the ribbon material and the print media. Too great an air gap will cause light print or missing dots and too small an air gap will produce ink smudge on the media. The air gap can be changed by turning the 5/64 hex socket drive screws near each end of the print bar. These screws are visible once the cover is raised and
the ribbon cartridge is removed. Clockwise adjustment will increase the air gap and
5/64 Adjustment Screws
Pertech® 2006 | 8 |