:7 ZejkPccPkZfe
S zxyıˆ
S x´´¸ ˆ
m wu u w uxx y RlhRfbMY z u xyw
wu
U ¸
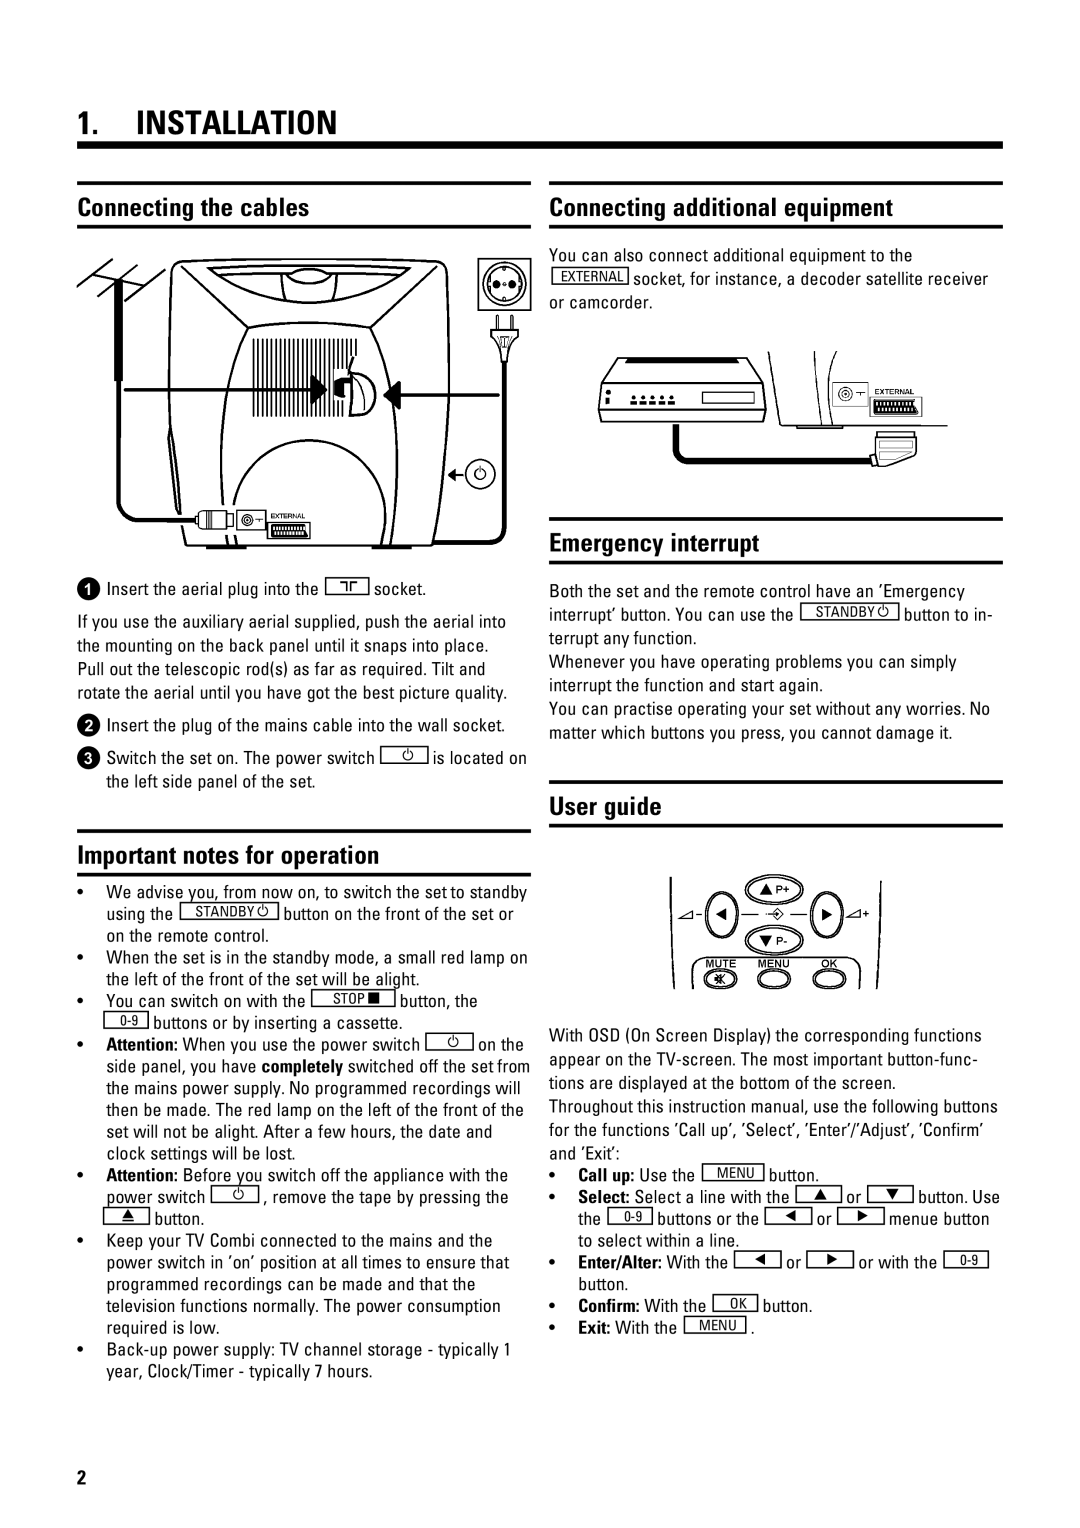
1V uy
Vz u uy uy vuw
du zu u h u
uy vy
2V wuv
3g h
2
m
Nu w u
vm wu
u z
kwu
z u u
m wu | u b |
v | wu xu |
ghMbPNm m
v
l ¨
Z ˙
• ky ux z
ghMbPNm m v z
w
• k u
zvy u
•m wu
| 63D | v v u wu | ||
• | P | k |
| z |
| b |
|
| |
|
|
|
| |
| vy h | z |
|
|
| vy u Mz u zy | xu u | ||
| w vy | Nyz | u | |
• | P | |||
|
|
| m | 2 v |
|
| v |
| |
| J |
|
| |
|
|
|
| |
• Xyy hj O w u
ghcd h
z
v
m
k cgP .c gw P w z
uhj3 h v u x u v
h | z v |
zz
• Sxıı i
•jˆıˆz gy u
63D v
u
aRbi v
D
A
C
B
v
v i
-u u y wu vy u
z h w
•Nuw hj w 3 7 O 3 B
• | U | k |
|
|
|
| D | |
|
|
|
|
|
| |||
| v | k |
|
|
|
|
| v |
• | S |
| cX |
| ||||
| U | k |
|
| 4 |
| ||
• | aRbi |
|
| |||||
C
63D
A