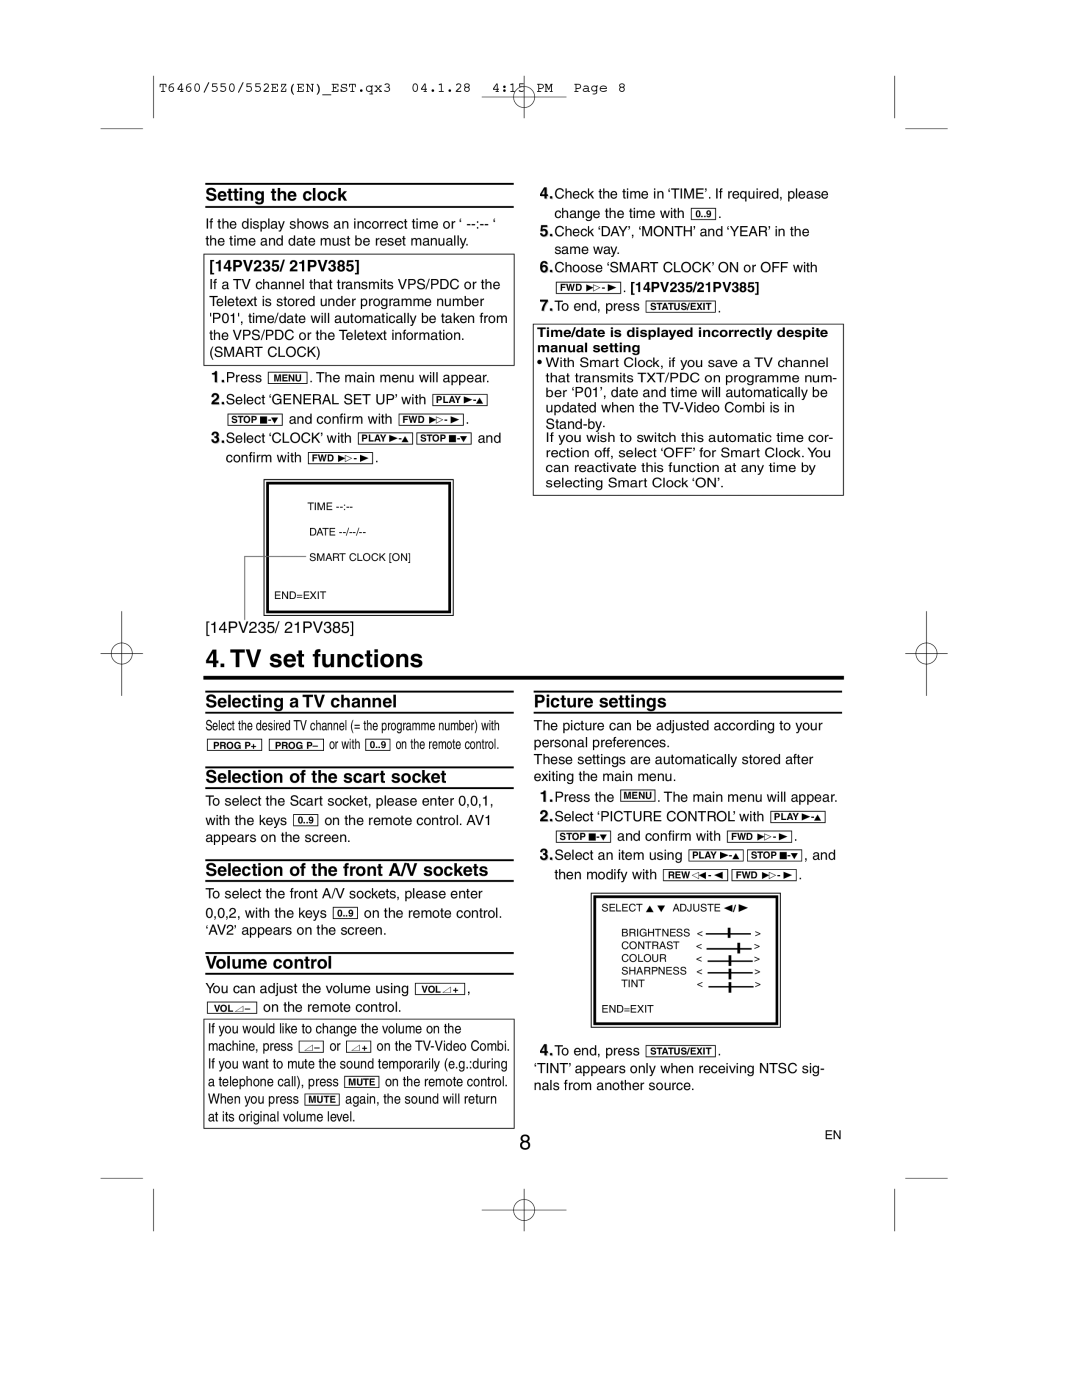
T6460/550/552EZ(EN)_EST.qx3 04.1.28 4:15 PM Page 8
Setting the clock
If the display shows an incorrect time or ‘
[14PV235/ 21PV385]
If a TV channel that transmits VPS/PDC or the Teletext is stored under programme number 'P01', time/date will automatically be taken from the VPS/PDC or the Teletext information.
(SMART CLOCK)
MENU . The main menu will appear. 2.Select ‘GENERAL SET UP’ with ![]()
STOP
3.Select ‘CLOCK’ with PLAY ![]()
![]() STOP
STOP
TIME
DATE
SMART CLOCK [ON]
END=EXIT
[14PV235/ 21PV385]
4.Check the time in ‘TIME’. If required, please change the time with 0..9 .
5.Check ‘DAY’, ‘MONTH’ and ‘YEAR’ in the same way.
6.Choose ‘SMART CLOCK’ ON or OFF with FWD 1- B . [14PV235/21PV385]
7.To end, press STATUS/EXIT .
Time/date is displayed incorrectly despite manual setting
•With Smart Clock, if you save a TV channel that transmits TXT/PDC on programme num- ber ‘P01’, date and time will automatically be updated when the
If you wish to switch this automatic time cor- rection off, select ‘OFF’ for Smart Clock. You can reactivate this function at any time by selecting Smart Clock ‘ON’.
4. TV set functions
Selecting a TV channel
Select the desired TV channel (= the programme number) with
PROG P+ ![]()
![]() PROG P– or with 0..9 on the remote control.
PROG P– or with 0..9 on the remote control.
Selection of the scart socket
To select the Scart socket, please enter 0,0,1,
with the keys ![]()
![]() on the remote control. AV1 appears on the screen.
on the remote control. AV1 appears on the screen.
Selection of the front A/V sockets
To select the front A/V sockets, please enter
0,0,2, with the keys ![]()
![]() on the remote control. ‘AV2’ appears on the screen.
on the remote control. ‘AV2’ appears on the screen.
Volume control
You can adjust the volume using VOL5+ ,
![]()
![]() on the remote control.
on the remote control.
If you would like to change the volume on the machine, press 5– or 5+ on the
If you want to mute the sound temporarily (e.g.:during a telephone call), press MUTE on the remote control. When you press MUTE again, the sound will return at its original volume level.
Picture settings
The picture can be adjusted according to your personal preferences.
These settings are automatically stored after exiting the main menu.
1.Press the MENU . The main menu will appear.
2.Select ‘PICTURE CONTROL’ with PLAY
3.Select an item using PLAY ![]()
![]() STOP
STOP ![]()
![]() FWD 1- B .
FWD 1- B .
SELECT K L ADJUSTE s/ B |
|
|
| |||||
BRIGHTNESS < |
|
|
|
| > | |||
|
|
|
| |||||
|
|
|
| |||||
CONTRAST | < |
|
|
|
| > | ||
|
|
|
| |||||
COLOUR | < |
|
|
|
|
| > | |
|
|
|
|
| ||||
SHARPNESS | < |
|
|
|
|
| > | |
TINT | < |
|
|
|
|
|
| > |
END=EXIT
4.To end, press STATUS/EXIT .
‘TINT’ appears only when receiving NTSC sig- nals from another source.
8 | EN |
|
