Product Information
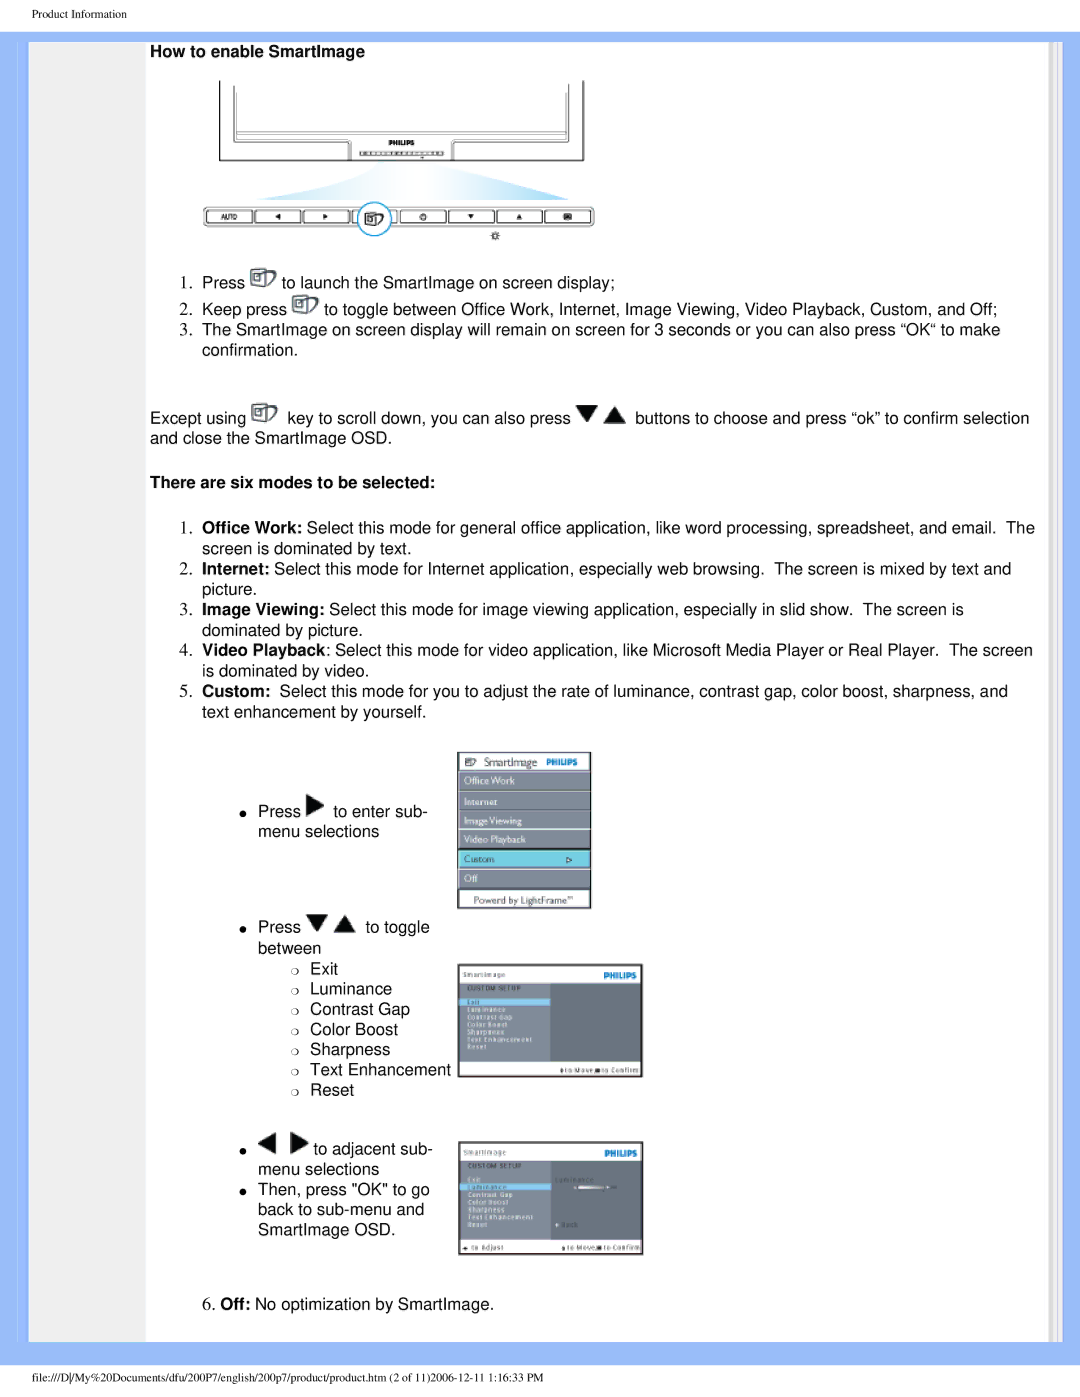
How to enable SmartImage
1.Press ![]() to launch the SmartImage on screen display;
to launch the SmartImage on screen display;
2.Keep press ![]() to toggle between Office Work, Internet, Image Viewing, Video Playback, Custom, and Off;
to toggle between Office Work, Internet, Image Viewing, Video Playback, Custom, and Off;
3.The SmartImage on screen display will remain on screen for 3 seconds or you can also press “OK“ to make confirmation.
Except using ![]() key to scroll down, you can also press
key to scroll down, you can also press ![]()
![]() buttons to choose and press “ok” to confirm selection and close the SmartImage OSD.
buttons to choose and press “ok” to confirm selection and close the SmartImage OSD.
There are six modes to be selected:
1.Office Work: Select this mode for general office application, like word processing, spreadsheet, and email. The screen is dominated by text.
2.Internet: Select this mode for Internet application, especially web browsing. The screen is mixed by text and picture.
3.Image Viewing: Select this mode for image viewing application, especially in slid show. The screen is dominated by picture.
4.Video Playback: Select this mode for video application, like Microsoft Media Player or Real Player. The screen is dominated by video.
5.Custom: Select this mode for you to adjust the rate of luminance, contrast gap, color boost, sharpness, and text enhancement by yourself.
●Press ![]() to enter sub- menu selections
to enter sub- menu selections
●Press ![]()
![]() to toggle between
to toggle between
❍Exit
❍Luminance
❍Contrast Gap
❍Color Boost
❍Sharpness
❍Text Enhancement
❍Reset
●![]()
![]() to adjacent sub- menu selections
to adjacent sub- menu selections
●Then, press "OK" to go back to
6.Off: No optimization by SmartImage.
file:///D/My%20Documents/dfu/200P7/english/200p7/product/product.htm (2 of