27DVCR55S
Dear Philips product owner
For Customer Use
Model No Serial No
Safety and General Information
Safety Precautions
Declaration of Conformity
Table of Contents
Introduction
Region Codes
Playable Discs
Color Systems
Videotapes
Before Using the TV/VCR/DVD
Hooking Up the TV/VCR/DVD
Indoor Antenna
Hooking Up the TV/VCR/DVD cont’d
Not supplied, example only
Jacks on VCR example only
Optional Connections
Analog Stereo Hookups
Digital Stereo Hookups
Press VOL. / to adjust the volume
First-Time Setup, Watching TV
Playing a Videotape
Playing a Disc
Remote Control Buttons
Remote Control Buttons cont’d
Front Panel
Rear Panel
Power Cord
ANT. Jack Antenna
Connect to a standard AC outlet 120V/60Hz
Resetting TV Channels
Menu Language, Resetting TV Channels
Press Setup once so the TV/VCR Setup menu appears
Press Setup to exit the menu
Press Setup when you are finished
Adding/Deleting Channels
To delete another channel, repeat steps
Manual Clock Setting
Setting the Clock
You may have to reset the clock after a power failure
Press or to select Manual Clock SET Then, press Enter
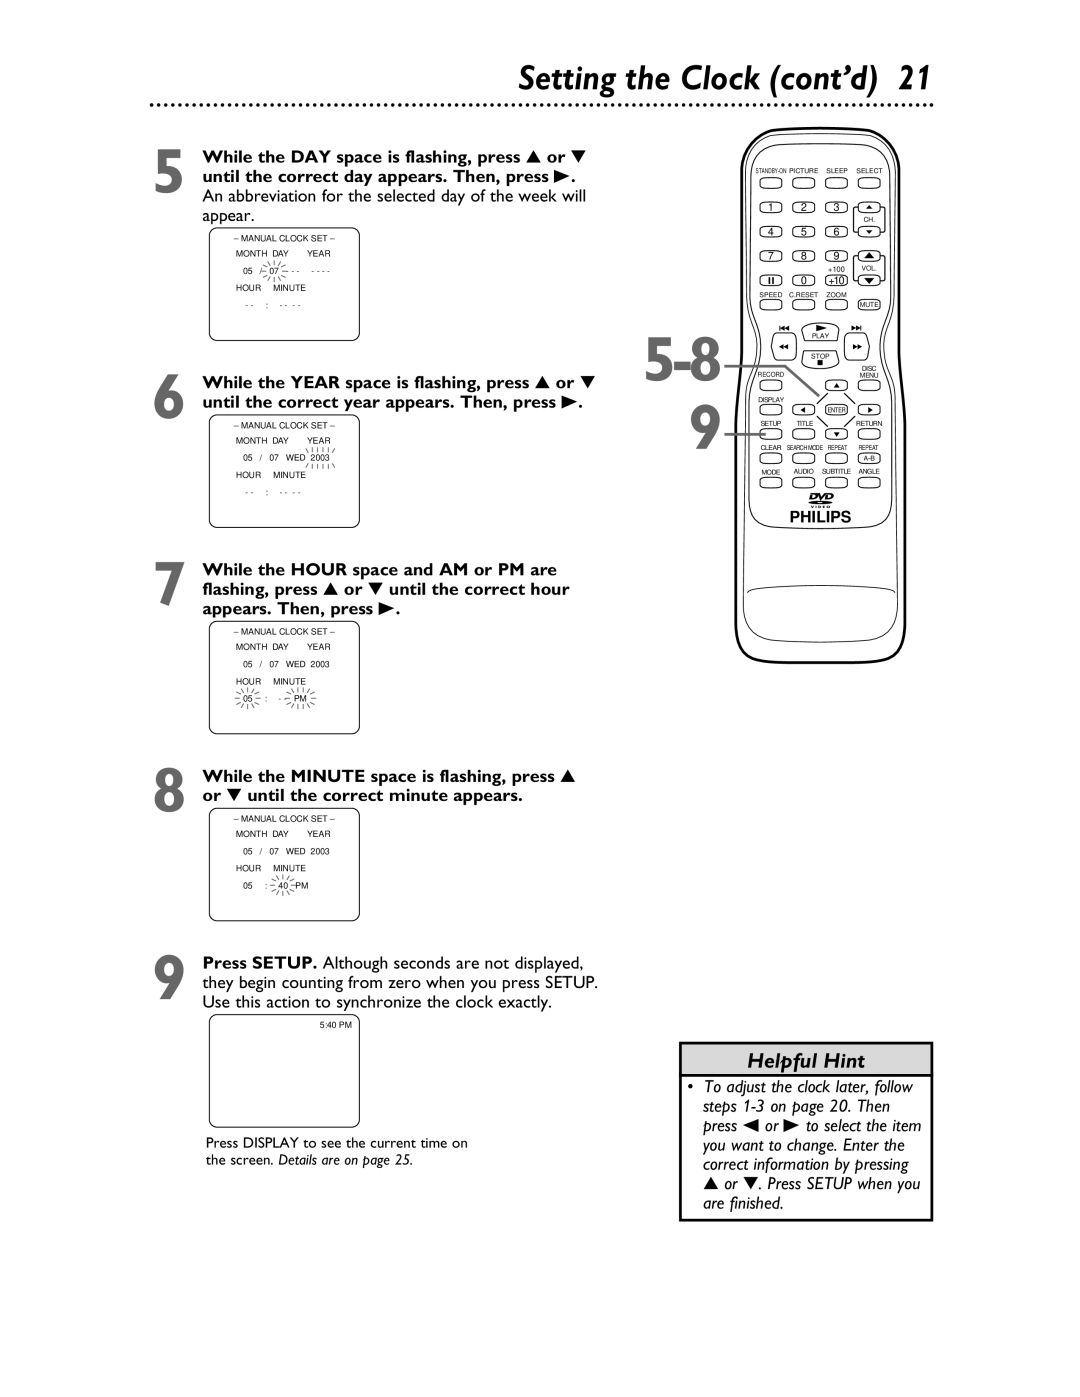
While the DAY space is flashing, press or
Setting the Clock cont’d
Until the correct day appears. Then, press B
Appear
Turn on the TV/VCR/DVD power
Auto Clock Setting
Before you begin
Turn on the Cable Box/Satellite Receiver if applicable
Auto Clock CH Search 08 10
Daylight-Savings Time
Press Setup to remove the menu
Status Displays, Picture Controls
Status Displays
Picture Controls
Put a videotape
Videotape Recording
Tape Speeds
Hrs
You cannot do an OTR with the remote control
One-Touch Recording
Press REC/OTR on the front of the TV/VCR/DVD
Before you begin, make sure
Timer Recording
Channels are set. Details are on
Press or to select a program position. Then, press B
Finally, press B
Timer Recording cont’d
Or, to record a program at the same time on
Same channel every weekday Monday
850 P M
Correcting a Timer Recording
Extending a Timer Recording
Cancelling Timer Recordings
To cancel a timer recording that is in progress
Timer Recording Auto Return
Rerecording Tape Duplication
Repeat Play
PLAY, press Enter to select OFF
Play B will appear on the screen briefly
Press or to select Rental
Rental Play
Press Enter until on appears beside
RENTAL. To turn off RENTAL, press Enter to
Sleep Timer
Zero Return, Sleep Timer
Zero Return
Press Sleep until Sleep 0 Minute appears
Length of time by 10 minutes
Time Search
Insert a videotape
Time Search will not operate dur- ing recording
Stop C
Index Search
Slow Motion
Videotape Playback Features
Forward and Reverse Searching SP/LP/SLP
Super High Speed Searching LP/SLP
Automatic Tracking Adjustment
Automatic Operation Features
Following videotape features are available
Automatic Rewind, Eject, Off
Closed Captions
Press Setup Press or to select Caption
TV Rating Settings
Setting V-Chip
TV Rating Explanations
TV/VCR/DVD is on
Press Setup to save your settings and remove the menus
Setting V-Chip cont’d
Press or to select the TV Rating level at
Which you want to block viewing, then press
Press Setup Press or to select V-CHIP SET UP Press Enter
TV Rating Subratings
Press or to select TV Rating Press Enter
When you select TV-Y7
Adjust. Then, press Enter twice to go to its
Press or L to select the rating you wish to
Subratings
Mpaa Rating Explanations
Mpaa Rating Settings
Changing the Access Code
V-CHIP SET UP screen will reappear
Press or to select Change Code Then, press Enter
Multi-Channel Television Sound
Multi-Channel Television Sound cont’d
Press Setup to exit the menus
Selecting HiFi or Monaural Sound
Press or to select VCR Audio
Press or to select TV Audio
Press SETUP. Press or to select USER’S
Disc Menus
Disc Menus, Title Menus
Title Menus
Not all DVDs have Title menus
Fast Forward/Reverse Search
During Disc play, press and hold i/g or
On the remote for two seconds
Title/Chapter Playback, Time Playback
Title/Chapter Playback
Time Playback
Track Play
Paused and Step-by-Step Play
Paused and Step-by-Step Play, Resume On
Resume On
During Disc play, press F pause
Over. OFF will appear briefly on the TV screen
Repeat Play
Regular play will resume
Repeat play is not available with some Discs
Markers
Subtitles
Subtitles, Camera Angles
Camera Angles
During play, press Subtitle to select a subti
Zoom
Slow Motion, Zoom
Times the regular size. ZOOM3 will appear
Sound will be mute during slow motion play
Press B to select Custom at the top
Parental Password
Menu, then press Enter
Press B to select the lock, then press Enter
Parental Password cont’d
Power failure will not erase your password
Press p to select CHANGE, then press Enter
Parental Levels
Press B to select Custom at the top Menu, then press Enter
Press B to select the lock, then press
Parental Levels cont’d
Stereo Sound
Audio Language
Random Play
Random Play, Programmed Play
Programmed Play
Random screen appears
To stop play, press Stop C
66 MP3/JPEG Playback
Jpeg Files have the icon
MP3 Files have the 3 icon
Press Display again to remove the display
MP3/JPEG Displays
Language menu
Language Settings
Language Codes
Language Settings cont’d
Press B to select DISPLAY, then press
Display Settings
Display Settings cont’d
If you selected Angle ICON, press Enter
Repeatedly to turn Angle Icon on or OFF.
Audio Settings
Press B to select Audio , then press
Dolby Digital sound must be available on the DVD
On-Screen Displays
DVD Display
Audio CD Display
Adjust Black Level to brighten the DVD picture
Black Level
Virtual Surround
Glossary
Helpful Hints
Helpful Hints cont’d
Other Specifications
Specifications
Electrical Specifications
General TV/VCR
Please contact Philips at French Speaking
Limited Warranty
Model # Serial #
Philips, P.O. Box 520890, Miami, FL 33152 402
Warranty
Remote control
Index
Controls