AUTO CHRON (SYNCHRONISATION OF TIME)
Auto Chron allows you to set the clock of the TV automatically for automatic selection, there will be queries for Channel, Time Zone and Day Light saving. After successful setup, Auto Chron will automatically maintain the
correct time. This feature is ONLY available in Digital Mode.
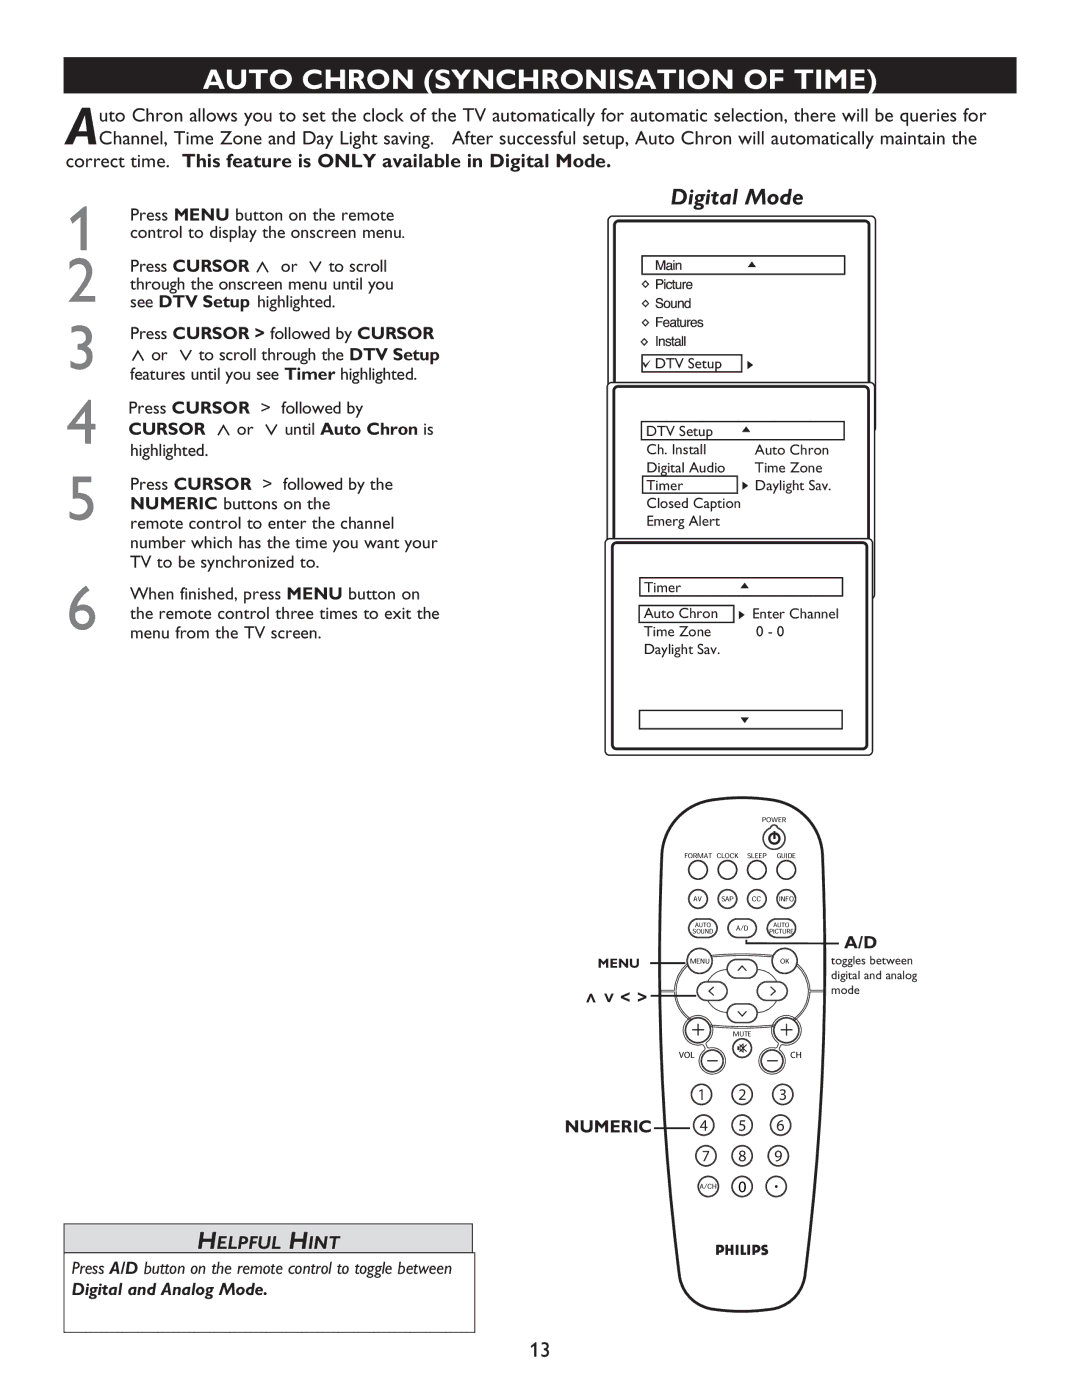
1 | Press MENU button on the remote |
control to display the onscreen menu. | |
2 | Press CURSOR < or > to scroll |
through the onscreen menu until you | |
see DTV Setup highlighted. | |
3 | Press CURSOR > followed by CURSOR |
< or > to scroll through the DTV Setup | |
features until you see Timer highlighted. | |
4 | Press CURSOR > followed by |
CURSORhighlighted. < or > until Auto Chron is | |
5 | Press CURSOR > followed by the |
NUMERIC buttons on the | |
remote control to enter the channel | |
| number which has the time you want your |
| TV to be synchronized to. |
6 | When finished, press MENU button on |
the remote control three times to exit the | |
menu from the TV screen. |
Digital Mode
![]() DTV Setup
DTV Setup
DTV Setup
| Ch. Install | Auto Chron | ||
| Digital Audio | Time Zone | ||
| Timer |
| Daylight Sav. | |
| Closed Caption |
| ||
| Emerg Alert |
| ||
|
|
|
|
|
|
|
|
|
|
|
|
|
| |
| Timer |
| ||
|
|
| Enter Channel | |
| Auto Chron | |||
| Time Zone |
| 0 - 0 | |
| Daylight Sav. |
| ||
|
|
|
|
|
|
|
|
|
|
POWER
FORMAT CLOCK SLEEP GUIDE
| AV SAP |
| CC INFO |
|
| AUTO | A/D | AUTO |
|
| SOUND | PICTURE | A/D | |
|
| |||
MENU |
|
|
| |
MENU |
| OK | toggles between | |
|
|
| ||
|
|
|
| digital and analog |
>>< > |
|
|
| mode |
|
|
|
|
MUTE
VOLCH
1 2 3
NUMERIC 4 5 6
7 8 9
A/CH 0
HELPFUL HINT
Press A/D button on the remote control to toggle between
Digital and Analog Mode.
13