User Manual BDS4241V/BDH4241V/BDH5021V
6. ADVANCED FUNCTIONS
Image | Screen | Setup | Audio | |||
| B rightnes s |
|
| 083 |
| |
| C ontras t |
|
| 052 |
| |
| S harpnes s |
|
| 019 |
| |
| C olor |
|
| 063 |
| |
| Tint |
|
| 050 |
| |
| Image Preset |
|
|
|
| |
| Move [- VOL +] | Select [- CH +] Exit [MENU] | ||||
|
|
|
|
|
|
|
Image | Screen | Setup | Audio |
| B rightnes s |
| 083 |
| Adjust [- VOL +] | Exit [MENU] | |
|
|
|
|
Image | Screen | Setup | Audio |
| B rightnes s |
| 083 |
| C ontras t |
| 052 |
| S harpnes s |
| 019 |
| C olor |
| 063 |
| Tint |
| 050 |
| Image Preset |
| Image Preset Complete! |
| Move [- CH +] | Select [- VOL +] Exit [MENU] | |
6.1PICTURE CONTROLS
6.1.1ADJUSTING PICTURE SETTINGS
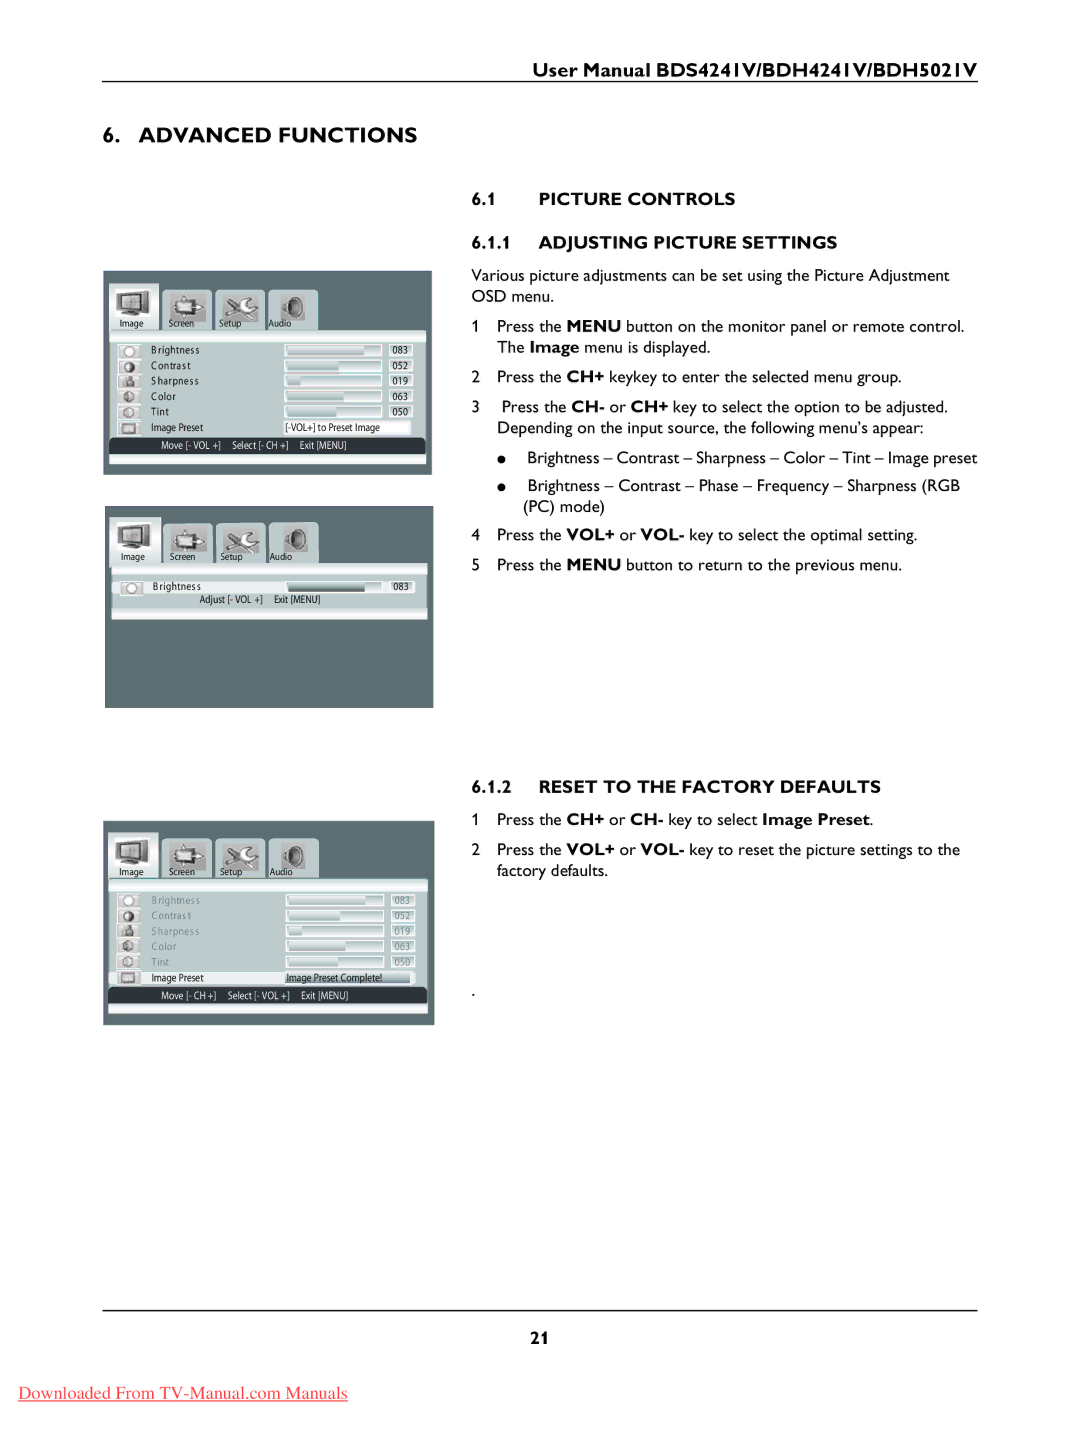
Various picture adjustments can be set using the Picture Adjustment OSD menu.
1Press the MENU button on the monitor panel or remote control. The Image menu is displayed.
2Press the CH+ keykey to enter the selected menu group.
3Press the CH- or CH+ key to select the option to be adjusted. Depending on the input source, the following menu’s appear:
●Brightness – Contrast – Sharpness – Color – Tint – Image preset
●Brightness – Contrast – Phase – Frequency – Sharpness (RGB (PC) mode)
4Press the VOL+ or VOL- key to select the optimal setting.
5Press the MENU button to return to the previous menu.
6.1.2RESET TO THE FACTORY DEFAULTS
1Press the CH+ or CH- key to select Image Preset.
2Press the VOL+ or VOL- key to reset the picture settings to the factory defaults.
.
21
Downloaded From
