DSX5500_5540 11/13/02 12:21 PM Page 10
Connections (cont’d)
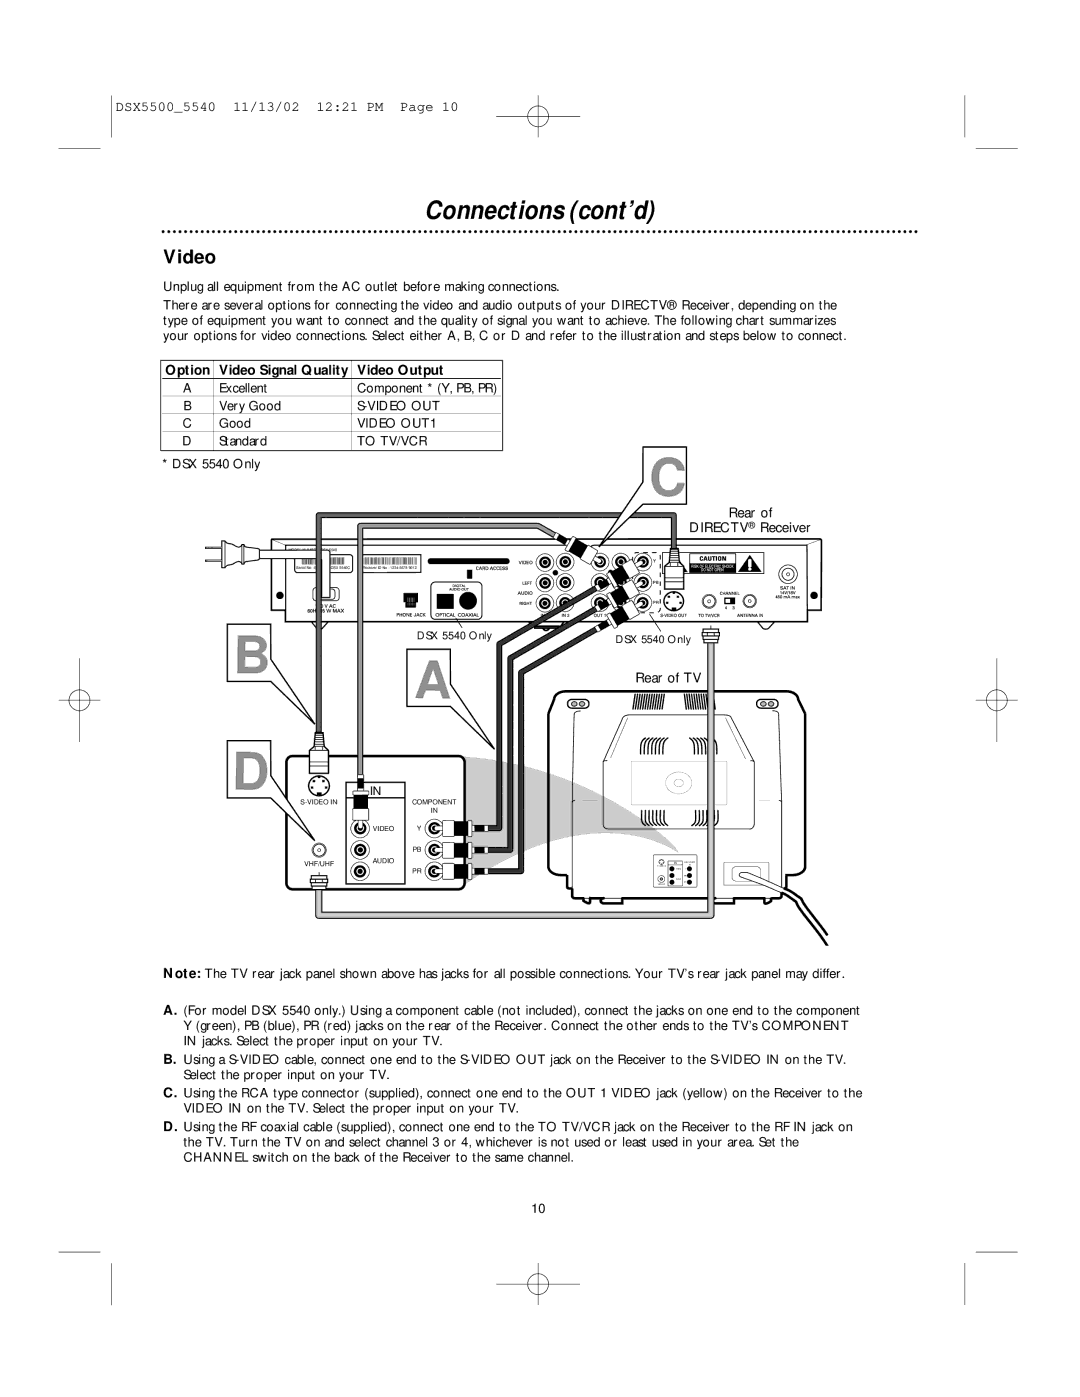
Video
Unplug all equipment from the AC outlet before making connections.
There are several options for connecting the video and audio outputs of your DIRECTV® Receiver, depending on the type of equipment you want to connect and the quality of signal you want to achieve. The following chart summarizes your options for video connections. Select either A, B, C or D and refer to the illustration and steps below to connect.
Option Video Signal Quality Video Output
A | Excellent | Component * (Y, PB, PR) |
B | Very Good | |
C | Good | VIDEO OUT1 |
D | Standard | TO TV/VCR |
* DSX 5540 Only
MODEL NUMBER: DSX 5540
Serial No : 81476039DSX 5540C Receiver ID No : 1234 5678 9012
C
Rear of
DIRECTV® Receiver
B
D
S VIDEO IN
VHF/UHF
![]() IN
IN
VIDEO
AUDIO
DSX 5540 Only
A
COMPONENT
IN
Y
PB
PR
DSX 5540 Only
Rear of TV
IN
Note: The TV rear jack panel shown above has jacks for all possible connections. Your TV’s rear jack panel may differ.
A.(For model DSX 5540 only.) Using a component cable (not included), connect the jacks on one end to the component Y (green), PB (blue), PR (red) jacks on the rear of the Receiver. Connect the other ends to the TV’s COMPONENT IN jacks. Select the proper input on your TV.
B.Using a
C.Using the RCA type connector (supplied), connect one end to the OUT 1 VIDEO jack (yellow) on the Receiver to the VIDEO IN on the TV. Select the proper input on your TV.
D.Using the RF coaxial cable (supplied), connect one end to the TO TV/VCR jack on the Receiver to the RF IN jack on the TV. Turn the TV on and select channel 3 or 4, whichever is not used or least used in your area. Set the CHANNEL switch on the back of the Receiver to the same channel.
10