Hookups (cont’d) 13
Connecting to a TV Only
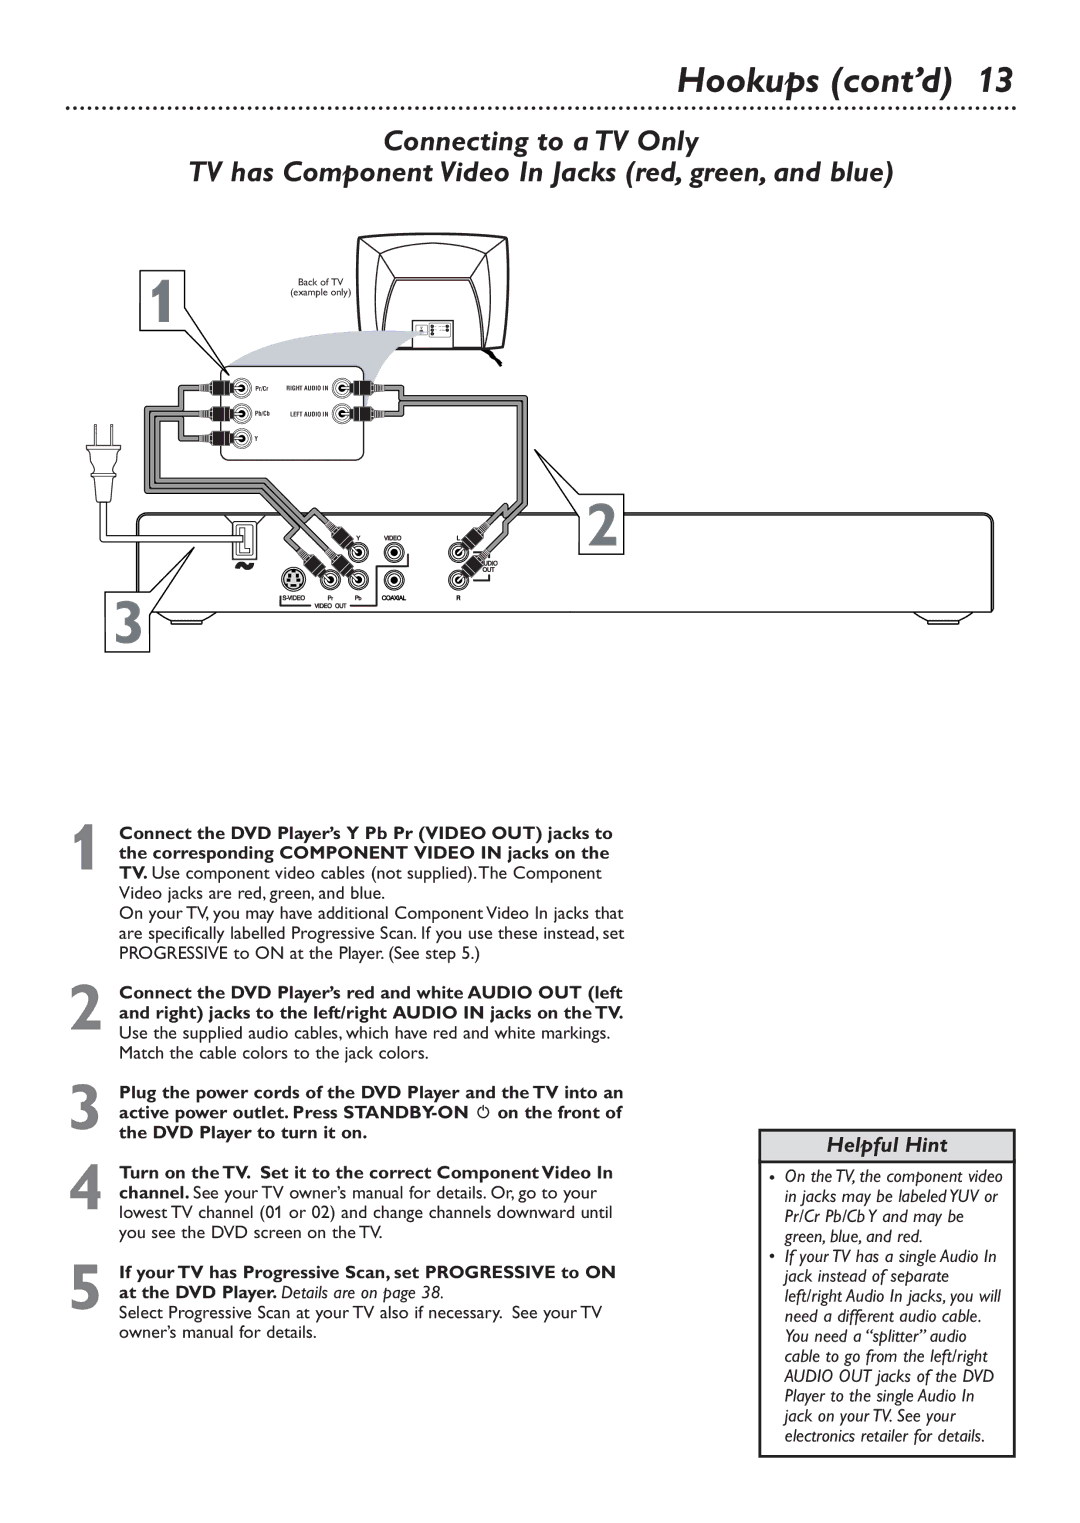
TV has Component Video In Jacks (red, green, and blue)
1
3
Back of TV
(example only)
Pr/Cr | RIGHT AUDIO IN |
Pb/Cb | LEFT AUDIO IN |
Y |
|
2
1 Connect the DVD Player’s Y Pb Pr (VIDEO OUT) jacks to the corresponding COMPONENT VIDEO IN jacks on the TV. Use component video cables (not supplied).The Component Video jacks are red, green, and blue.
On your TV, you may have additional Component Video In jacks that are specifically labelled Progressive Scan. If you use these instead, set PROGRESSIVE to ON at the Player. (See step 5.)
2 Connect the DVD Player’s red and white AUDIO OUT (left and right) jacks to the left/right AUDIO IN jacks on the TV. Use the supplied audio cables, which have red and white markings.
Match the cable colors to the jack colors.
3
4 Turn on the TV. Set it to the correct Component Video In channel. See your TV owner’s manual for details. Or, go to your lowest TV channel (01 or 02) and change channels downward until you see the DVD screen on the TV.
5 If your TV has Progressive Scan, set PROGRESSIVE to ON at the DVD Player. Details are on page 38.
Select Progressive Scan at your TV also if necessary. See your TV owner’s manual for details.
Helpful Hint
•On the TV, the component video in jacks may be labeled YUV or Pr/Cr Pb/Cb Y and may be green, blue, and red.
•If your TV has a single Audio In jack instead of separate left/right Audio In jacks, you will need a different audio cable. You need a “splitter” audio cable to go from the left/right AUDIO OUT jacks of the DVD Player to the single Audio In jack on your TV. See your electronics retailer for details.