DVDR3510V, DVDR3512V specifications
The Philips DVDR3512V and DVDR3510V are versatile DVD recorders that bring together advanced recording technologies with user-friendly features, making them ideal devices for home entertainment enthusiasts. These models are designed to simplify the process of archiving, recording, and playing back high-quality video content.One of the standout features of both models is their ability to record directly from various sources, including cable or satellite TV, ensuring that users can capture their favorite shows, movies, and events in pristine quality. This functionality is supported by the integrated tuner, allowing for flexible recording options without the need for an external device.
Both the DVDR3512V and DVDR3510V support a wide range of disc formats, such as DVD-R, DVD+R, DVD-RW, and DVD+RW, accommodating a variety of recording needs. The dual-layer recording capability of the DVDR3512V enhances its versatility, enabling users to store more content on a single disc. This feature is particularly useful for long recordings, such as sports tournaments or entire seasons of television shows.
The devices are equipped with an intuitive user interface that makes navigation and scheduling recordings straightforward. With the program guide, users can easily set up timed recordings and manage their playback options. The Philips DVDR3512V and DVDR3510V also offer the ability to pause live TV, allowing users to capture the action at their convenience.
Another significant characteristic of these recorders is the integrated video upconversion capability. This feature enhances the quality of standard-definition content, providing an optimized viewing experience on modern high-definition televisions. The result is a clearer picture with improved detail, which enriches the overall home viewing experience.
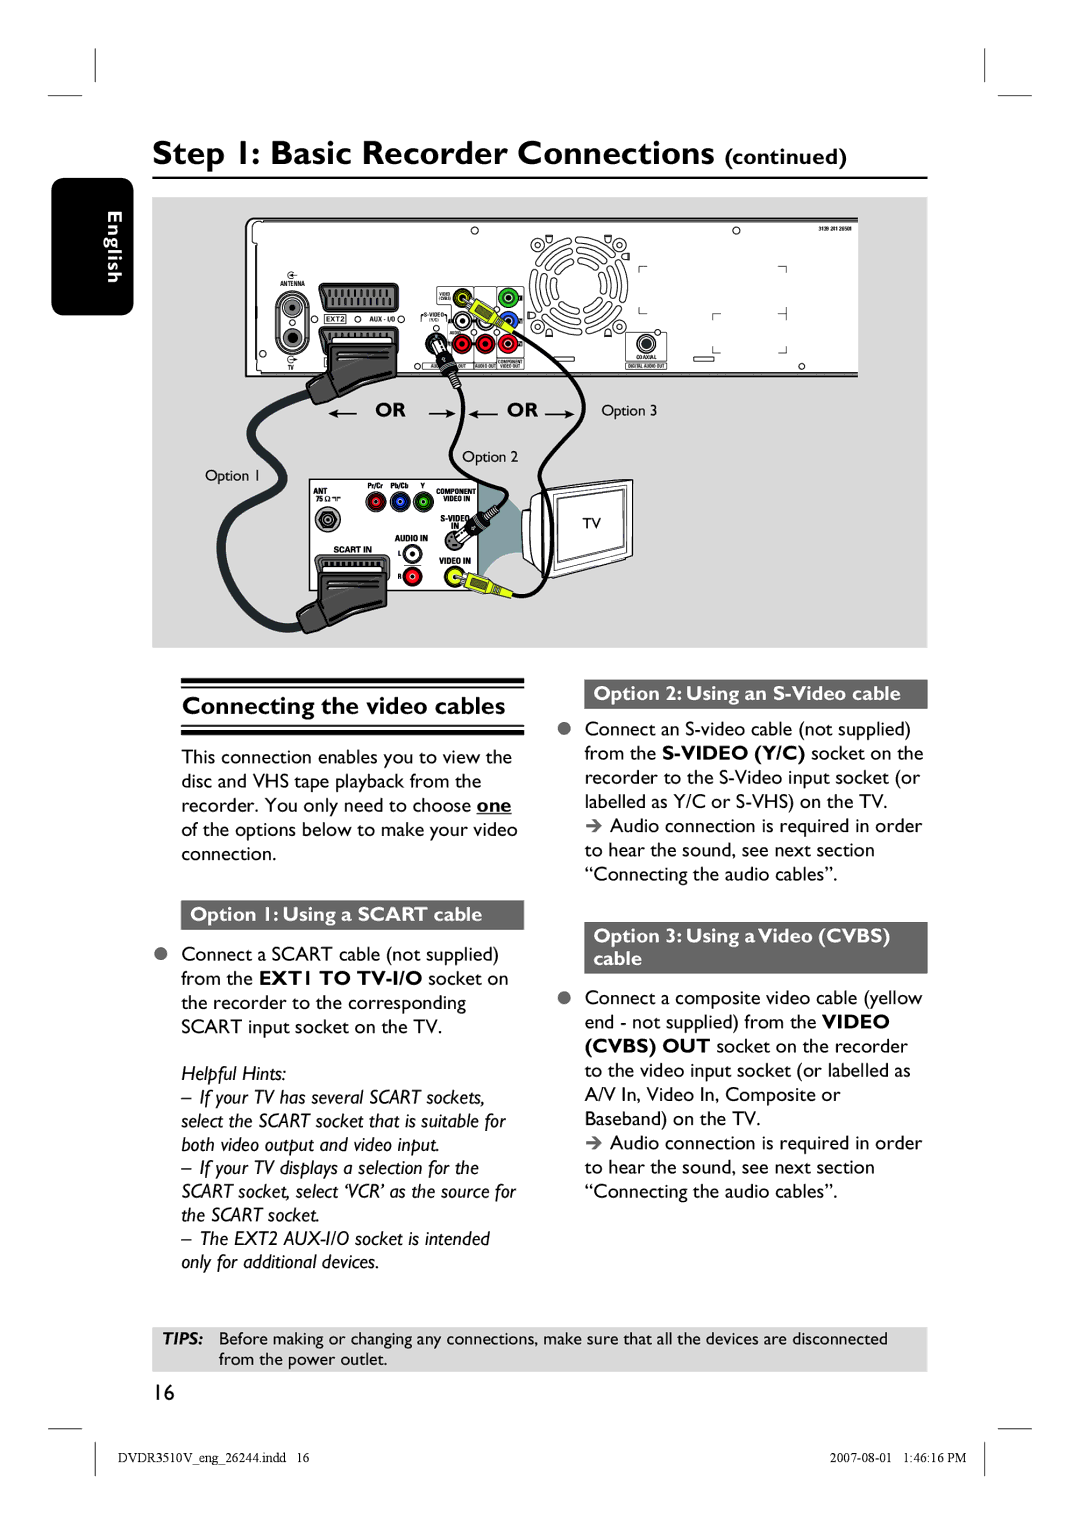
Connectivity is also a strong suit of the DVDR3512V and DVDR3510V, featuring multiple input options, including SCART and composite inputs, allowing for easy integration with various audio and video equipment. This flexibility ensures that users can connect their devices, be it a VCR or gaming console, without hassle.
In summary, the Philips DVDR3512V and DVDR3510V are well-equipped DVD recorders that offer a combination of convenient features, robust recording options, and enhanced playback quality. Their user-friendly design and technical capabilities make them an excellent choice for those looking to digitize their memories and enjoy their favorite content with ease.