|
| Getting Started (continued) | |||||||||||||
|
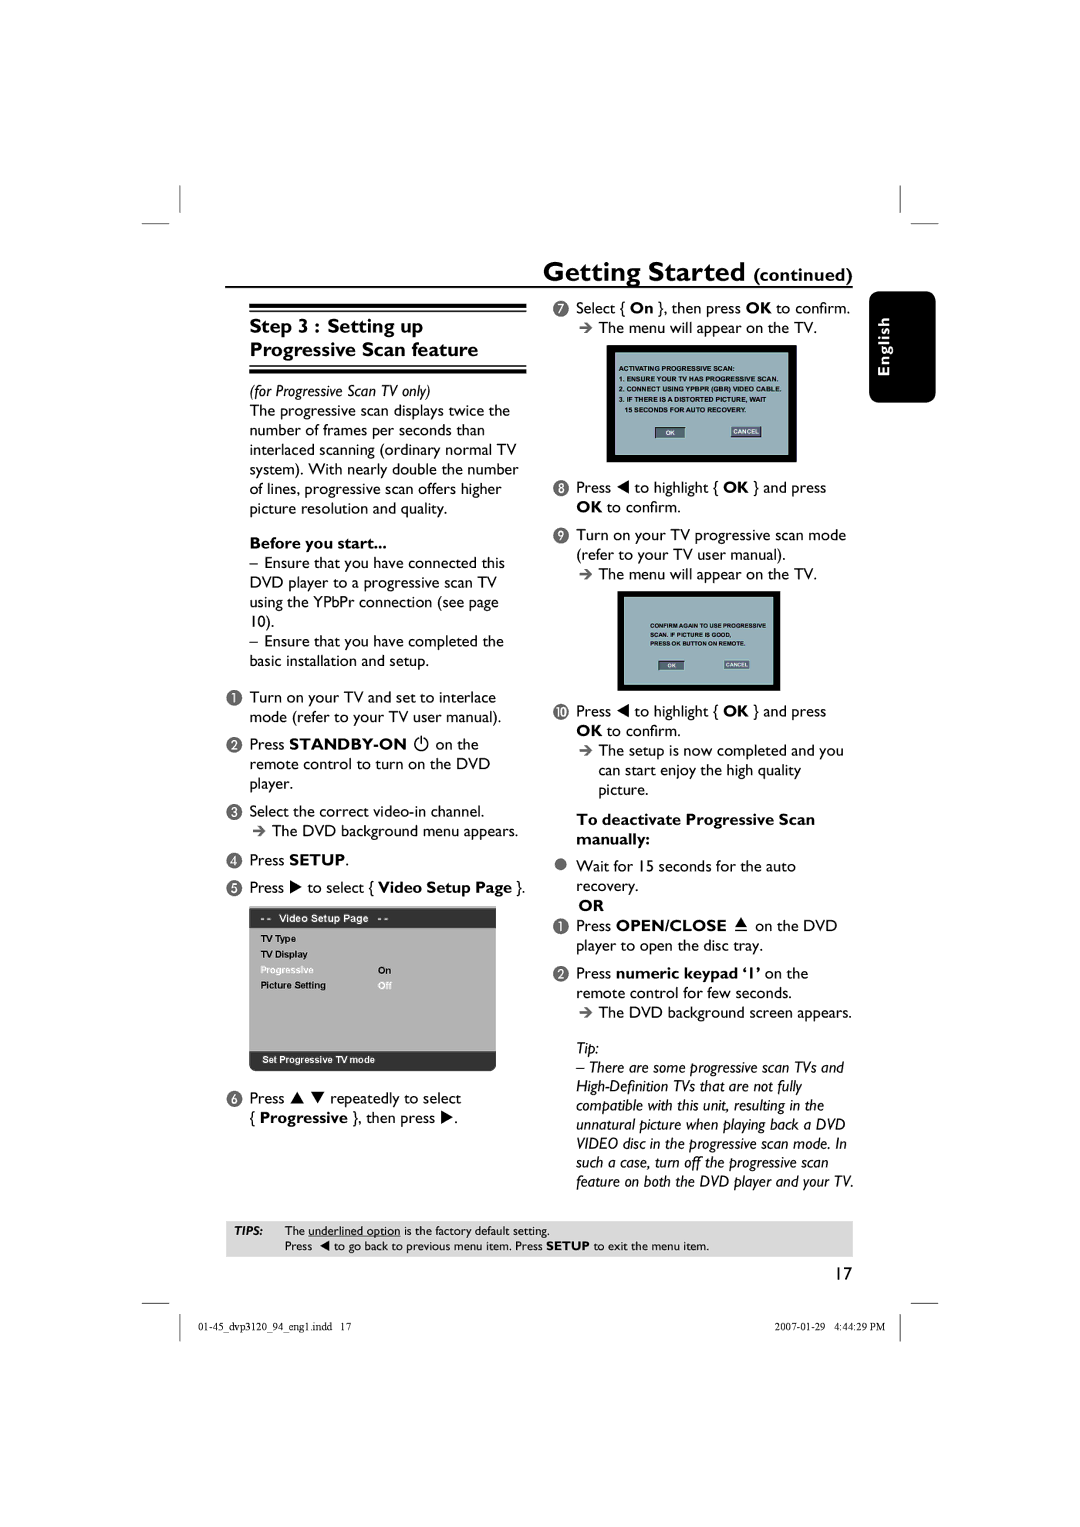
| G Select { On }, then press OK to confirm. | |||||||||||||
|
| ||||||||||||||
| Step 3 : Setting up | ||||||||||||||
| The menu will appear on the TV. | ||||||||||||||
| Progressive Scan feature |
|
|
|
|
|
|
|
|
|
|
|
|
|
|
|
|
|
|
|
|
|
|
|
|
|
|
|
|
| |
|
|
| ACTIVATING PROGRESSIVE SCAN: |
|
| ||||||||||
|
|
|
|
|
| ||||||||||
|
| ||||||||||||||
| (for Progressive Scan TV only) |
|
| 1. ENSURE YOUR TV HAS PROGRESSIVE SCAN. |
|
| |||||||||
|
|
| 2. CONNECT USING YPBPR (GBR) VIDEO CABLE. |
|
| ||||||||||
|
|
|
|
|
| ||||||||||
| The progressive scan displays twice the |
|
| 3. IF THERE IS A DISTORTED PICTURE, WAIT |
|
| |||||||||
|
|
|
| 15 SECONDS FOR AUTO RECOVERY. |
|
| |||||||||
|
|
|
|
|
|
| |||||||||
| number of frames per seconds than |
|
|
|
|
|
|
|
|
|
|
|
|
|
|
|
|
|
|
| OK |
|
| CANCEL |
|
|
|
|
| ||
| interlaced scanning (ordinary normal TV |
|
|
|
|
|
|
|
|
|
|
|
|
|
|
| system). With nearly double the number | H Press W to highlight { OK } and press | |||||||||||||
| of lines, progressive scan offers higher | ||||||||||||||
| picture resolution and quality. | OK to confirm. |
|
|
|
|
|
|
|
|
| ||||
| Before you start... | I Turn on your TV progressive scan mode | |||||||||||||
| (refer to your TV user manual). | ||||||||||||||
| – Ensure that you have connected this | ||||||||||||||
| The menu will appear on the TV. | ||||||||||||||
| DVD player to a progressive scan TV | ||||||||||||||
|
|
|
|
|
|
|
|
|
|
|
|
|
|
| |
| using the YPbPr connection (see page |
|
|
|
|
|
|
|
|
|
|
|
|
|
|
|
|
|
|
|
|
|
|
|
|
|
|
|
|
| |
10). |
|
|
| CONFIRM AGAIN TO USE PROGRESSIVE |
|
| |||||||||
| – Ensure that you have completed the |
|
|
| SCAN. IF PICTURE IS GOOD, |
|
| ||||||||
|
|
|
| PRESS OK BUTTON ON REMOTE. |
|
| |||||||||
| basic installation and setup. |
|
|
|
|
|
|
|
|
|
| ||||
|
|
|
|
| OK |
| CANCEL |
|
|
|
|
|
| ||
|
|
|
|
|
|
|
|
|
|
|
|
|
|
|
|
|
|
|
|
|
|
|
|
|
|
|
|
|
|
|
|
A Turn on your TV and set to interlace | J Press W to highlight { OK } and press | |
mode (refer to your TV user manual). | ||
OK to confirm. | ||
B Press | ||
The setup is now completed and you | ||
remote control to turn on the DVD | ||
can start enjoy the high quality | ||
player. | ||
picture. | ||
| ||
C Select the correct | To deactivate Progressive Scan | |
The DVD background menu appears. | ||
manually: | ||
|
English
DPress SETUP.
EPress X to select { Video Setup Page }.
- - Video Setup Page - -
TV Type |
|
TV Display |
|
Progressive | On |
Picture Setting | Off |
Set Progressive TV mode
FPress S T repeatedly to select { Progressive }, then press X.
Wait for 15 seconds for the auto recovery.
OR
APress OPEN/CLOSE ç on the DVD player to open the disc tray.
BPress numeric keypad ‘1’ on the remote control for few seconds.
The DVD background screen appears.
Tip:
– There are some progressive scan TVs and
TIPS: The underlined option is the factory default setting.
Press W to go back to previous menu item. Press SETUP to exit the menu item.
17
