AAM Loop Antenna

Connection

Connect the supplied loop antenna to the AM ANTENNA terminal. Place the AM loop antenna far away from the system and adjust its position for the best reception.

DSubwoofer Out Connection

Connect the optional active subwoofer to the SUBWOOFER OUT terminal. The subwoofer reproduces just the low bass effect (e.g. explosions, the rumble of spaceships, etc.). Be sure to follow the instructions supplied with the subwoofer.

DIGITAL COAXIAL CONNECTIONS

For recording

Connect the cable between the DIGITAL IN- socket on the CD recorder and the DIGITAL OUT-socket of the mini system or CD player.

For playback

PREPARATION

FAC Power Supply

After all other connections have been made, connect the AC power cord to the system and to the wall outlet.

Inserting batteries into the

English

BFM Wire Antenna

Connection

Connect the supplied FM wire antenna to the FM ANTENNA 75 Ω terminal. Adjust the position of the FM antenna for the best reception.

Outdoor Antenna

For better FM stereo reception, connect an outdoor FM antenna to the FM ANTENNA 75 Ω terminal using a 75 Ω coxial wire.

CSpeakers Connection

Connect the right speaker to Front terminal R, with the colored wire to + and the black wire to -.

Connect the left speaker to Front terminal L, with the colored wire to + and the black wire to -.

Clip the stripped portion of the speaker wire as shown.

12 mm

unlock

lock

ECD Recorder Connections

ANALOG CONNECTIONS

Connect the red plugs to the R sockets, and the white plugs to the L sockets.

For recording

Connect cable between the ANALOG IN- sockets on the CD recorder and the LINE OUT sockets on the mini system, or the CDR LINE- or TAPE OUT-sockets of an amplifier.

Note:

For recording directly from a CD player, the analog input of the CD recorder should be connected to the analog output of the CD player.

For playback

Connect cable between the ANALOG OUT- sockets on the CD recorder and the AUX/ CDR IN sockets on the mini system, or the input sockets of an amplifier e.g. TAPE IN, CDR or AUX.

Note:

– Never use the PHONO input.

Connect the cable between the DIGITAL OUT-socket on the CD recorder and the digital coaxial input of an amplifer or recording device.

Note:

Digital coaxial connection is only required in case you wish to record from a CD player with digital coaxial output.

DIGITAL OPTICAL CONNECTIONS

For recording

Connect a fibre-optic cable (not supplied) between the IN OPTICAL of the CD recorder and the digital-optical output of a CD player.

Notes:

Digital optical connection is only required in case you wish to record from a CD player with digital optical output.

For playback, the digital coaxial output or analog output should be connected to an amplifier.

When connecting the Digital Optical cable, make sure it is fully inserted until there is a click.

Remote Control

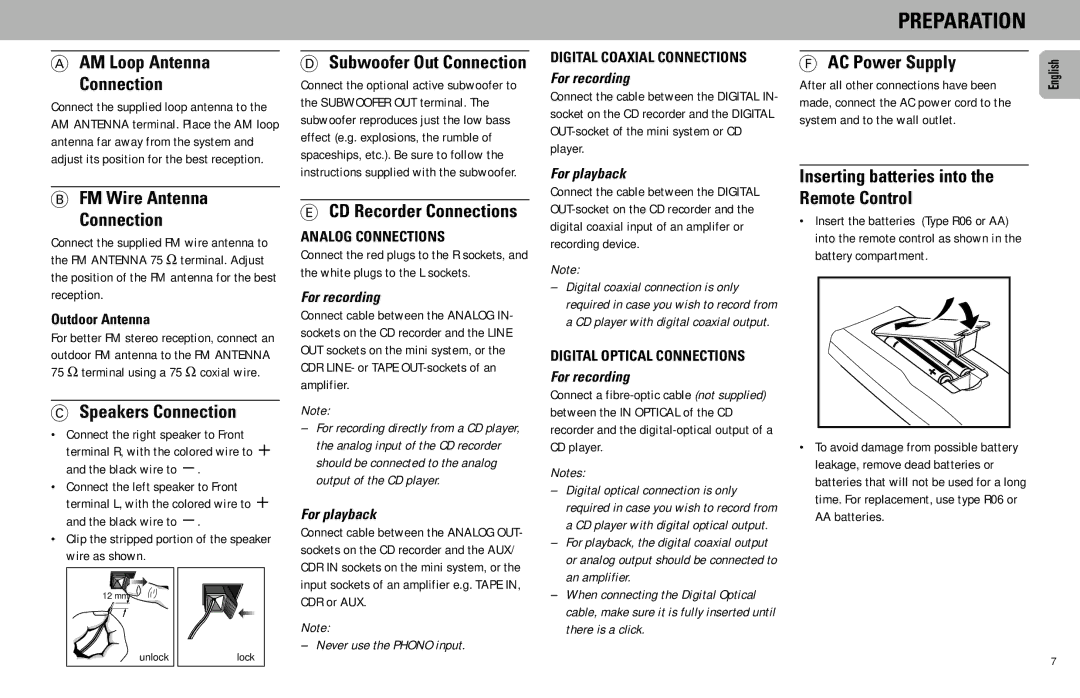
Insert the batteries (Type R06 or AA) into the remote control as shown in the battery compartment.

To avoid damage from possible battery leakage, remove dead batteries or batteries that will not be used for a long time. For replacement, use type R06 or AA batteries.

7

Page 7
Image 7
Philips FW930P2/2 manual AM Loop Antenna Connection, AC Power Supply, Inserting batteries into, FM Wire Antenna Connection

FW930P2/2, FW930SR specifications

The Philips FW930SR and FW930P2/2 are standout models in the realm of home audio and entertainment systems, designed to deliver powerful sound and a suite of modern features that enhance the overall media experience. These systems cater to audiophiles and casual listeners alike, embodying Philips' commitment to quality and innovation.

One of the key features of the FW930 series is its integrated CD player, which supports various disc formats, allowing users to enjoy their favorite albums with high fidelity. The ability to play audio CDs and MP3 CDs ensures versatility, making the system an all-in-one solution for both traditional and digital music libraries. Additionally, the built-in cassette deck serves as a nostalgic throwback, allowing users to enjoy classic tapes, further broadening its appeal.

The sound quality of the Philips FW930SR and FW930P2/2 is underscored by their powerful output capacity. With robust speakers and advanced audio technology, these systems provide rich, clear sound across different genres of music. The dynamic bass enhancement feature offers a deep, thumping low-end, ideal for bass-heavy tracks, while the overall clarity ensures that vocals and instrumentals stand out, creating an immersive listening experience.

Connectivity is another strong point for these models. They come equipped with multiple inputs, including AUX, making it easy to connect external devices like smartphones, tablets, or computers. The availability of USB ports allows for direct playback from flash drives, providing more options to diversify the music collection. Additionally, some models feature Bluetooth compatibility, enabling wireless streaming from any Bluetooth-enabled device. This modern touch aligns the FW930 series with contemporary audio preferences, facilitating convenience for users.

The design of Philips FW930SR and FW930P2/2 also deserves mention, as they boast a sleek and stylish aesthetic that can fit well into various home settings. With an intuitive control panel and a user-friendly remote, operation is straightforward, enhancing user enjoyment without complexity.

Overall, the Philips FW930SR and FW930P2/2 represent an excellent fusion of classic audio technology and modern features. Their superior sound quality, diverse playback options, and appealing design make them a worthy addition to any home audio setup, ensuring that music lovers can enjoy their favorite tunes in style and sophistication. These systems truly embody the best of both worlds, combining nostalgia with contemporary connectivity.