English
Basic Connections (continued)
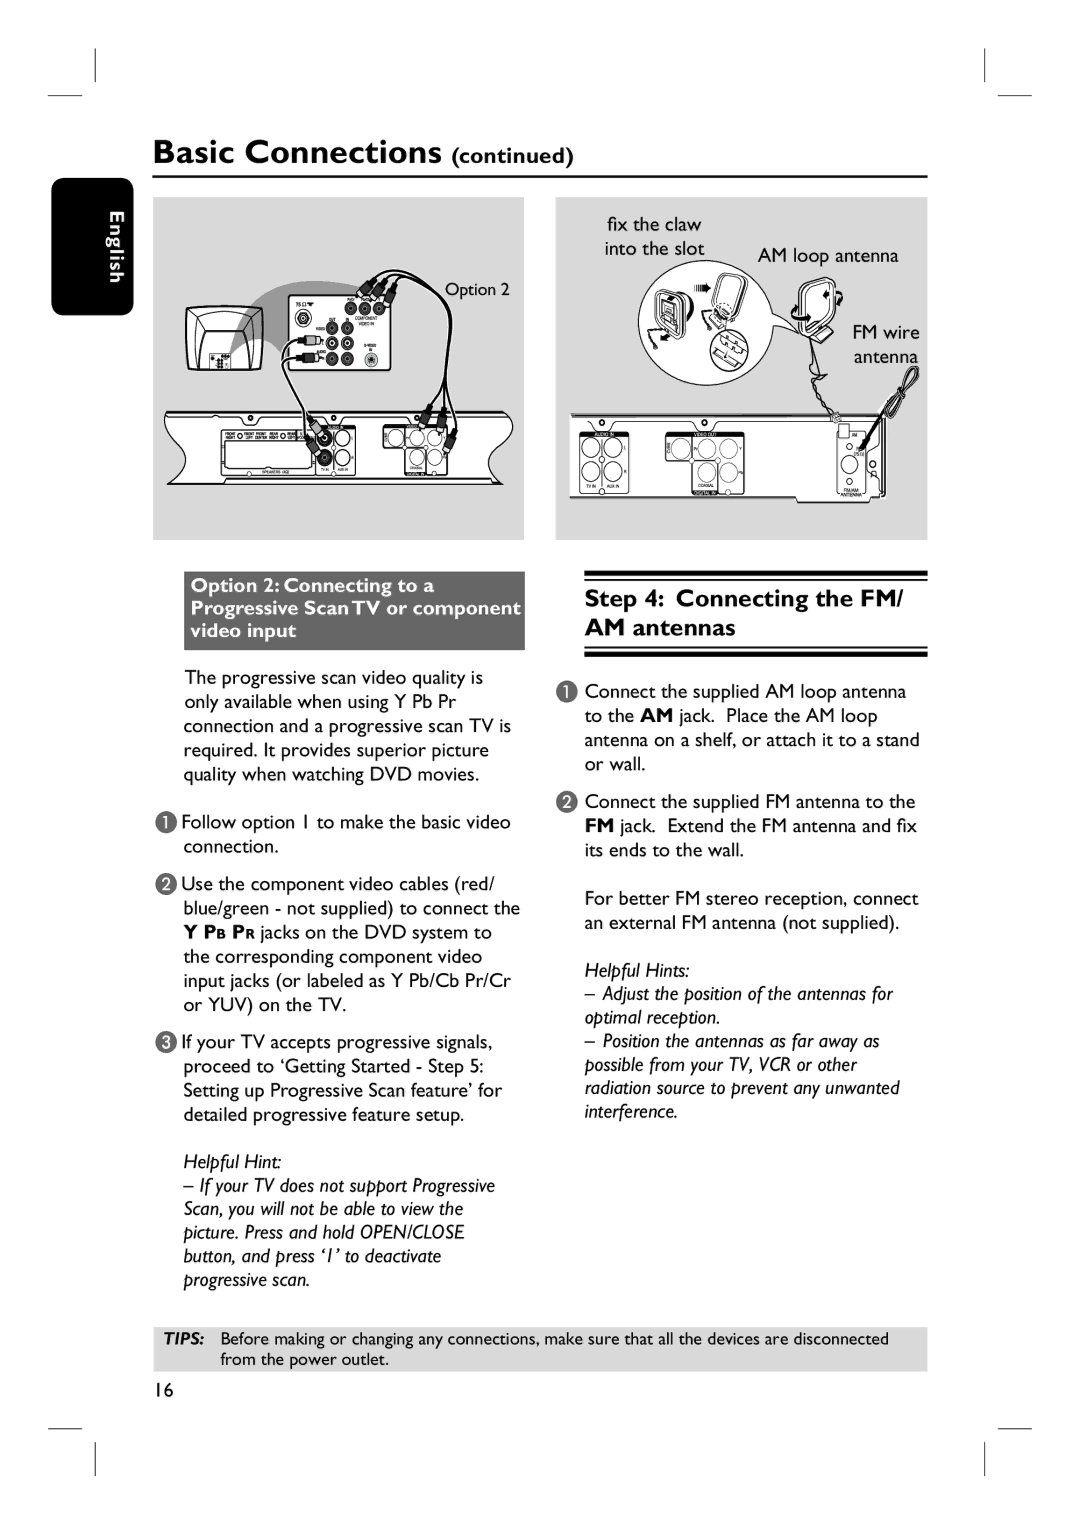
fix the claw
into the slot | AM loop antenna |
|
Option 2 | ➠ |
| FM wire |
antenna
Option 2: Connecting to a Progressive Scan TV or component video input
The progressive scan video quality is only available when using Y Pb Pr connection and a progressive scan TV is required. It provides superior picture quality when watching DVD movies.
AFollow option 1 to make the basic video connection.
BUse the component video cables (red/ blue/green - not supplied) to connect the Y PB PR jacks on the DVD system to the corresponding component video input jacks (or labeled as Y Pb/Cb Pr/Cr or YUV) on the TV.
CIf your TV accepts progressive signals, proceed to ‘Getting Started - Step 5: Setting up Progressive Scan feature’ for detailed progressive feature setup.
Helpful Hint:
–If your TV does not support Progressive Scan, you will not be able to view the picture. Press and hold OPEN/CLOSE button, and press ‘1’ to deactivate progressive scan.
Step 4: Connecting the FM/ AM antennas
A Connect the supplied AM loop antenna
to the AM jack. Place the AM loop antenna on a shelf, or attach it to a stand or wall.
B Connect the supplied FM antenna to the FM jack. Extend the FM antenna and fix its ends to the wall.
For better FM stereo reception, connect an external FM antenna (not supplied).
Helpful Hints:
–Adjust the position of the antennas for optimal reception.
–Position the antennas as far away as possible from your TV, VCR or other radiation source to prevent any unwanted interference.
TIPS: Before making or changing any connections, make sure that all the devices are disconnected from the power outlet.
16