
MCM760 specifications
The Philips MCM760 is a compact audio system that showcases the brand's commitment to delivering high-quality sound in a stylish, space-efficient design. This model is a perfect blend of modern technology and user-friendly features, making it suitable for both casual listeners and audiophiles alike.One of the main features of the MCM760 is its digital sound processing technology, which ensures that the audio output is both clear and powerful. The system includes a built-in CD player, providing versatility for those who enjoy traditional media formats. Additionally, the MCM760 supports various audio playback options, allowing users to listen to their favorite music through USB ports or auxiliary inputs, accommodating modern devices and various file formats.
The MCM760 stands out with its integrated FM/AM radio tuner, giving users access to a wide range of radio stations. With a digital tuning system, users benefit from precise frequency adjustments and enhanced reception quality. The system also features preset station memory functionality, enabling quick access to favorite radio stations.
Another significant characteristic of this model is its impressive power output. With dual speaker construction, the MCM760 produces rich, dynamic sound across various genres of music. The speakers are specifically designed for optimal bass response and clear highs, ensuring an immersive listening experience.
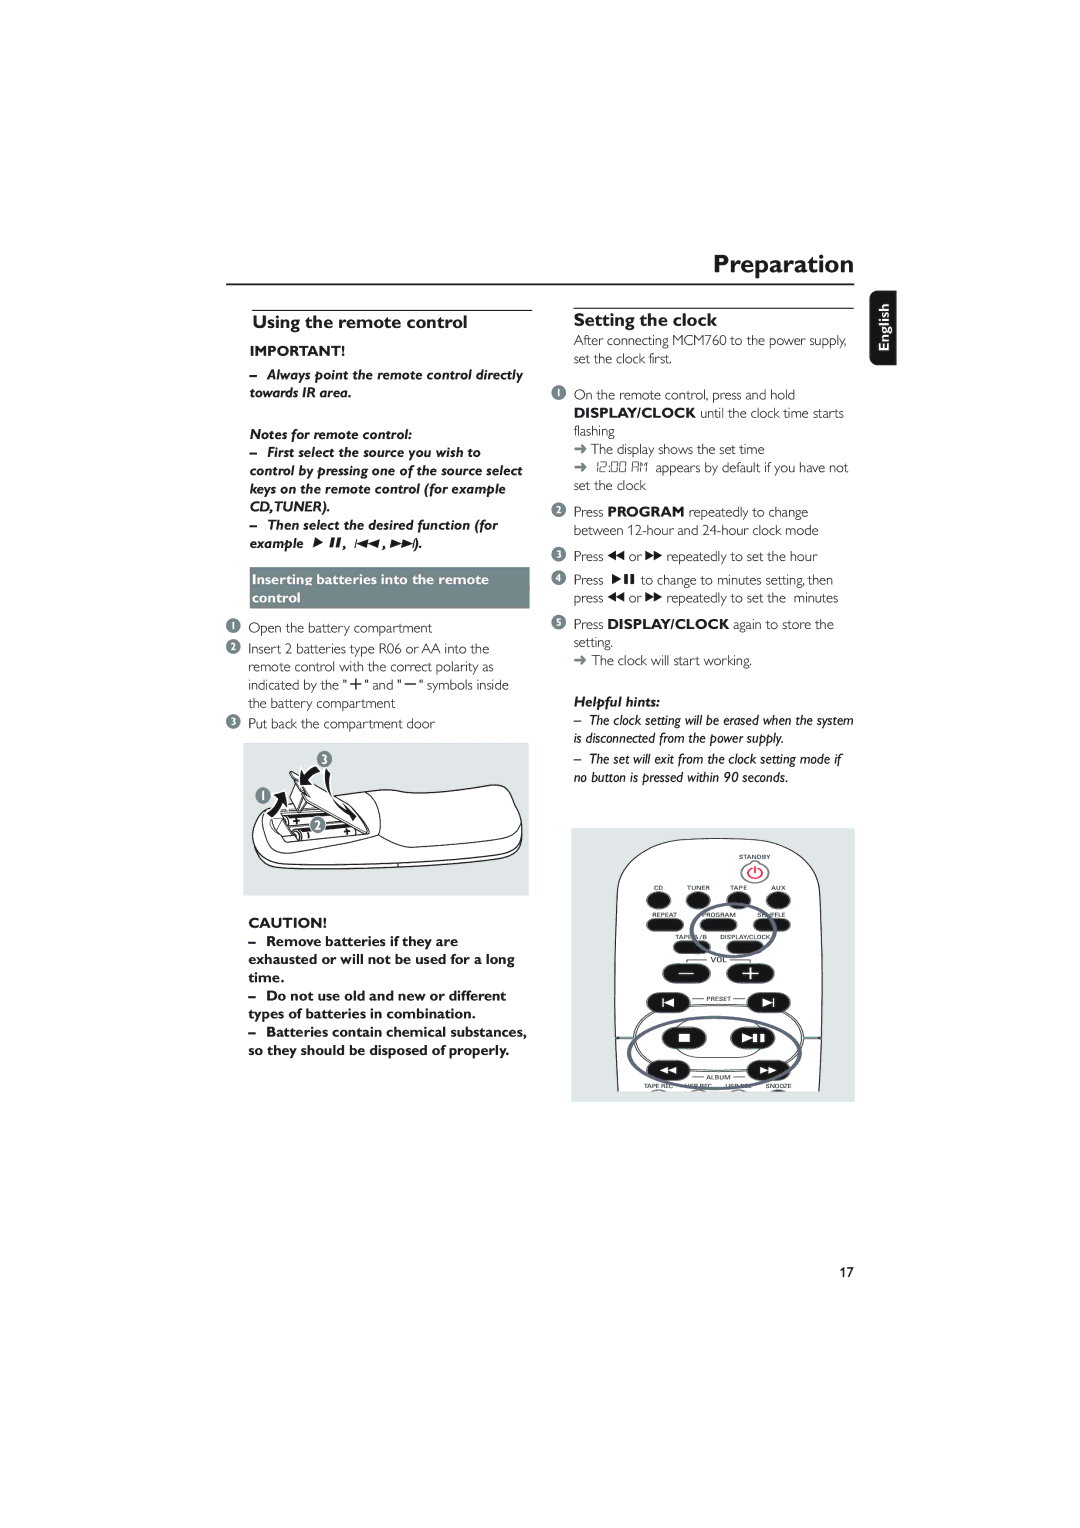
User convenience is further enhanced with the inclusion of a remote control, allowing users to operate the system from a distance with ease. The intuitive interface and user-friendly controls simplify navigation through different modes and settings, which is particularly appealing for those who may not be tech-savvy.
In addition to audio playback, the MCM760 is designed with an appealing aesthetic, featuring a sleek and contemporary look that fits seamlessly into any living space. Its compact size makes it easy to place in various locations, from living rooms to bedrooms or offices.
Overall, the Philips MCM760 exemplifies a well-rounded audio solution, combining modern technology with practical features. Its ability to play multiple formats, along with its high-quality sound and user-friendly design, makes it a valuable addition to any music lover's collection. Whether for personal enjoyment or entertaining guests, the MCM760 proves itself as a versatile and reliable audio system.