3 Initial Operation
Connect power supply / charge battery
CAUTION!
Mains Voltage at the Site of Installation!
Check whether the mains voltage of the power supply matches the mains voltage avail- able at the setup location.
1Insert the small plug of the power supply into the socket on the rear side of your device.
2Plug the power supply into the mains.
3During the charging process, the indicator light on the top of the device will be red. When the battery is fully charged, it will turn green.
4Charge the
Initial Installation
1Switch the device on using the on/off switch on the side.
2Turn the device towards an appropriate projection surface or wall at a distance of at least 0,2m and at most 3m. Make sure the projector is in a secure position.
3Use the focus wheel on the top to adjust the image sharpness.
4Select the desired menu language using ¡/¢.
5Confirm with à.
Notice
The main menu appears instead of the language selection
The device has already been installed. In order to change the menu language, pro- ceed as follows:
1Select with the navigation keys Settings.
2 Confirm with à.
3 Select using ¡/¢ Language.
4 Confirm using à.
5 Select the desired language with ¡/¢.
6 Confirm with à.
7 You can exit with ¿.
Installing or Changing the Batteries of the Remote Control
DANGER!
Risk of explosion with incorrect type of batteries
Use only batterytype:CR 2025.
CAUTION! RISK OF EXPLOSION IF BAT- TERY IS REPLACED BY ONE OF AN INCORRECT TYPE.
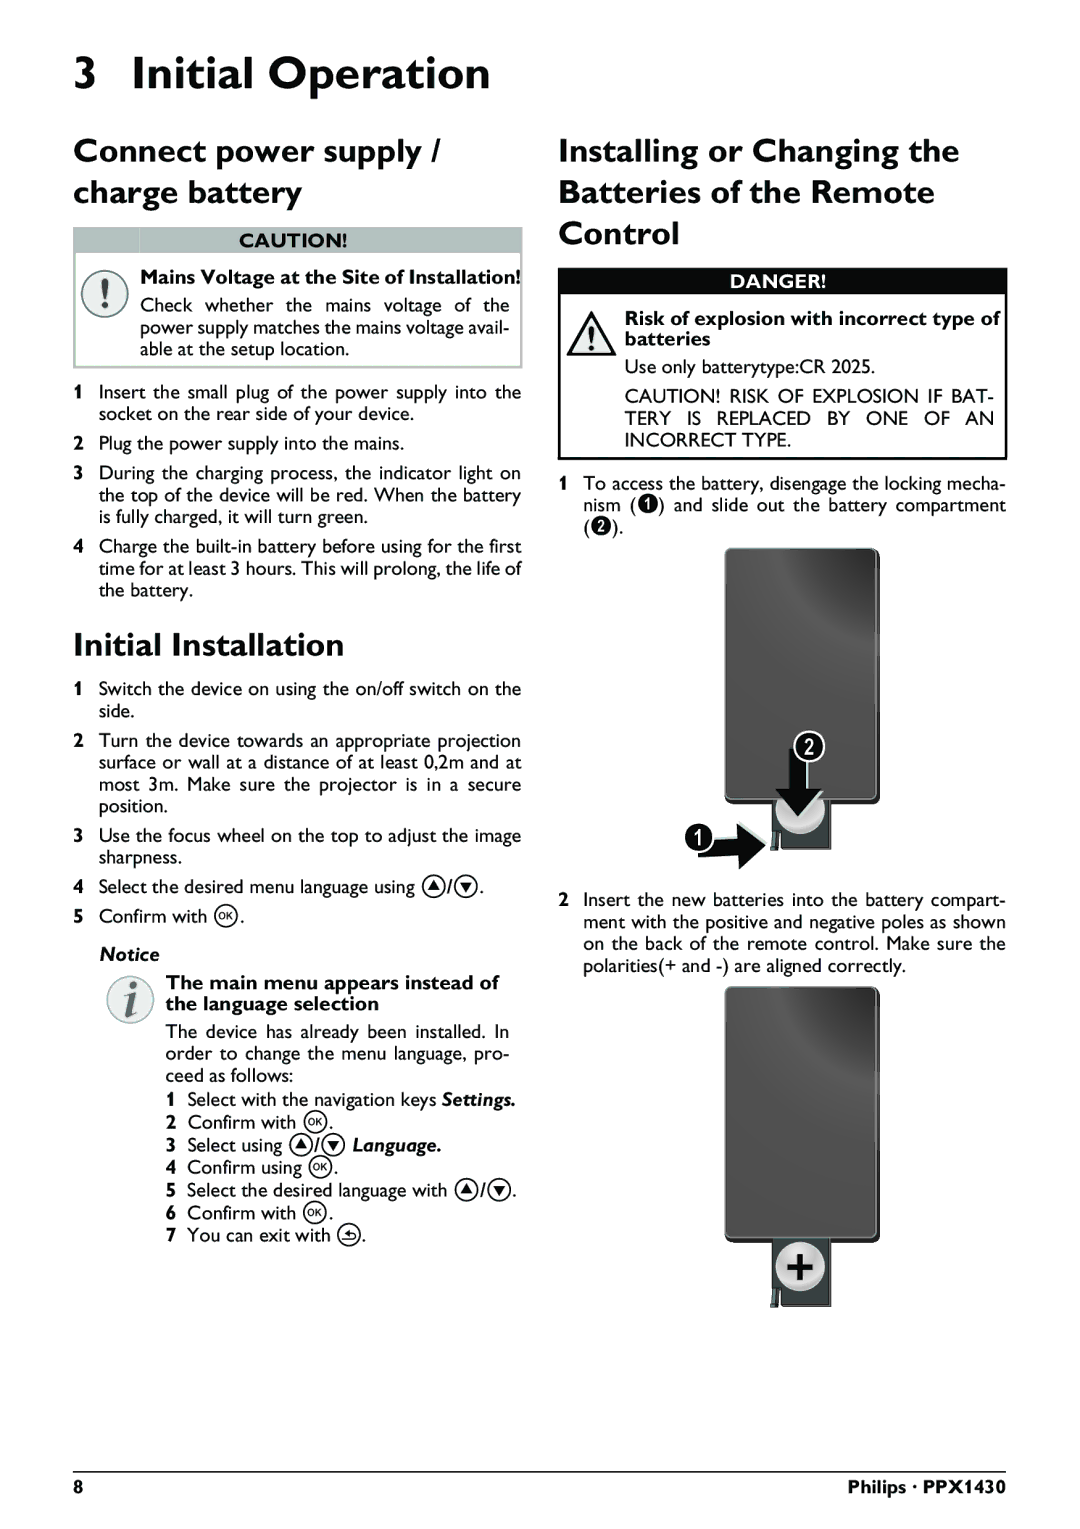
1To access the battery, disengage the locking mecha- nism (‚) and slide out the battery compartment (ƒ).
2Insert the new batteries into the battery compart- ment with the positive and negative poles as shown on the back of the remote control. Make sure the polarities(+ and
8 | Philips · PPX1430 |