Remote control operation
Switching the input signal
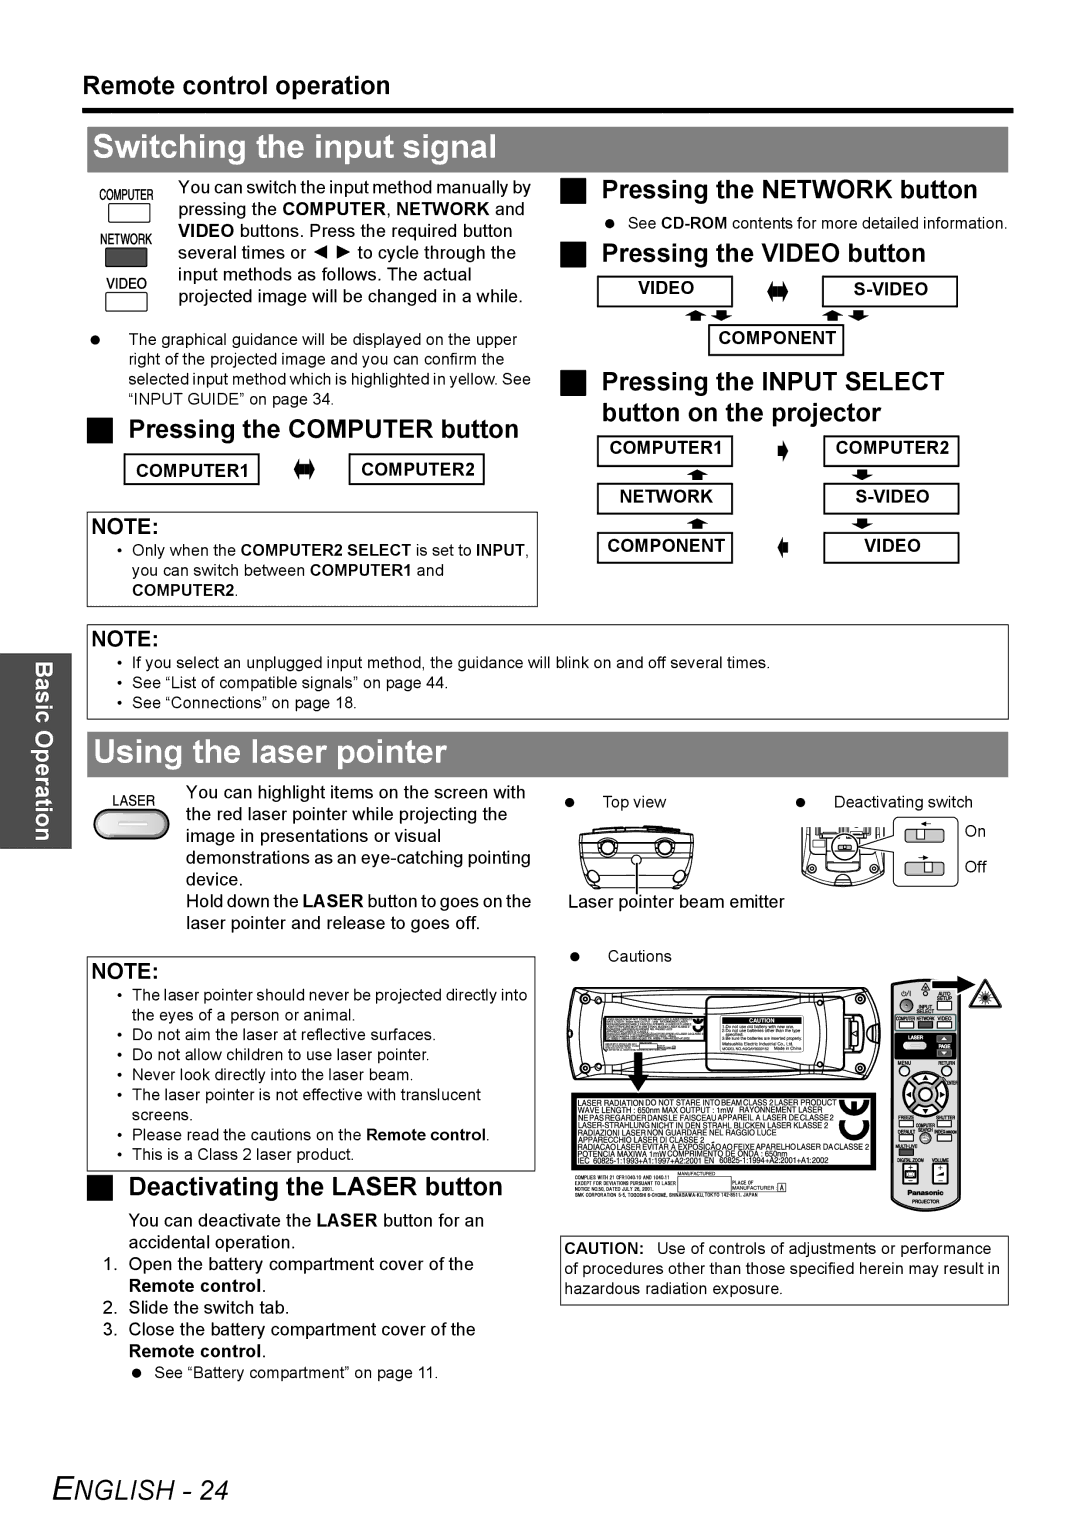
You can switch the input method manually by pressing the COMPUTER, NETWORK and VIDEO buttons. Press the required button several times or I H to cycle through the input methods as follows. The actual projected image will be changed in a while.
The graphical guidance will be displayed on the upper right of the projected image and you can confirm the selected input method which is highlighted in yellow. See “INPUT GUIDE” on page 34.
Pressing the COMPUTER button
COMPUTER1 |
|
|
| COMPUTER2 |
|
|
| ||
|
|
|
Pressing the NETWORK button
See
Pressing the VIDEO button
VIDEO |
|
|
|
|
|
| ||||||
|
|
| ||||||||||
|
|
|
|
|
|
|
|
|
|
|
|
|
|
|
|
|
|
|
|
|
|
|
|
|
|
COMPONENT
Pressing the INPUT SELECT button on the projector
COMPUTER1 |
|
| COMPUTER2 | ||||
|
| ||||||
|
|
|
|
|
|
|
|
|
|
|
|
|
|
|
|
|
|
|
|
|
|
|
|
Basic
|
| NETWORK |
|
|
| ||||
NOTE: |
|
|
|
|
|
|
|
|
|
| COMPONENT |
|
|
| VIDEO | ||||
• Only when the COMPUTER2 SELECT is set to INPUT, |
|
|
|
| |||||
|
|
| |||||||
|
|
| |||||||
you can switch between COMPUTER1 and |
|
|
|
|
|
|
|
|
|
|
|
|
|
|
|
|
|
| |
COMPUTER2. |
|
|
|
|
|
|
|
|
|
|
|
|
|
|
|
|
|
|
|
NOTE:
•If you select an unplugged input method, the guidance will blink on and off several times.
•See “List of compatible signals” on page 44.
•See “Connections” on page 18.
Operation
Using the laser pointer
You can highlight items on the screen with the red laser pointer while projecting the image in presentations or visual demonstrations as an
Hold down the LASER button to goes on the laser pointer and release to goes off.
NOTE:
•The laser pointer should never be projected directly into the eyes of a person or animal.
•Do not aim the laser at reflective surfaces.
•Do not allow children to use laser pointer.
•Never look directly into the laser beam.
•The laser pointer is not effective with translucent screens.
•Please read the cautions on the Remote control.
•This is a Class 2 laser product.
Deactivating the LASER button
You can deactivate the LASER button for an accidental operation.
1.Open the battery compartment cover of the Remote control.
2.Slide the switch tab.
3.Close the battery compartment cover of the Remote control.
See “Battery compartment” on page 11.
Top view | Deactivating switch |
| On |
| Off |
Laser pointer beam emitter
Cautions
CAUTION: Use of controls of adjustments or performance of procedures other than those specified herein may result in hazardous radiation exposure.
