Setting the Clock 15
Follow the steps below to set your VCR’s clock. Make sure:
●The VCR is on and the VCR light appears on the display panel. (If it does not, press the VCR/TV button once.)
●You make each entry within 60 seconds of the previous entry.
1 |
|
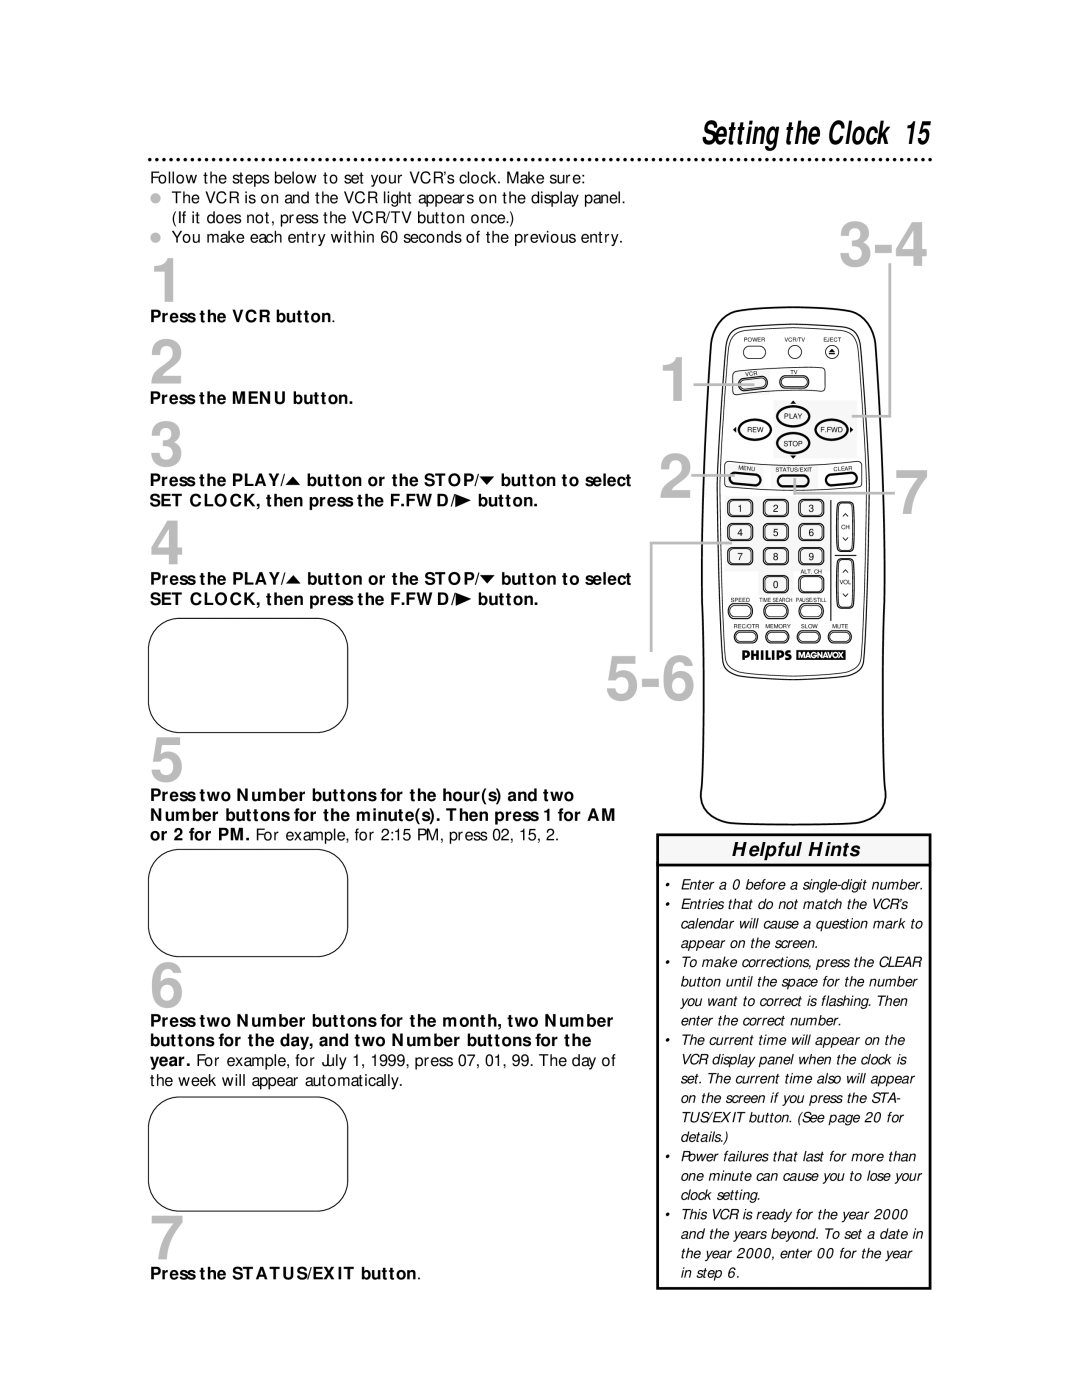
Press the VCR button. |
|
2 | 1 |
Press the MENU button. | |
3 |
|
POWER VCR/TV EJECT
VCR | TV |
PLAY
REWF.FWD
STOP
Press the PLAY/o button or the STOP/p button to select |
|
|
|
2 |
| ||
SET CLOCK, then press the F.FWD/B button. |
| ||
4 |
|
|
|
|
|
| |
Press the PLAY/o button or the STOP/p button to select |
|
|
|
MENU | STATUS/EXIT |
1 2 3
4 5 6
7 8 9
ALT. CH
0
CLEAR
CH
VOL
7
SET CLOCK, then press the F.FWD/B button. |
5
SPEED TIME SEARCH PAUSE/STILL
REC/OTR MEMORY SLOW MUTE
Press two Number buttons for the hour(s) and two Number buttons for the minute(s). Then press 1 for AM or 2 for PM. For example, for 2:15 PM, press 02, 15, 2.
6
Press two Number buttons for the month, two Number buttons for the day, and two Number buttons for the year. For example, for July 1, 1999, press 07, 01, 99. The day of the week will appear automatically.
7
Press the STATUS/EXIT button.
Helpful Hints
•Enter a 0 before a single-digit number.
•Entries that do not match the VCR’s calendar will cause a question mark to appear on the screen.
•To make corrections, press the CLEAR button until the space for the number you want to correct is flashing. Then enter the correct number.
•The current time will appear on the VCR display panel when the clock is set. The current time also will appear on the screen if you press the STA- TUS/EXIT button. (See page 20 for details.)
•Power failures that last for more than one minute can cause you to lose your clock setting.
•This VCR is ready for the year 2000 and the years beyond. To set a date in the year 2000, enter 00 for the year in step 6.
