HOW TO USE THE DNR (NOISE REDUCTION) CONTROL
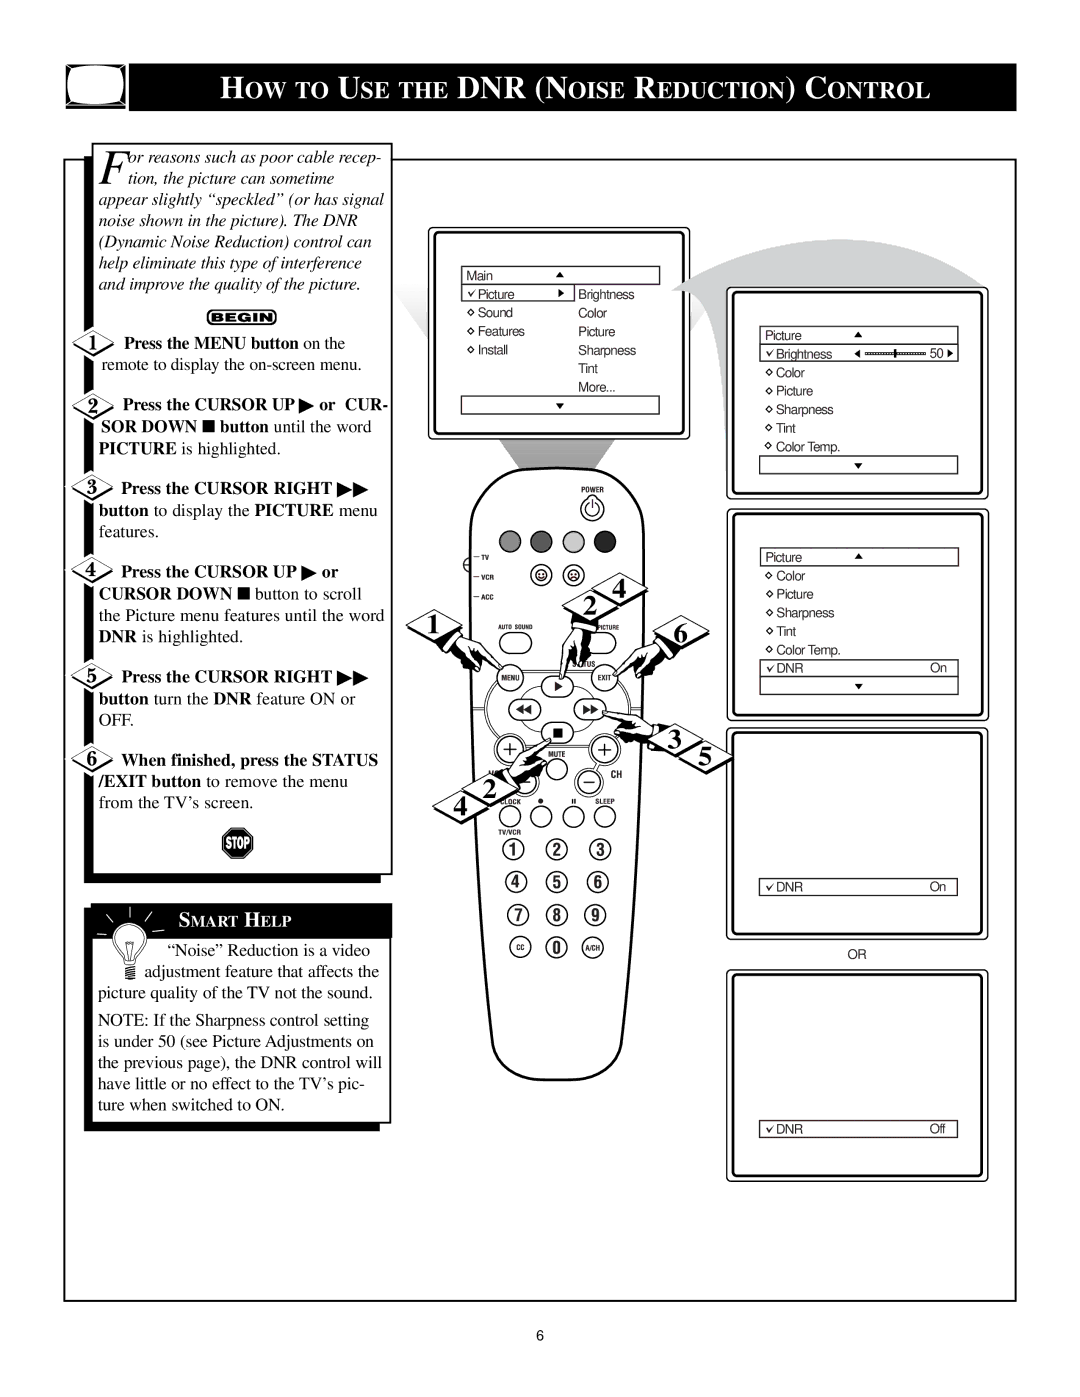
or reasons such as poor cable recep- |
|
|
|
|
|
Ftion, the picture can sometime |
|
|
|
|
|
appear slightly “speckled” (or has signal |
|
|
|
|
|
noise shown in the picture). The DNR |
|
|
|
|
|
(Dynamic Noise Reduction) control can |
|
|
|
|
|
help eliminate this type of interference | Main |
|
|
|
|
and improve the quality of the picture. |
|
|
|
| |
Picture | Brightness |
|
|
| |
|
|
|
| ||
| Sound | Color |
|
|
|
Press the MENU button on the | Features | Picture |
| Picture |
|
Install | Sharpness |
|
| ||
| Brightness | 50 | |||
remote to display the |
| ||||
| Tint |
| Color |
| |
|
| More... |
|
| |
Press the CURSOR UP ▶ or CUR- |
|
| Picture |
| |
|
|
|
| ||
|
|
| Sharpness |
| |
SOR DOWN ■ button until the word |
|
|
| Tint |
|
PICTURE is highlighted. |
|
|
| Color Temp. |
|
Press the CURSOR RIGHT ▶▶ |
|
|
|
|
|
button to display the PICTURE menu |
|
|
|
|
|
features. |
|
|
|
|
|
Press the CURSOR UP ▶ or |
|
|
| Picture |
|
| 4 |
| Color |
| |
CURSOR DOWN ■ button to scroll |
|
| Picture |
| |
the Picture menu features until the word | 1 | 2 | 6 | Sharpness |
|
DNR is highlighted. |
| Tint |
| ||
|
| Color Temp. |
| ||
|
|
|
|
| |
Press the CURSOR RIGHT ▶▶ |
|
|
| DNR | On |
|
|
|
|
| |
button turn the DNR feature ON or |
|
|
|
|
|
OFF. |
|
| 3 5 |
|
|
When finished, press the STATUS | L |
| Picture |
| |
/EXIT button to remove the menu |
|
|
| ||
2 |
|
|
| ||
from the TV’s screen. |
|
| Color |
| |
4 |
|
| Picture |
| |
|
|
|
| ||
|
|
|
| Sharpness |
|
|
|
|
| Tint |
|
|
|
|
| Color Temp. |
|
|
|
|
| DNR | On |
SMART HELP |
|
|
|
|
|
“Noise” Reduction is a video |
|
|
|
| OR |
adjustment feature that affects the |
|
|
|
|
|
picture quality of the TV not the sound. |
|
|
|
|
|
NOTE: If the Sharpness control setting |
|
|
| Picture |
|
is under 50 (see Picture Adjustments on |
|
|
| Color |
|
the previous page), the DNR control will |
|
|
| Picture |
|
|
|
| Sharpness |
| |
have little or no effect to the TV’s pic- |
|
|
|
| |
|
|
| Tint |
| |
ture when switched to ON. |
|
|
|
| |
|
|
| Color Temp. |
| |
|
|
|
| DNR | Off |
|
| 6 |
|
|
|