Annunciator Module
the panel.
Panel |
|
| |
locking | Allen |
| |
side | Rear of | ||
screw | |||
panel |
| Module |
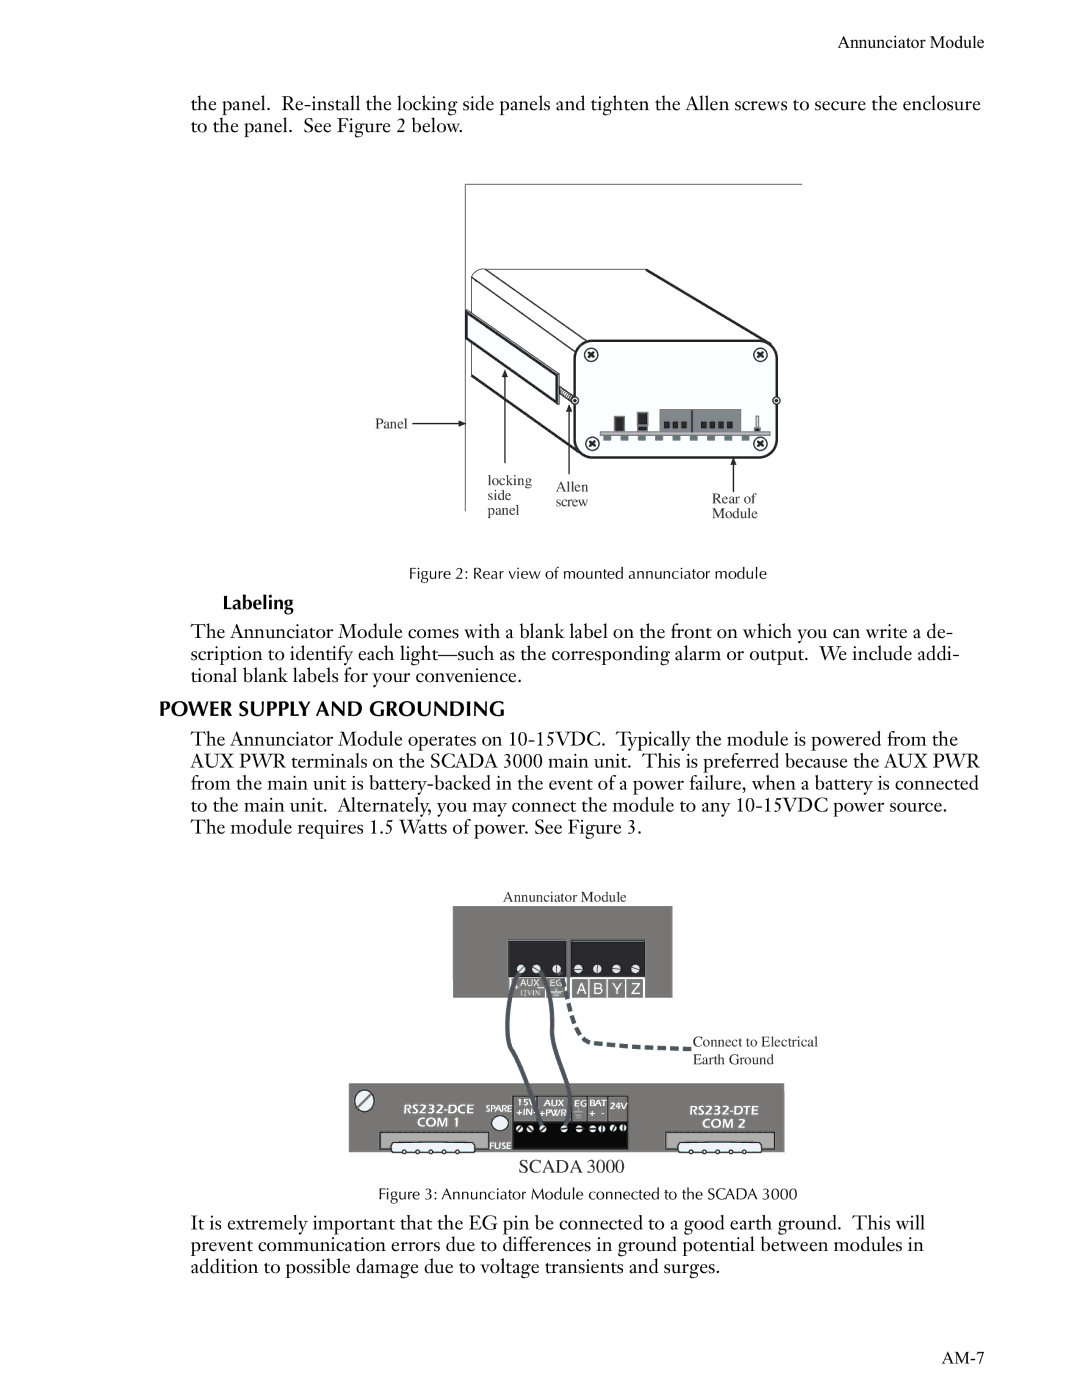
Figure 2: Rear view of mounted annunciator module
Labeling
The Annunciator Module comes with a blank label on the front on which you can write a de- scription to identify each
POWER SUPPLY AND GROUNDING
The Annunciator Module operates on
Annunciator Module
+AUX | EG | A B Y Z |
12VIN |
| |
|
| 4 |
Connect to Electrical
Earth Ground
|
|
|
|
|
|
|
|
|
SPARE | 15V | AUX | EG | BAT | 24V | |||
+IN- | +PWR- |
|
|
| + - | |||
|
|
|
| |||||
COM 1 |
|
|
|
|
|
|
|
|
|
|
|
|
|
|
|
| |
![]()
![]()
![]() FUSE
FUSE
SCADA 3000
COM 2
Figure 3: Annunciator Module connected to the SCADA 3000
It is extremely important that the EG pin be connected to a good earth ground. This will prevent communication errors due to differences in ground potential between modules in addition to possible damage due to voltage transients and surges.