HTZ363DVD
Thank you for buying this Pioneer product
Location bottom of the unit
Class Laser Product
Contents
Initial Settings menu
Parental Lock About DivX VOD content
Components Recording mode Connecting the S-videooutput
Other connections
Controls and displays
Controls and displays Chapter
Front panel
Controls and displays Remote control
Cursor, Enter and tuning buttons
Function select buttons
Number buttons, CLEAR, Display and DVD controls
Volume +/- Adjusts the volume
Controls and displays
Playback controls
TV Control buttons
Tuner indicators
Controls and displays Display
RPT and RPT-1
Character display
Home theater sound setup
Using the Auto Mcacc setup for optimal surround sound
Getting started
Getting started Chapter
Using the on-screen displays
If the system is off, press STANDBY/ON to turn the power on
Getting started
Place the microphone at your normal listening position
Adjust the volume. Use the Volume control
Playing discs
Basic playback controls
Tip
Listening to the radio
Resume and Last Memory
DVD-Video disc menus
Video CD/Super VCD PBC menus
Listening to station presets
Listening to other sources
Improving poor FM reception
Reducing AM reception noise
Auto listening mode
Dolby Pro Logic II Music settings
Listening to your system
Listening to your system Chapter
Listening to your system Using Front Stage Surround Advance
Using Advanced Surround
Listening with headphones
Listening in stereo
Using the Sound Retriever
Using the Tone controls
Listening to your system
Enhancing dialog
Disc playback features
Disc playback features
Select a view option
Select the thumbnail image for what you want to play
Using Playlists
Programming playlists
Use Enter to navigate
Press Play List 1, 2 or
Using repeat play
Using random play
Looping a section of a disc
Listening to playlists
Creating a program list
Other functions available from the program menu
Select ‘Random’ then select an option
To play the program list, press play
Disc playback features Searching a disc
Switching subtitles
Switching language/audio Channels
Zooming the screen
Disc playback features Switching camera angles
Displaying disc information
Using the USB interface
USB playback
USB playback Chapter
Basic playback controls
USB playback Scanning files
Browsing files with the Navigator
Press Menu then use Enter to navigate
Surround sound settings
Surround sound settings Chapter
Using the Setup menu
Video Adjust menu
Video Adjust menu Chapter
Video Adjust menu
Make settings using
Initial Settings menu
Initial Settings menu Chapter
Using the Initial Settings menu
Video Output settings
Initial Settings menu
Language settings
Display settings
Options settings
Registering a new password
Changing your password
Setting/changing the Parental Lock
About DivX VOD content
Setting/changing the Country/Area code
Playing DivX VOD content
Displaying your DivX VOD registration code
Connecting external antennas
Connecting auxiliary audio components
Recording mode
Other connections
Other connections Connecting the S-video output
About progressive scan video
Other connections Connecting using Hdmi
Switching the Hdmi audio setting
Resetting the Hdmi connection
About Hdmi
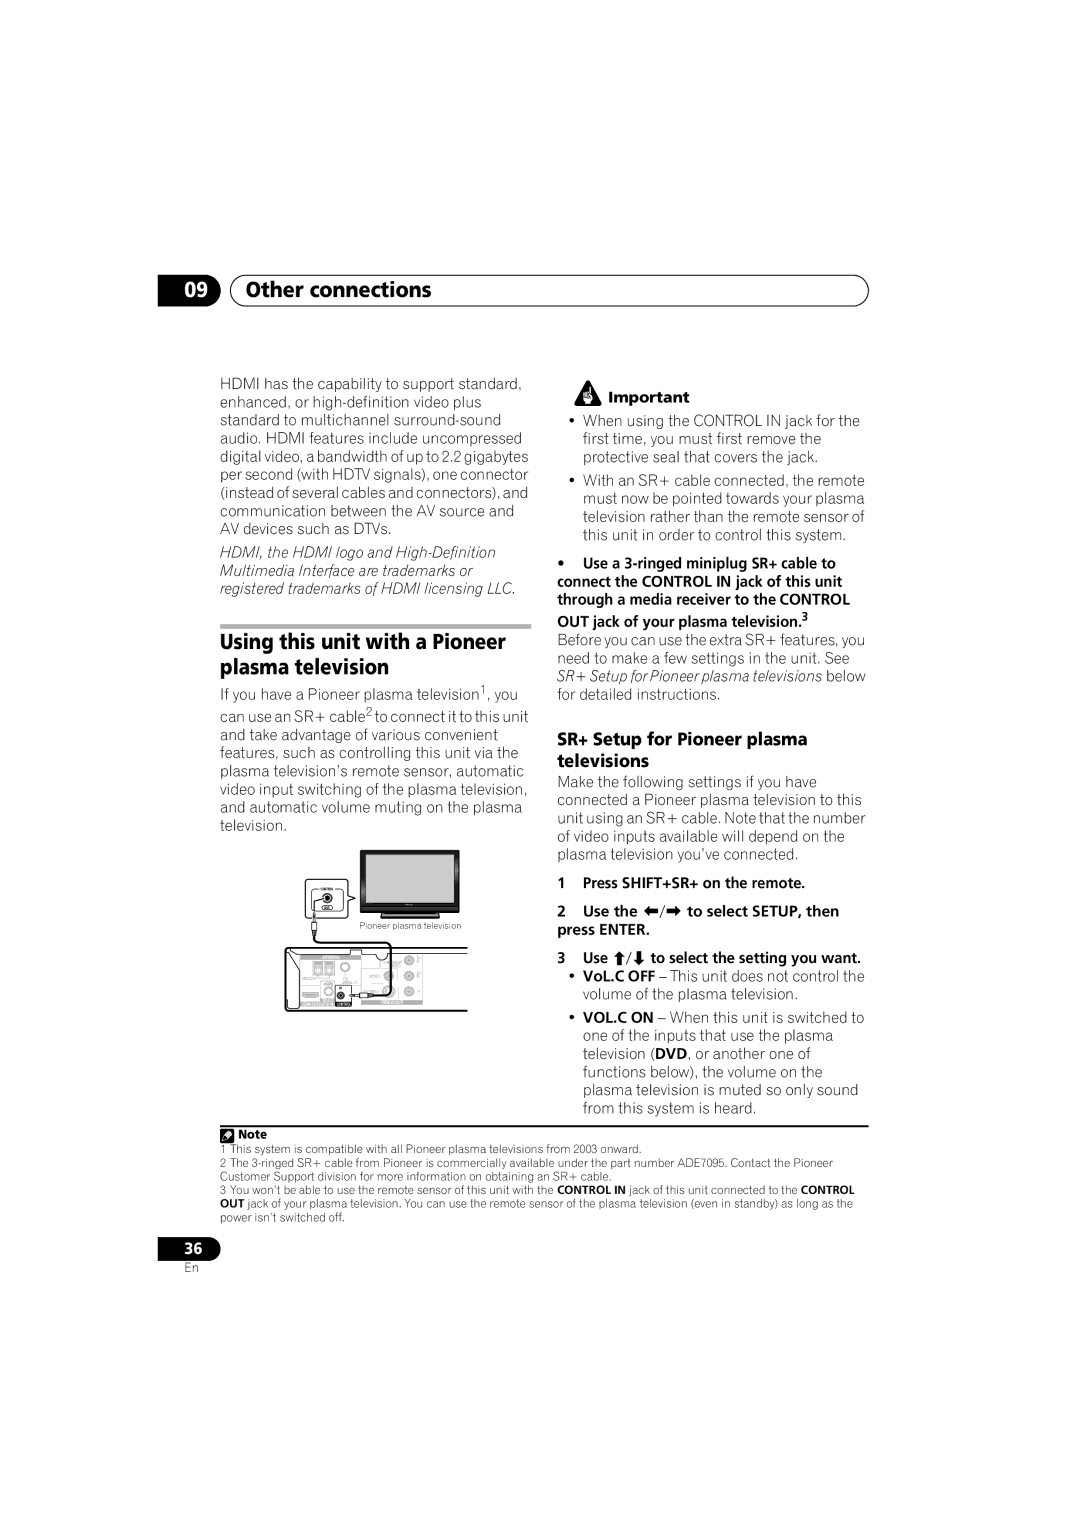
Using this unit with a Pioneer plasma television
SR+ Setup for Pioneer plasma televisions
Press SHIFT+SR+ on the remote Use To select SETUP, then
Other connections
Switching on the SR+ mode
When youre finished, press ENTER.2
About control out connections
Optional system settings
Setting the sleep timer
Additional information
Additional information Chapter
Disc/content format playback compatibility
Additional information Dimming the display
Disc compatibility table
About DualDisc playback
Additional information
About DivX
About DVD+R/DVD+RW compatibility
DivX video compatibility
Using and taking care of discs
About MPEG-4 AAC
About WMA
Displaying DivX subtitle files
Installation and maintenance
Hints on installation
Cleaning the pickup lens
Problems with condensation
Screen sizes and disc formats
Moving the system unit
Additional information Troubleshooting
General
DVD/CD/Video CD player
SND. Demo shows
Tuner
USB connection
Hdmi connection
Error Messages
ProblemRemedy
Resetting the system
Using the language code list
Additional information Language code list
Country/Area code list
Language Language code letter, Language code
Country/Area, Country/Area code, Country/Area code letter
Additional information Specifications
DV363 Speaker system
DV2T Speaker system
DV4T Speaker system
DV2SW Speaker system
Surround speakers
感謝您購買本台先鋒產品。
Class
USB 播放
前面板 遙控器 顯示屏
家庭劇院音效設置 使用自動 Mcacc 設置功能,以產生最佳的
使用 「設定」選單
08 「初始設置」選單
09 其他接線
10 其他資訊
01 控制與顯示
前面板
10 指示燈
11 遙控感應器 12 顯示屏
控制與顯示 遙控器
游標按鍵,ENTER 及調諧按鍵
功能選取按鍵
音效控制
Volume +
播放控制
TV Control 按鍵
Playlist 按鍵
控制與顯示 顯示屏
10 kHz/MHz
RPT 及 RPT-1
調諧器指示燈
請視房間的大小及特性選擇使用以下的設定選 項:1
設置好揚聲器後,請參閱下列 使用自動 Mcacc 設置功能,以產生最佳的環繞聲效果 完成您的環繞音效設定。
重要提示
測試音量很大,但在設定期間請勿調低音 量,以免降低最佳補正品質。
開始操作
使用在屏顯示畫面 (OSD)
按下 SHIFT+MCACC。
02 開始操作
碟片播放
基本播放控制
聆聽收音機
恢復播放及最終記憶播放
DVD-Video 碟片選單
VCD/ 超級 VCD PBC 選單
聆聽其他來源
改善 FM 接收不良
抑制 AM 接收雜訊
記憶電台
聆聽您的系統
自動聆聽模式
以環繞聲聆聽
Dolby Pro Logic II Music 設定值
03 聆聽您的系統 使用 「前置環繞聲進階」功能
以立體聲聆聽
使用 「先進環繞聲」功能
戴上耳機聆聽
使用 「聲音修正器」功能
加強對白
使用 「音調控制」功能
加重低音音量
04 碟片播放功能
碟片掃描
格進/格退播放
播放 Jpeg 幻燈片秀
碟片播放功能
使用 「碟片導向」瀏覽 DVD 或 VCD/ 超級 VCD 碟片
播放期間,按下 Home Menu 並從在屏 選單中選取 「碟片導向」。
選擇檢視選項。
DivX 視頻及 Jpeg 等檔案
使用播放清單
製作播放清單
選取想要加到播放清單上的檔案。
循環播放碟片某個片段
使用重複播放功能
使用隨機播放功能
聆聽播放清單
建立程序編輯清單
程序編輯選單中其他可用的功能
碟片播放功能 搜索碟片
切換字幕
切換對白語言/音頻聲道
放大畫面
04 碟片播放功能 切換拍攝角度
顯示碟片資訊
播放期間(或暫停時),按下 SHIFT+ANGLE 以切換角度。
要顯示/切換/隱藏顯示的資訊,可連續按
USB 播放
USB 播放
使用 USB 介面
基本播放控制
掃描檔案
利用 「導覽器」瀏覽檔案
播放期間,按下 或 。
按下 MENU,然後使用
按下 SHIFT+SETUP 並使用
SW 重低音
DRC MID 適中設定值
07 「視頻調整」選單
「視頻調整」選單
「視頻調整」的功能畫面中,您可以調整能 影響影像呈現的設定值。
色度等級 可調色彩呈現的飽和度 (-9至 +9) 使用 來調整亮度、對比度、色調及色度 等級等設定值。
按下 DVD/CD。
所有設定值及選項將會在後續的內容中詳加說 明。1
顯示屏設定值
成人鎖定
08 「初始設置」選單
關於 DivX VOD 內容
播放 DivX VOD 內容
其他接線
連接外部天線
連接輔助音頻設備
錄製模式
使用色差視頻輸出連接
關於逐行掃描視頻
如果您的電視機上有色差視頻輸入,您可以使 用這些端子代替標準視頻輸出來連接本系統至
您的電視機上。
其他接線 使用 Hdmi 連接
關於 Hdmi
OUT,然後按下 ENTER。
Audio OFF 關閉 Hdmi 音頻
09 其他接線
本機與先鋒電漿電視的組合運用
先鋒電漿電視的 SR+ 設置
關於控制輸出連接
完成時,請按下 ENTER。2
按下遙控器上的 SHIFT+SR+ 鍵。
DTS CD 設定值
Demo on 可開啟展示功能。 Demo OFF 可關閉展示功能。
SLP OFF 取消睡眠定時
按下 SHIFT+SETUP 並使用 DIMMER,然後按下 ENTER。
碟片相容性參照表
關於 DualDisc 的播放
認並退出。
10 其他資訊
關於 DVD+R/DVD+RW 相容性
關於 DivX
DivX 視頻相容性
其他資訊
碟片的使用及維護
關於 MPEG-4 AAC
關於 WMA
安裝及保養
清潔讀寫頭時
安裝提示
水氣凝結問題
其他資訊 畫面大小及碟片格式
CinemaScope 寬螢幕電影1 都可以。
10 其他資訊 故障排除
一般問題
Traylock ,同時無
DVD/CD/VCD 播放器
現下列訊息:非兼容碟片區域碼 /無法播放碟片。
調諧器
USB 連接
資訊,請參閱 第 39 頁的 碟片相容性參照表。
無法辨識 DVD-ROM碟 ‧ 確定 DVD-ROM是採用 UDF bridge 格式錄製。更多關於碟片相容性的資
DVI 及 Hdcp (High Bandwidth Digital Content Protection)相容)。
Hdmi 連接
錯誤訊息
96K
重新設置系統 使用語言代碼清單
配合系統開機按下
STANDBY/ON 並按住
選擇 「其他語言」。
其他資訊 語言代碼清單
國家/地區代碼清單
Esperanto eo
DV363 揚聲器系統
DV2T 揚聲器系統
DV4T 揚聲器系統
DV2SW 揚聲器系統
前置揚聲器
Pioneer Corporation

