PDR-W739 specifications
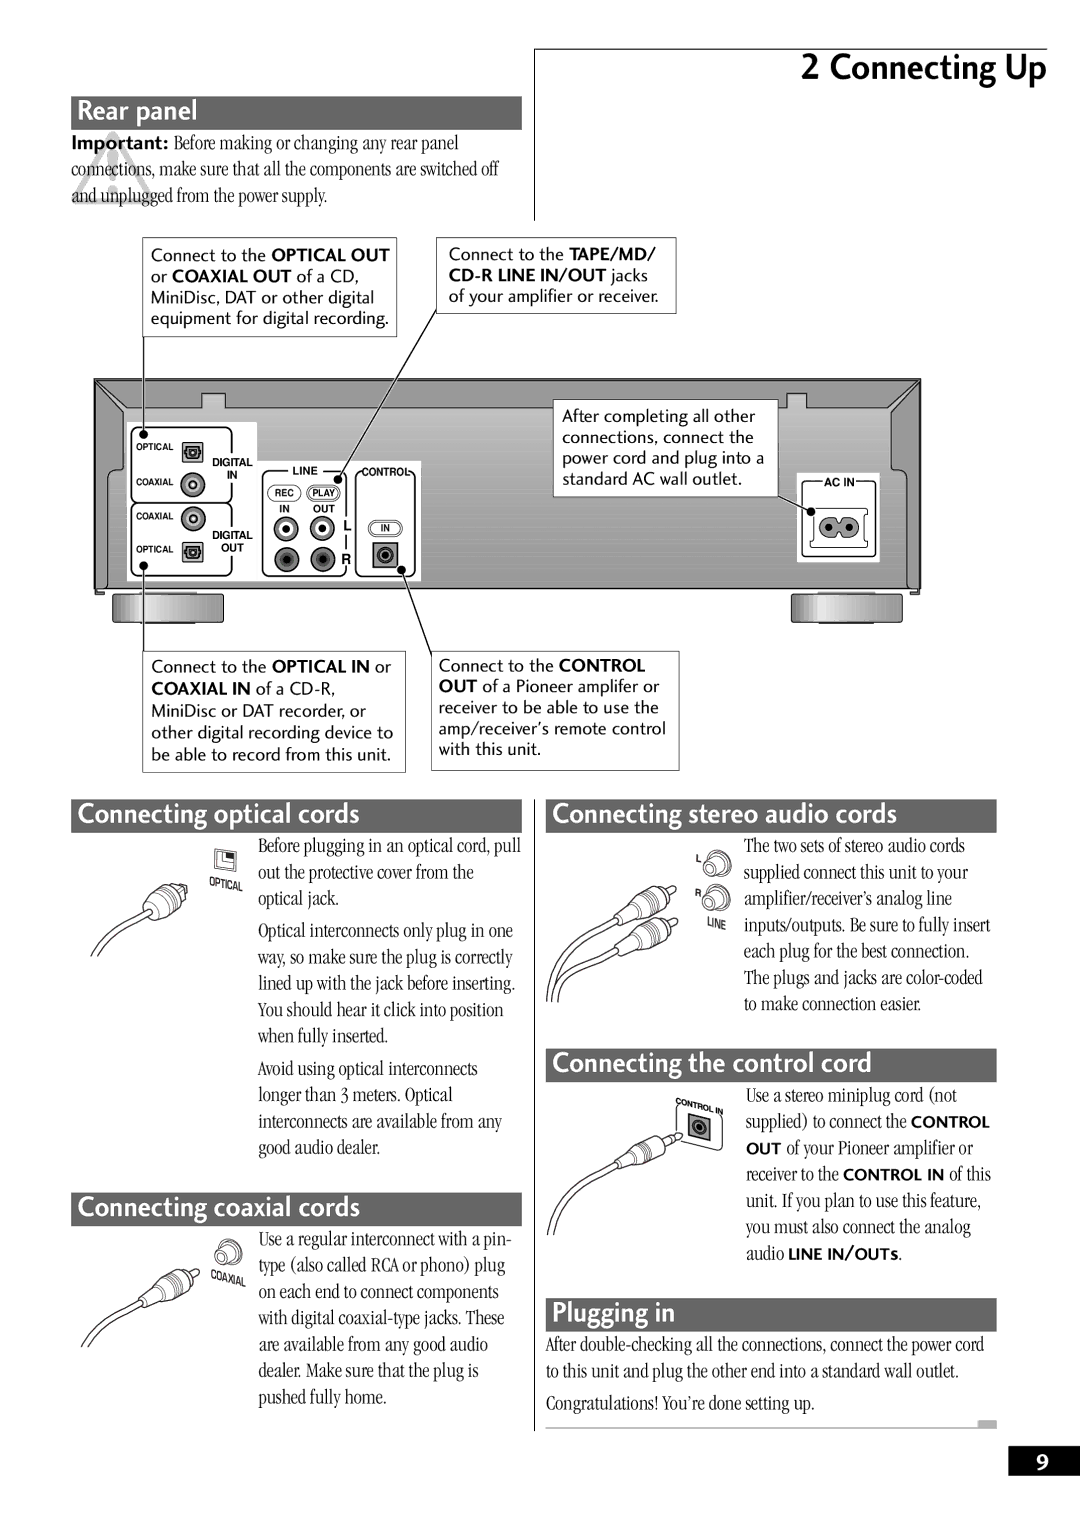
The Pioneer PDR-W739 is a versatile CD recorder that exemplifies the blend of high-quality audio performance and user-friendly features. It was designed to meet the needs of audiophiles and casual listeners alike, providing an excellent solution for recording and playing CDs.One of the most notable features of the PDR-W739 is its ability to record music from a variety of sources. Featuring both analog and digital inputs, the device allows users to connect to other audio equipment, such as turntables and CD players, facilitating a seamless recording process. The PDR-W739 supports several recording formats, including CD-R and CD-RW, allowing users the flexibility to create permanent copies of their favorite albums or to edit and overwrite tracks as needed.
The device is equipped with advanced technologies to enhance recording quality. The built-in Digital Wave System ensures minimal signal loss and maximizes clarity, resulting in recordings that retain the original sound's richness and depth. Additionally, Pioneer's high-quality A/D converters help capture audio signals with remarkable accuracy, maintaining the integrity of the sound through the entire recording process.
Another key characteristic of the PDR-W739 is its ease of use. The front panel is intuitively designed, featuring an easy-to-navigate LCD display that provides useful information, such as track numbers, time remaining, and recording levels. The device also includes an automatic track division feature, which detects silence and creates separate tracks, making it effortless to compile personalized CDs.
The PDR-W739 doesn't just excel in recording, but also offers playback capabilities. Supporting a wide range of CD formats, including CD-DA, CD-R, and CD-RW, the player ensures compatibility with various media. It also features a repeat function and programmable playback options, allowing users to create custom listening experiences.
Build quality is another standout feature of the Pioneer PDR-W739. With a solid construction and a sleek, modern design, it fits well with other audio components while adding an elegant touch to your setup. Its compact size allows for easy integration into entertainment systems, making it a practical choice for home use.
In conclusion, the Pioneer PDR-W739 stands out as a robust CD recorder that combines functionality with high audio fidelity. Its advanced recording technologies, user-friendly features, and solid construction make it an excellent choice for anyone looking to preserve their music collection or create personalized playlists. Whether for serious recording needs or casual listening, the PDR-W739 delivers a reliable and enjoyable audio experience.

