
HTP-330, S-ST330, SX-SW330 specifications
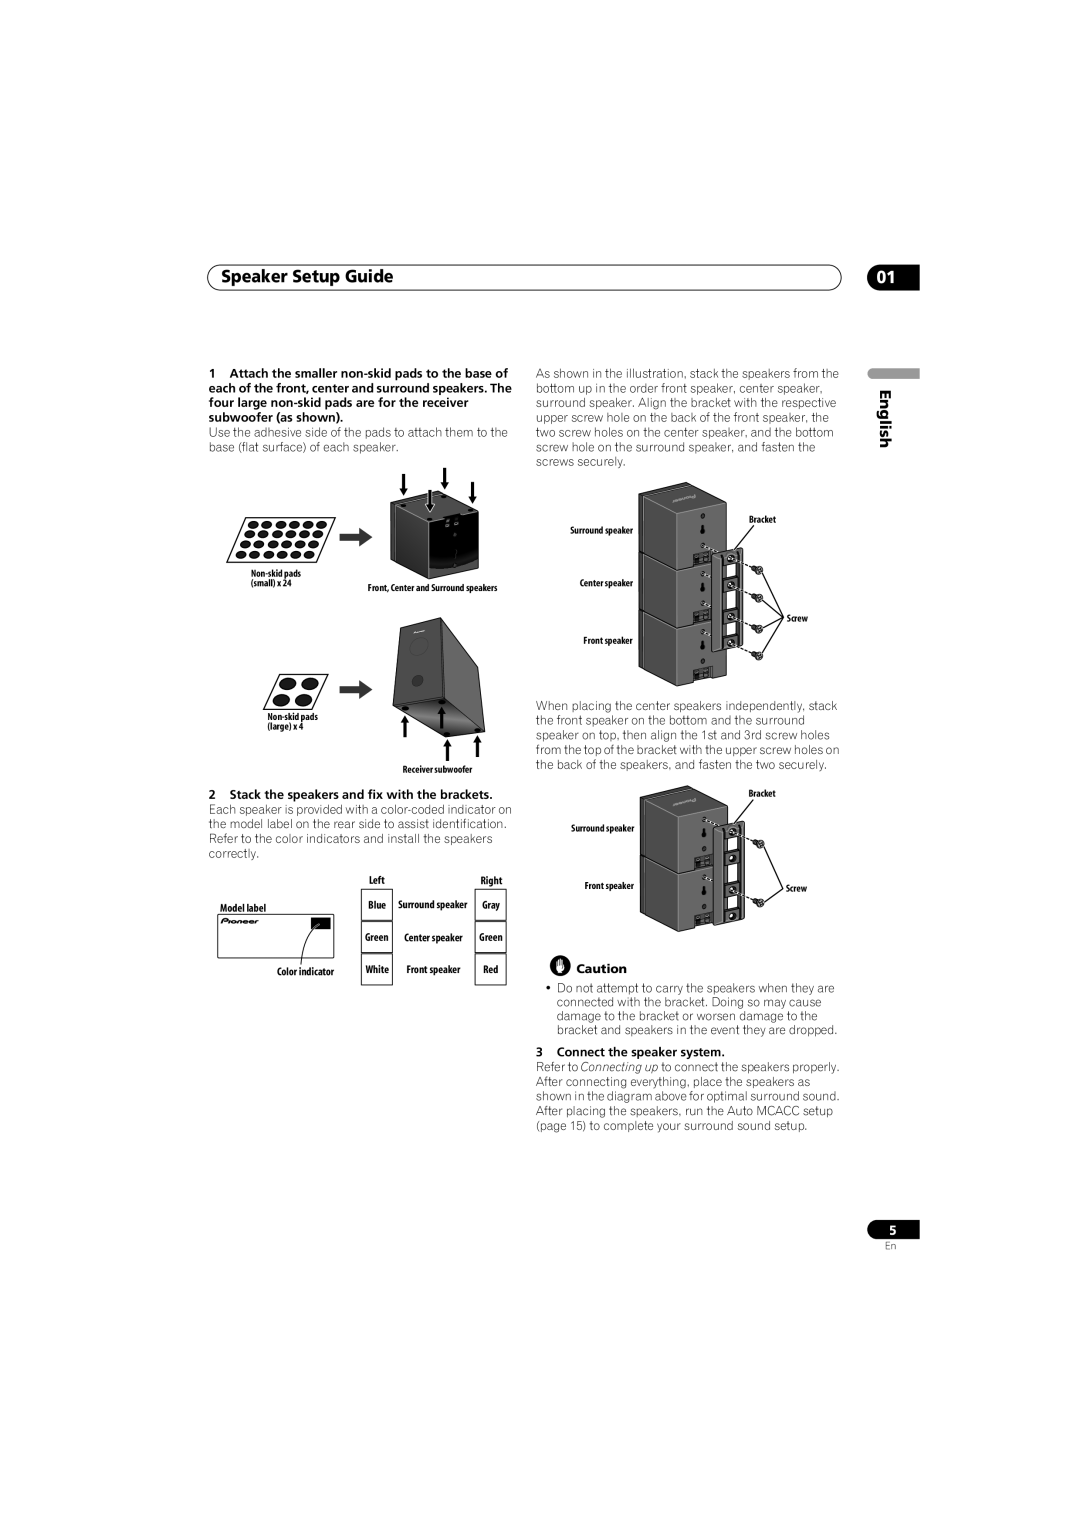
The Pioneer HTP-330, S-ST330, and SX-SW330 represent a sophisticated home theater system designed for audio enthusiasts seeking an immersive sound experience. These units combine cutting-edge technologies with user-friendly functionality, making them ideal for both movie lovers and music aficionados.The HTP-330 is a complete home theater package that includes a receiver, subwoofer, and satellite speakers. One of its standout features is the incorporation of Dolby TrueHD and DTS-HD Master Audio decoding, which ensures lossless audio quality for high-definition video formats. This enables users to experience cinema-like sound right in their living rooms, enhancing the impact of movies and TV shows.
The S-ST330, with its sleek design, offers a stylish addition to any home décor. Featuring multiple amplification channels, it provides an impressive output that fills larger spaces with dynamic sound. The speakers are engineered with high-quality drivers, ensuring clear highs and deep lows, which are essential for a balanced audio experience.
One of the significant technological advancements in this series is the integration of HDMI connectivity. The HTP-330 supports multiple HDMI inputs, allowing seamless switching between various devices, such as gaming consoles, Blu-ray players, and streaming devices. This simplifies the setup process and reduces cable clutter, giving users a more organized home theater environment.
The SX-SW330 subwoofer complements the system with its powerful low-frequency output, providing a solid foundation for music and cinematic soundtracks. With its adjustable crossover frequency and phase control, users can customize the bass response to match their specific preferences and room acoustics.
Another prominent feature is the easy setup process facilitated by auto-calibration technology. The receiver can automatically adjust the speaker settings based on the room’s unique acoustics, saving users time while ensuring optimal sound performance.
Wireless technology is also a hallmark of these components, with options for Bluetooth and Wi-Fi connectivity. This allows users to stream music directly from their smartphones or tablets without the hassle of wires, enhancing convenience and flexibility.
In summary, the Pioneer HTP-330, S-ST330, and SX-SW330 deliver exceptional audio performance wrapped in a stylish and modern package. With their advanced features, such as high-definition audio decoding, HDMI connectivity, and adjustable subwoofer settings, these systems are perfect for anyone looking to elevate their home entertainment experience. Whether hosting a movie night or enjoying a concert, these units provide a captivating sound environment that satisfies even the most discerning listeners.