Others
Operating with the Head Unit
When in the
When connected to a Pioneer
When connected to the
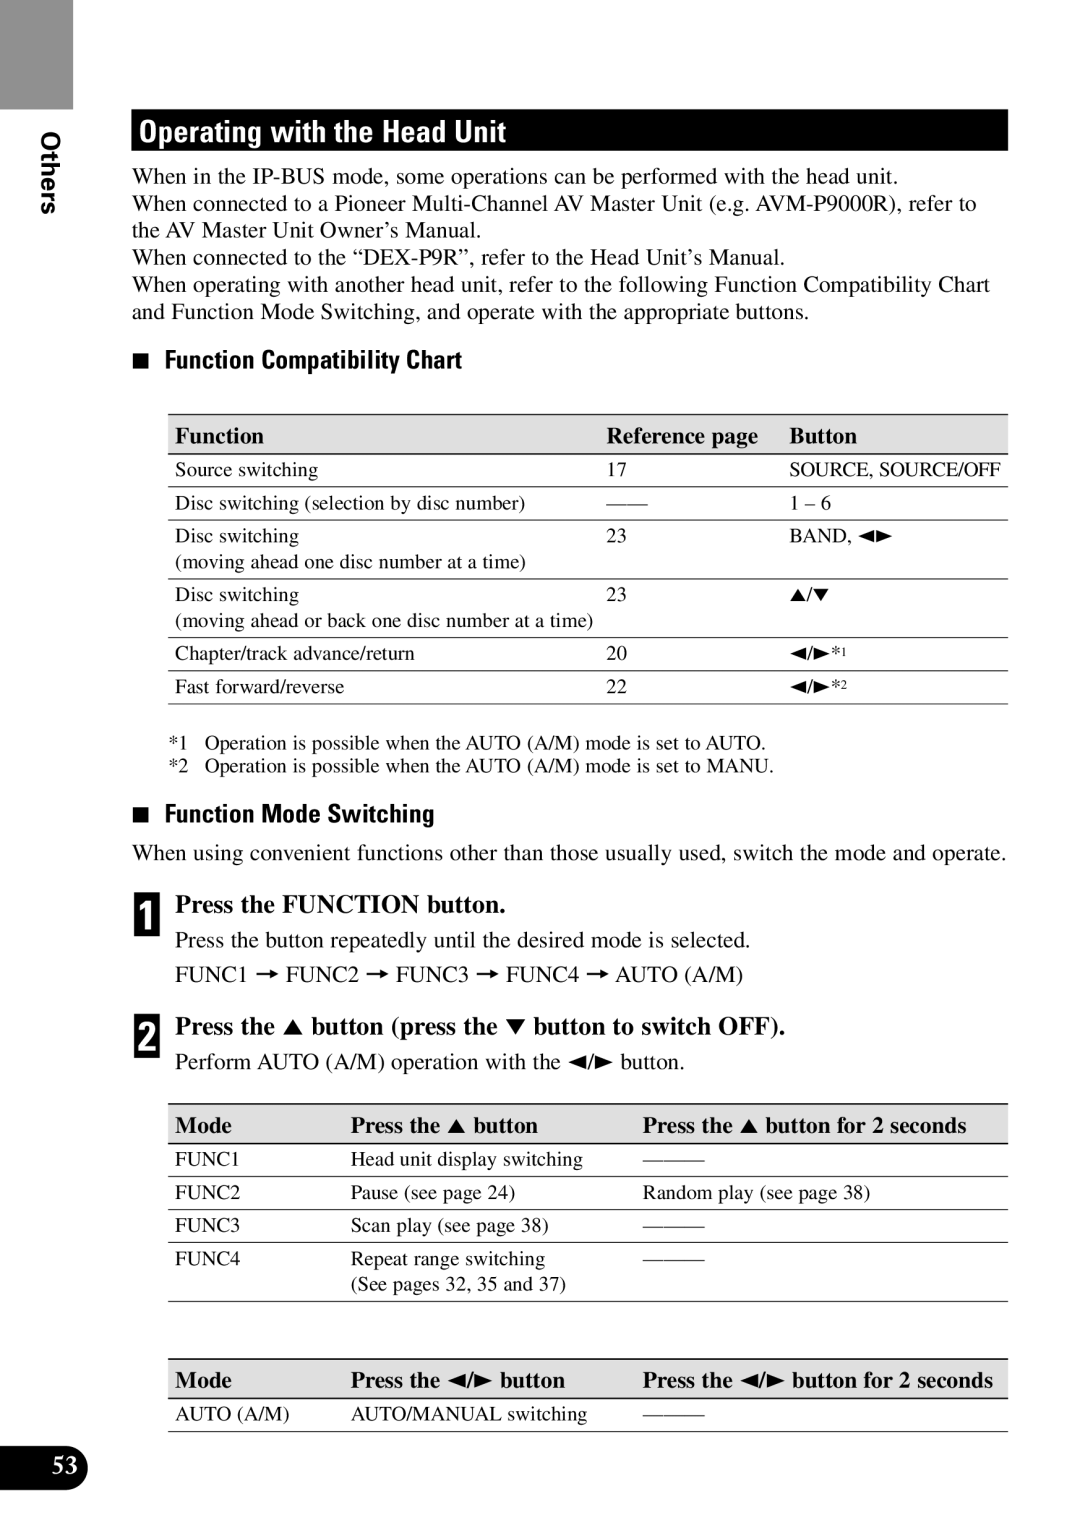
When operating with another head unit, refer to the following Function Compatibility Chart and Function Mode Switching, and operate with the appropriate buttons.
7Function Compatibility Chart
Function | Reference page | Button |
Source switching | 17 | SOURCE, SOURCE/OFF |
|
|
|
Disc switching (selection by disc number) | 1 – 6 | |
|
|
|
Disc switching | 23 | BAND, 23 |
(moving ahead one disc number at a time) |
|
|
|
|
|
Disc switching | 23 | 5/∞ |
(moving ahead or back one disc number at a time) |
|
|
|
|
|
Chapter/track advance/return | 20 | 2/3*1 |
|
|
|
Fast forward/reverse | 22 | 2/3*2 |
|
|
|
*1 Operation is possible when the AUTO (A/M) mode is set to AUTO. *2 Operation is possible when the AUTO (A/M) mode is set to MANU.
7Function Mode Switching
When using convenient functions other than those usually used, switch the mode and operate.
1 Press the FUNCTION button.
Press the button repeatedly until the desired mode is selected.
FUNC1 = FUNC2 = FUNC3 = FUNC4 =AUTO (A/M)
2 Press the 5 button (press the ∞ button to switch OFF).
Perform AUTO (A/M) operation with the 2/3 button.
Mode | Press the 5 button | Press the 5 button for 2 seconds |
FUNC1 | Head unit display switching | |
|
|
|
FUNC2 | Pause (see page 24) | Random play (see page 38) |
|
|
|
FUNC3 | Scan play (see page 38) | |
|
|
|
FUNC4 | Repeat range switching | |
| (See pages 32, 35 and 37) |
|
|
|
|
|
|
|
Mode | Press the 2/3 button | Press the 2/3 button for 2 seconds |
AUTO (A/M) | AUTO/MANUAL switching | |
|
|
|
53