
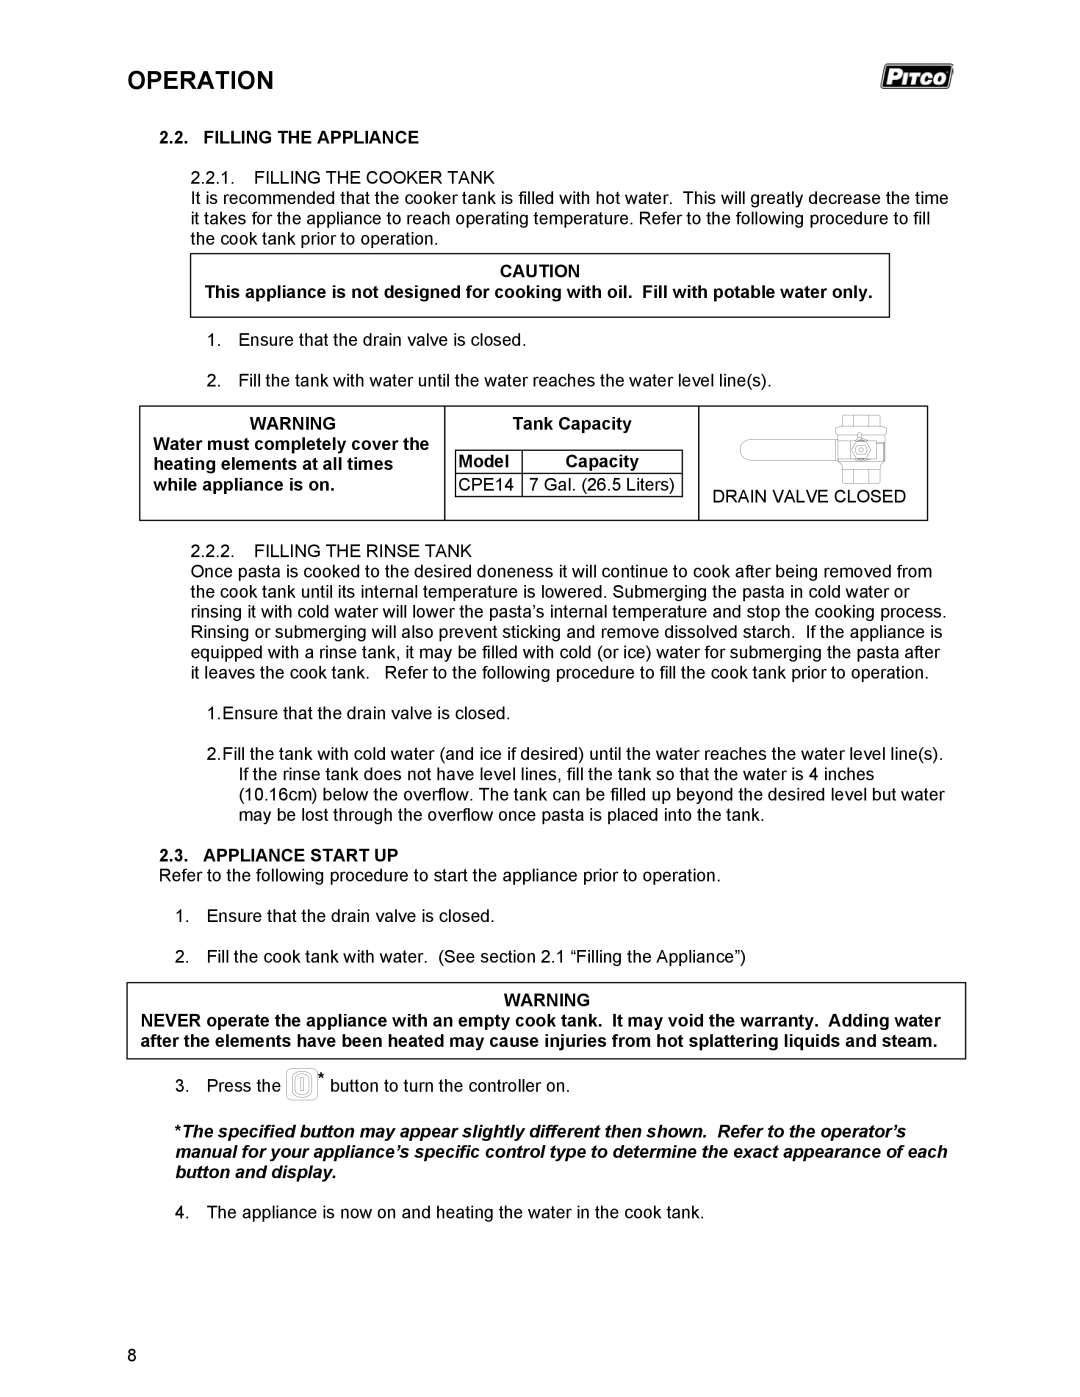
RSCPE14 specifications
The Pitco Frialator RSCPE14 is a top-of-the-line commercial fryer designed for efficient and consistent frying performance in restaurants and catering operations. Renowned for its robust build and advanced features, the RSCPE14 delivers reliable results, making it a preferred choice among culinary professionals.One of the standout features of the RSCPE14 is its high-capacity frying capability. With a 14-inch fry pot, the fryer can accommodate up to 50 pounds of oil, enabling users to fry large batches of food efficiently. Its design is optimized for volume frying, making it ideal for busy kitchens where time is of the essence.
The fryer incorporates state-of-the-art heating technology, featuring a powerful, high-efficiency burner system. This ensures quick heating and recovery times, allowing for faster cooking and a steady supply of delicious, crispy food. The burner design also promotes uniform heat distribution, minimizing hot spots and enhancing the overall frying quality.
Another key characteristic of the Pitco RSCPE14 is its advanced oil filtration system. This feature prolongs oil life and maintains food quality by removing impurities and food particles from the oil. The filtration cycle can be easily activated, and the automatic system saves time while ensuring that the oil remains clean and efficient for longer periods.
The fryer is built with user-friendliness in mind, boasting intuitive controls. The digital control panel allows easy monitoring and adjustment of frying temperatures, ensuring precise cooking for various food items. The easy-to-read display enhances operational efficiency, even during peak hours.
Safety is a paramount consideration with the Pitco RSCPE14. The frying unit is equipped with safety features such as an automatic shut-off function, ensuring that the fryer turns off when not in use. Additionally, the design includes a durable stainless-steel construction that not only enhances durability but also simplifies cleaning.
Energy efficiency is another hallmark of the RSCPE14, contributing to lower operational costs over time. The fryer’s innovative design and technologies work together to minimize energy consumption while maximizing output.
In summary, the Pitco Frialator RSCPE14 is a feature-packed commercial fryer that stands out for its high efficiency, large capacity, and user-friendly controls. With advanced heating technologies, effective oil filtration, and a focus on safety and durability, it serves as an invaluable asset for any commercial kitchen seeking to deliver high-quality fried foods consistently.