5.Press “ ” or “ ” to adjust.
6.Press “EXIT” to exit the item and save the adjusted value
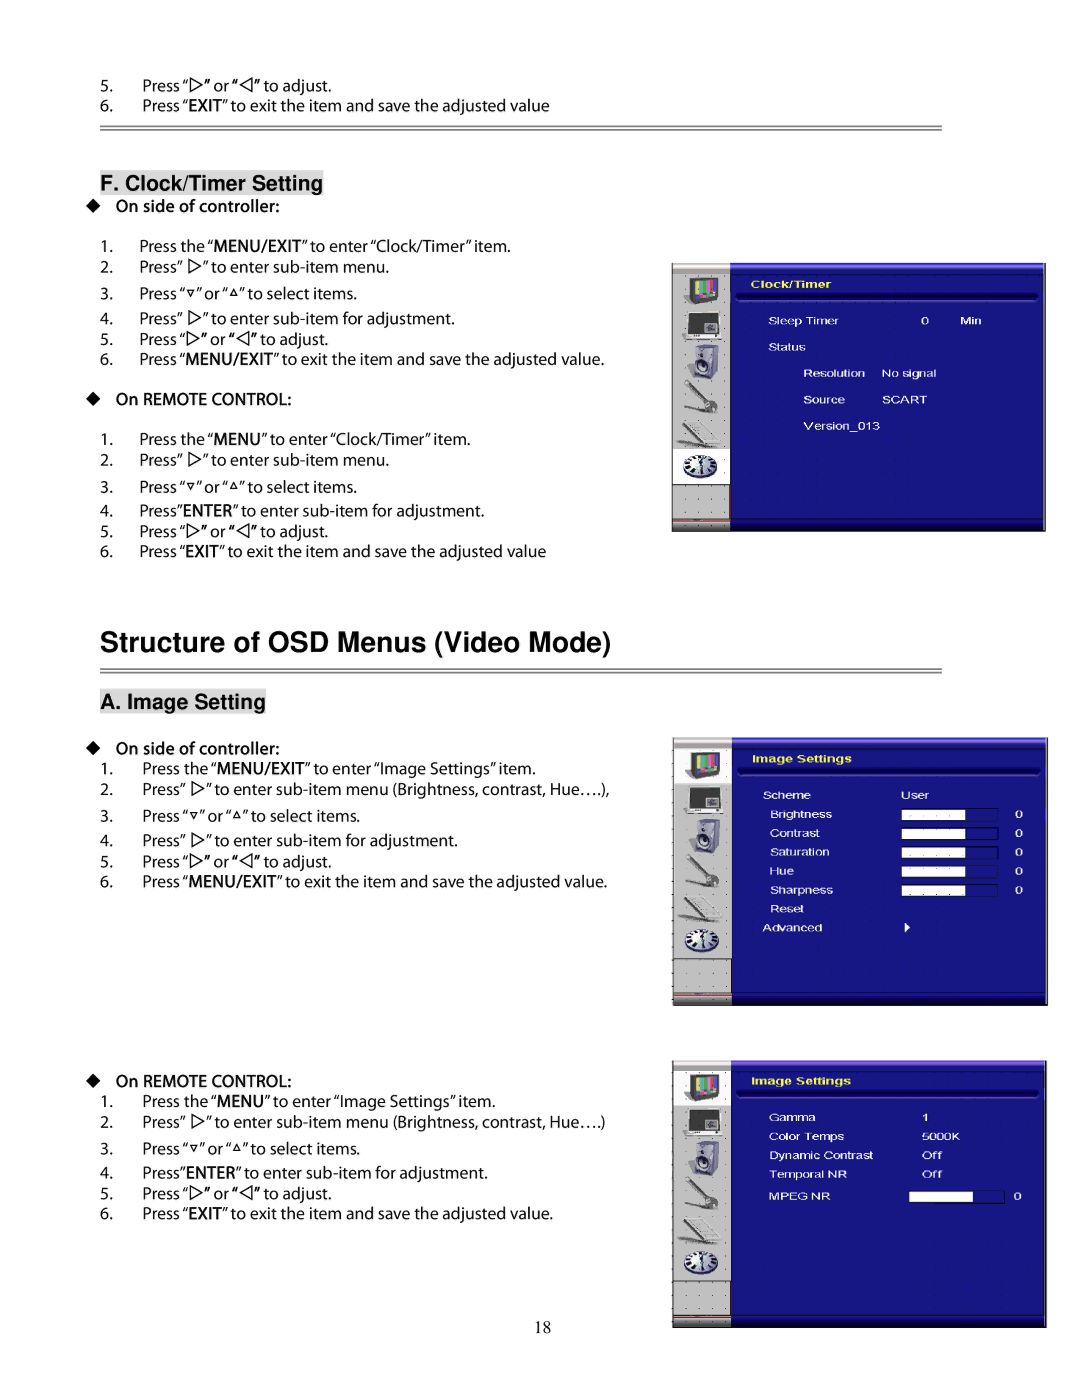
F. Clock/Timer Setting
On side of controller:
1.Press the “MENU/EXIT” to enter “Clock/Timer” item.
2. | Press” | ” to enter |
3. | Press “▽” or “△” to select items. | |
4. | Press” | ” to enter |
5.Press “ ” or “ ” to adjust.
6.Press “MENU/EXIT” to exit the item and save the adjusted value.
On REMOTE CONTROL:
1.Press the “MENU” to enter “Clock/Timer” item.
2. Press” ” to enter
3.Press “▽” or “△” to select items.
4.Press”ENTER” to enter
5.Press “ ” or “ ” to adjust.
6.Press “EXIT” to exit the item and save the adjusted value
Structure of OSD Menus (Video Mode)
A. Image Setting
On side of controller:
1.Press the “MENU/EXIT” to enter “Image Settings” item.
2. | Press” ” to enter |
3.Press “▽” or “△” to select items.
4. | Press” ” to enter |
5.Press “ ” or “ ” to adjust.
6.Press “MENU/EXIT” to exit the item and save the adjusted value.
On REMOTE CONTROL:
1.Press the “MENU” to enter “Image Settings” item.
2. | Press” ” to enter |
3.Press “▽” or “△” to select items.
4.Press”ENTER” to enter
5.Press “ ” or “ ” to adjust.
6.Press “EXIT” to exit the item and save the adjusted value.
18