Installing the Optional Cooling Kit
IMPORTANT! The optional cooling kit should only be installed by qualified personnel.
The Planar LC1503R can be fitted with an optional cooling kit to expand the temperature range of the display for specific applications. The optional cooling kit is typically installed by Planar personnel at assembly time but can be installed in the field under some circumstances. Take all necessary precautions when installing the LC1503R cooling kit as damage to the display can occur without proper care. For best results, the cooling kit should be used with a cover glass placed inside the frame (not provided).
1.Disconnect the power cord from the LC1503R.
2.Unpack the Cooling Kit from the packaging.
3.Lay the cooling kit face down on a sturdy surface (fan vents pointing up).
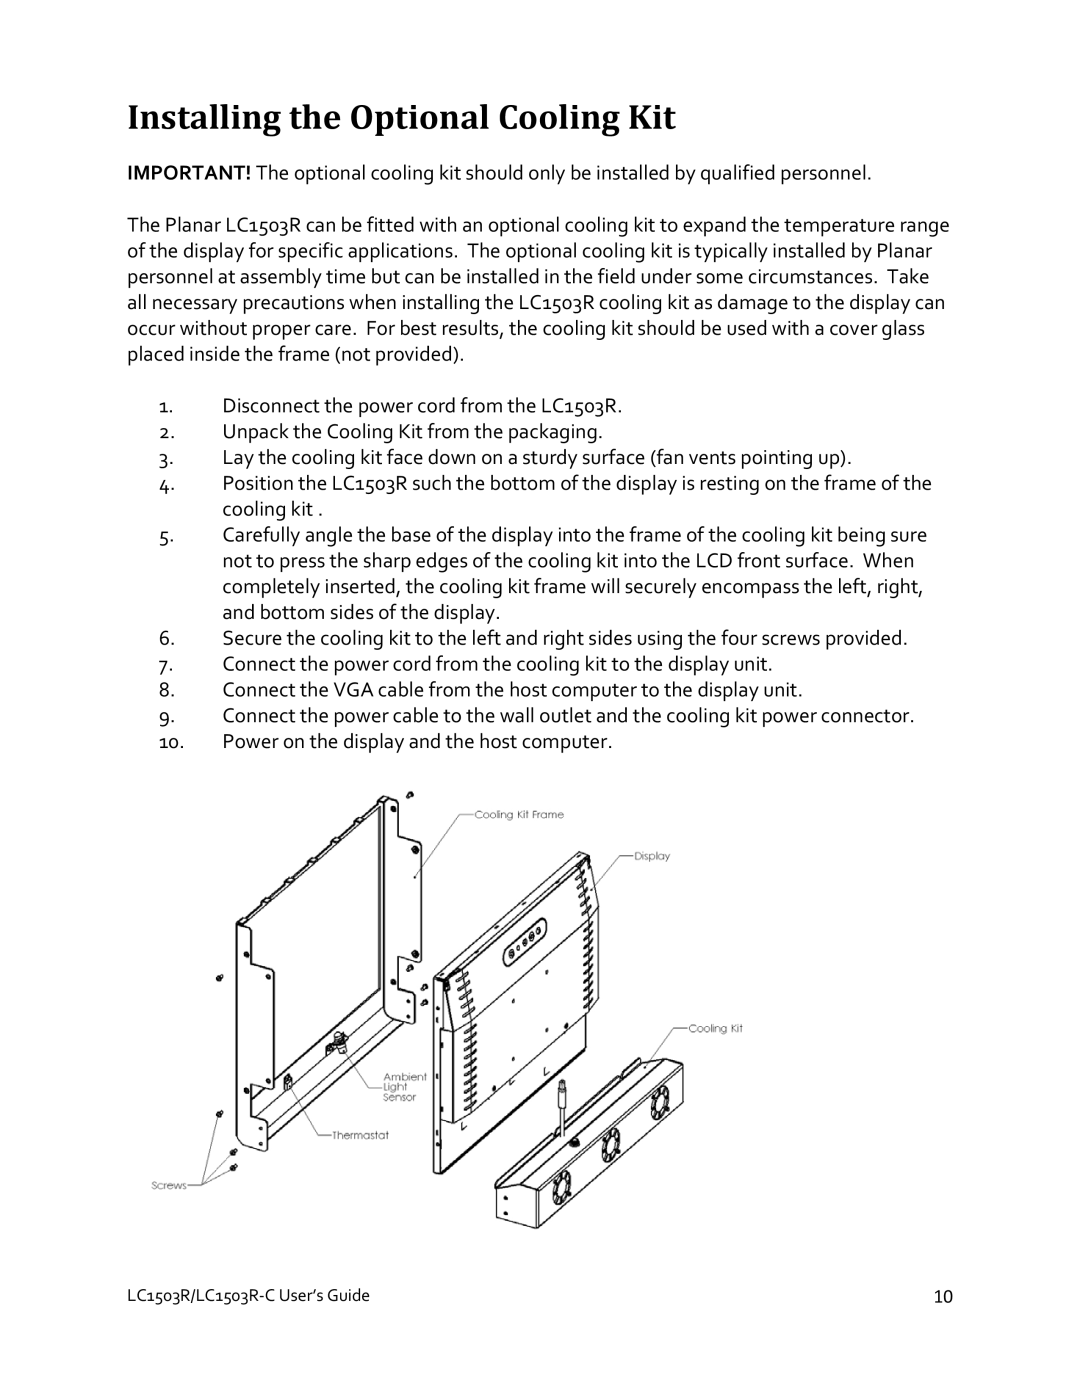
4.Position the LC1503R such the bottom of the display is resting on the frame of the cooling kit .
5.Carefully angle the base of the display into the frame of the cooling kit being sure not to press the sharp edges of the cooling kit into the LCD front surface. When completely inserted, the cooling kit frame will securely encompass the left, right, and bottom sides of the display.
6.Secure the cooling kit to the left and right sides using the four screws provided.
7.Connect the power cord from the cooling kit to the display unit.
8.Connect the VGA cable from the host computer to the display unit.
9.Connect the power cable to the wall outlet and the cooling kit power connector.
10.Power on the display and the host computer.
LC1503R/LC1503R‐C User’s Guide | 10 |